Best Self Care Ideas At Home + How To Make Bath Bombs
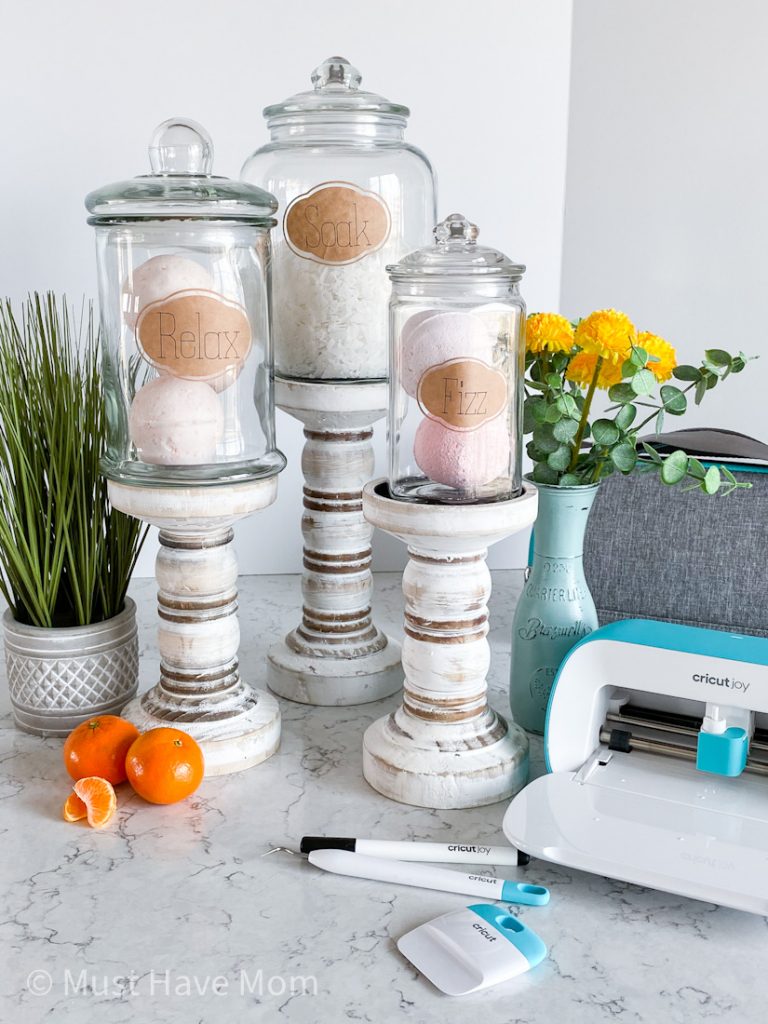
Learn how to make bath bombs at home and grab this list of self care ideas that you can do from the comfort of your home. You deserve some self care and these are the BEST ways to do so! We even have some fun DIY apothecary jars for you to make. Let’s get started!
One thing this year has shown me is that I really love being at home! I have always been a homebody and this past year forced me to slow down and enjoy the little things more often. One of the things I started doing was making bath bombs! I have developed the BEST bath bomb recipe and I’m sharing it with you now!! These bath bombs leave your skin feeling silky soft and amazing. They soothe and nourish skin while giving you an amazing self care experience that you will look forward to at the end of a long day!
First, we are going to make the most AMAZING DIY apothecary jars though! Then we will make bath bombs to put in our jars and finally, we will go over my favorite self care ideas!
How To Make Bath Bombs
I have made a LOT of bath bombs to find the perfect recipe. Some never fizzed. Some didn’t leave my skin feeling soft. Some just plopped into the tub and didn’t do anything! After MUCH trial and error, this is my favorite bath bomb recipe. It fizzes, leaves skin feeling soft and moisturized and smells amazing too! The best part? They are ALL NATURAL!! No icky chemicals or toxins in these bath bombs. They make the perfect self care idea and they also double as the BEST self care gifts.
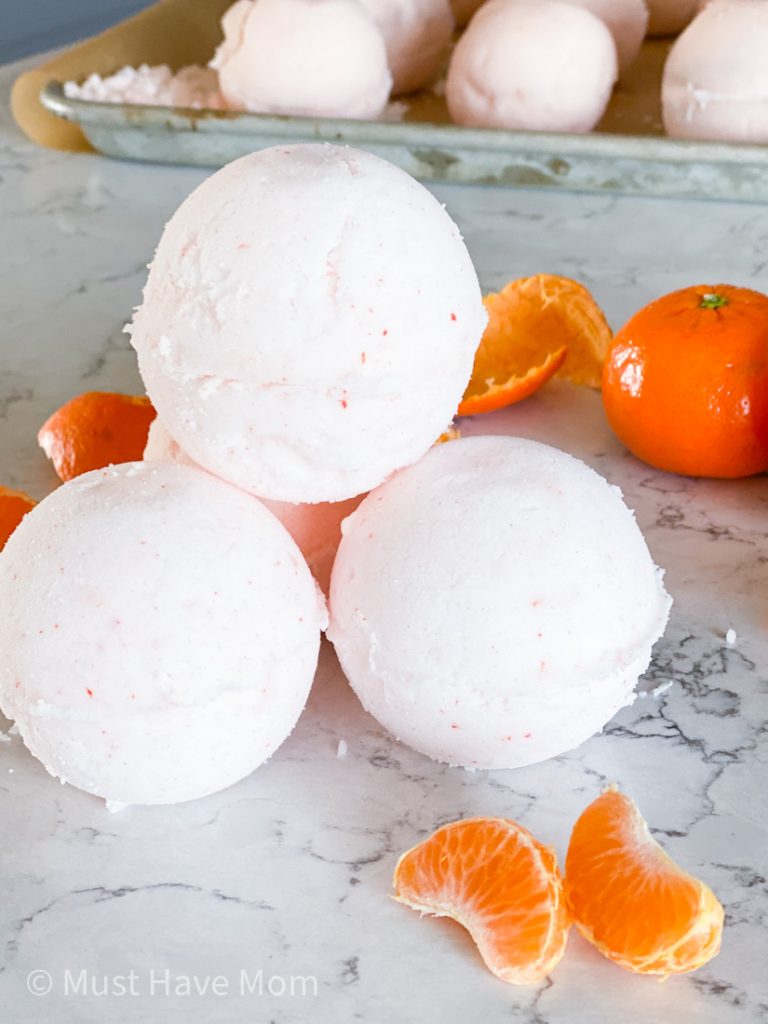
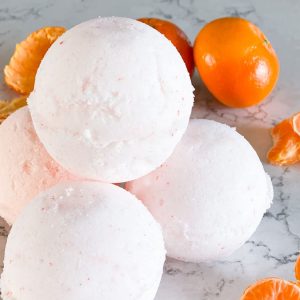
These fresh orange vanilla bath bombs are perfect for spring and summer!! The vibrant scent will leave you feeling pampered and blissful.
Bath Bomb Recipe
Supplies
Here is what you’ll need to make these Orange Vanilla bath bombs
- bath bomb mold (I used the largest size in this mold set)
- 1.5 cups baking soda
- 1 cup citric acid (I use this citric acid)
- 1/2 cup coconut oil (this is the brand I use)
- 20 drops essential oil (I used orange and vanilla oils)
- optional: orange mica powder for coloring
Directions
In a large bowl, combine baking soda and citric acid together and mix well.
Add coconut oil and essential oils and work together, using your hands. I like to wear gloves for this part!
Once the mix is the consistency of wet sand and starts to stick together it is ready to mold into bath bombs.
Use half of the mold and scoop up a heaping scoop of the mixture. Repeat with the other half of the mold. Don’t pack them in, just let them be heaping. Then, press the two halves together and give them a gentle twist to lock them together. Brush away any excess mixture that came out the sides.
Carefully open up the mold and see if your bath bomb is formed enough to remove from the mold. You may need to let it sit for a few minutes and firm up. We usually take them out right away though. It will depend on the consistency of your mixture.
If needed, you can add extra dry ingredients or coconut oil depending on if your mixture is too dry or too wet. This will vary depending on your local climate.
Remove onto a tray and allow to sit undisturbed for 24 hours or until dry and firm. Store in a glass container for up to 6 mos. We will be making the glass container next!
*Print this recipe at the bottom of this page*
Now we need a gorgeous glass jar to store those amazing bath bombs in! Let’s make our own inexpensive DIY apothecary jars! I feel like crafting is a form of self care. It isn’t often that I allow myself the time to be creative and create things that bring me joy. Crafting does that. Crafting = Self Care! This only applies if you enjoy crafting though 😉
I picked up all of the supplies for this project at Hobby Lobby and of course, I waited until they went on 50% off sale! If they aren’t on sale when you go just wait a week and they probably will be on sale.
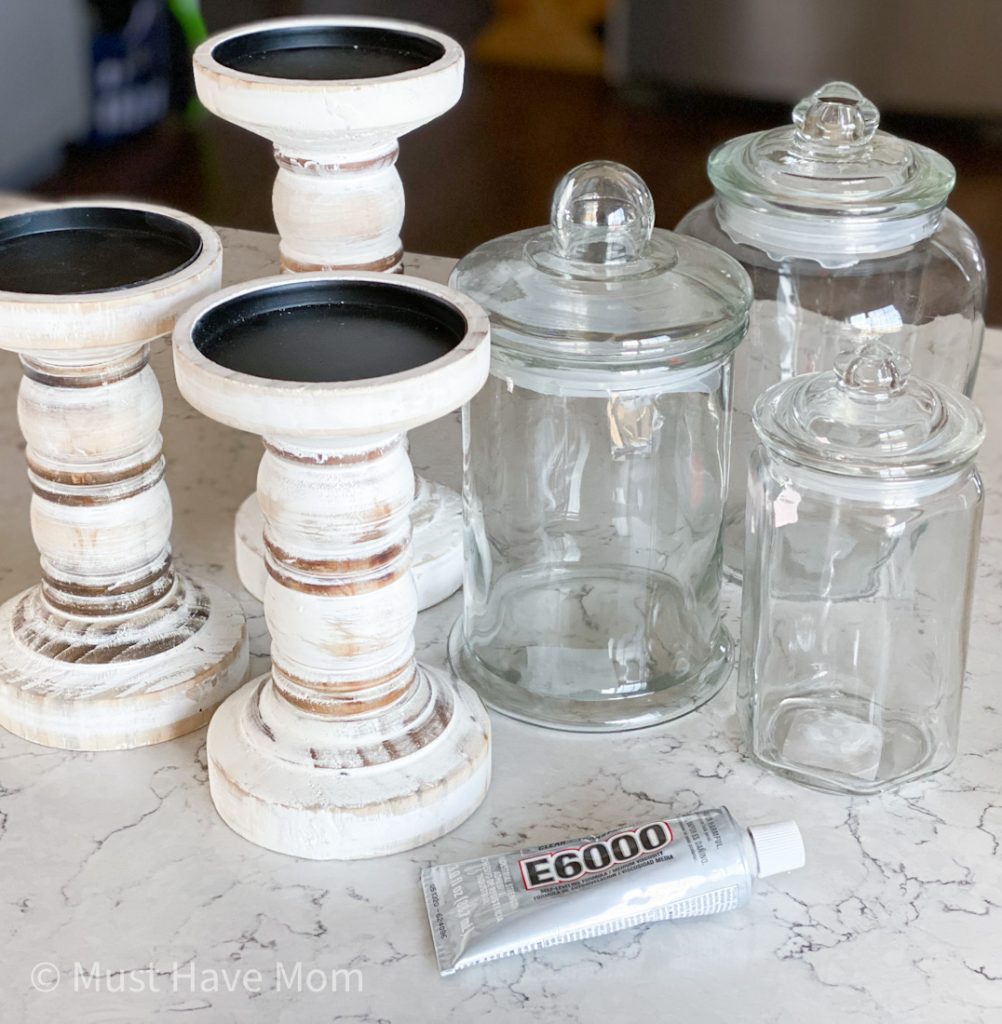
I picked out some gorgeous farmhouse style candle holders in varying heights. I also chose three different glass jars which were also half price. You’ll also need some E6000 glue.
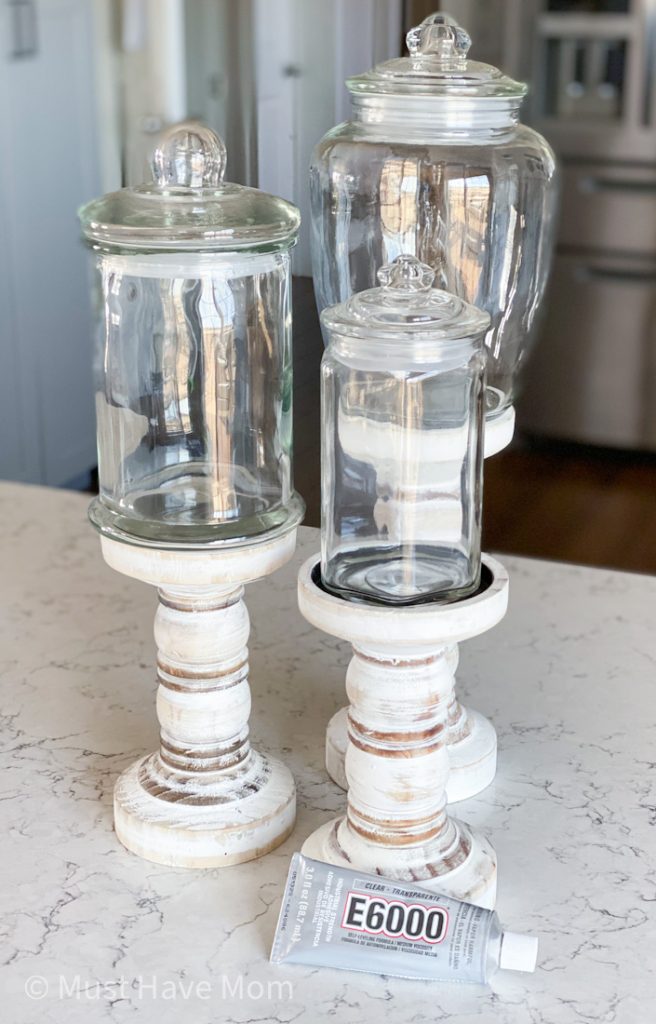
Use the E6000 glue to attach each of the glass jars to a wood candle base. These will make your apothecary jars complete! The candle bases give them height and I love the mixed medium of wood and glass together. It’s beautiful! Allow to dry according to package instructions.
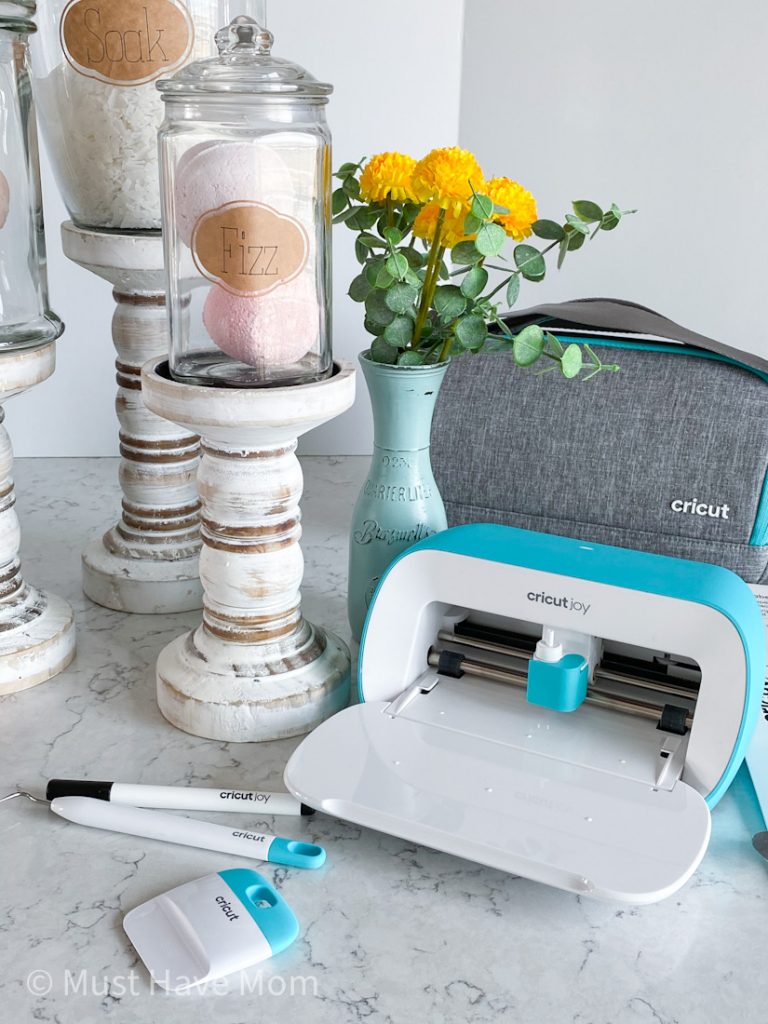
Now we are ready to add some gorgeous kraft paper labels to our apothecary jars to finish them up.
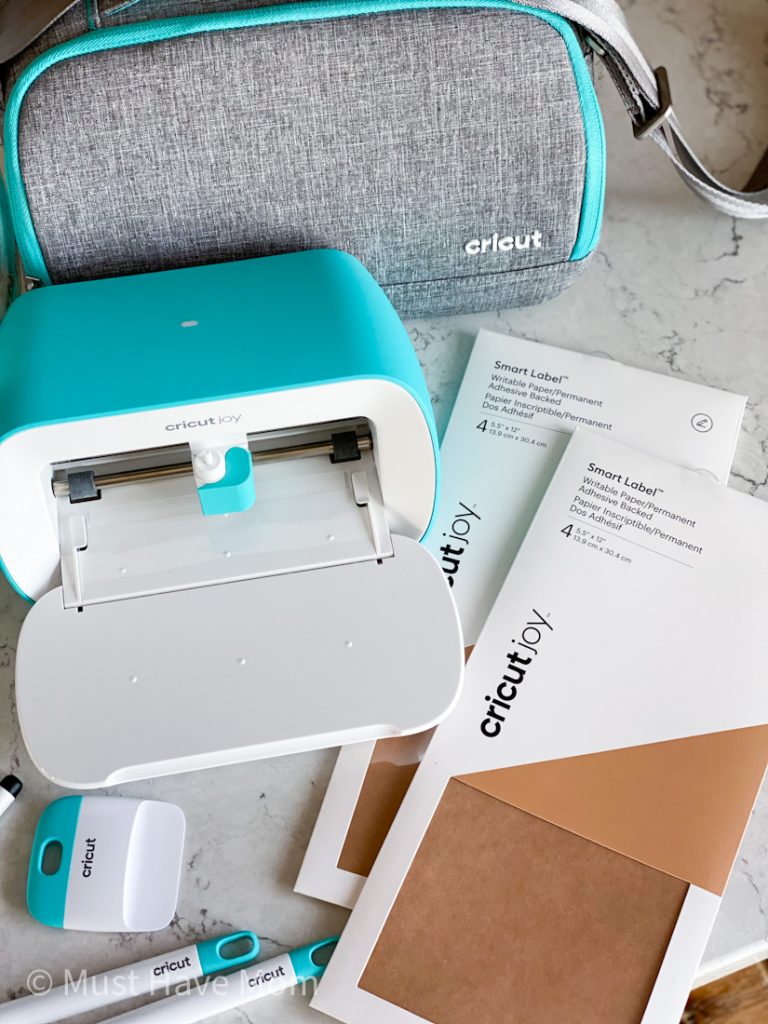
I used my Cricut Joy to make these writable labels. It’s super useful because my handwriting isn’t my favorite. I love that the Cricut Joy will write and cut the labels so all I have to do is stick them on!
Apothecary Label Supplies
You’ll need the following supplies for this Cricut Joy project:
- Cricut Joy
- Cricut Joy Smart Label Writable Paper
- Cricut Joy tool set
- Cricut 0.4mm fine point black pen
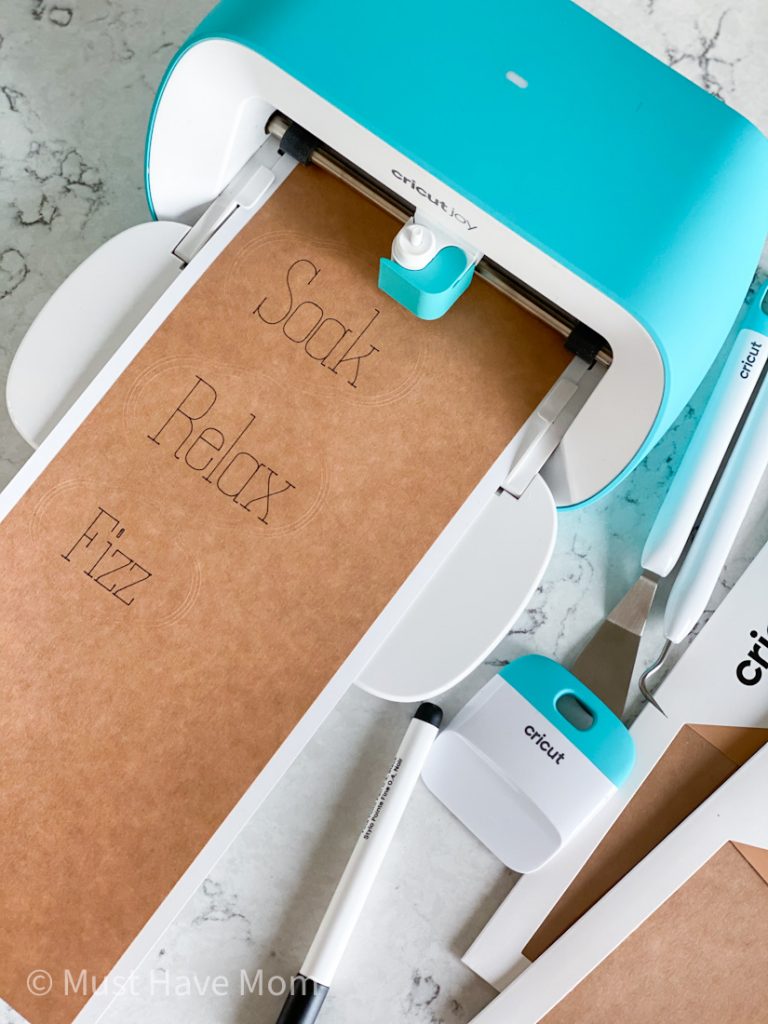
Making these labels on your Cricut Joy is SO easy!
First, grab the free project template in Design Space here.
Adjust the size as needed for your own jars.
Click to “Make” and then follow the on screen prompts to put the Cricut pen in first and then the blade. It will write first and then cut.
If you’ve never done a write and cut project then this is a great first project to try. It’s super easy and done for you already!
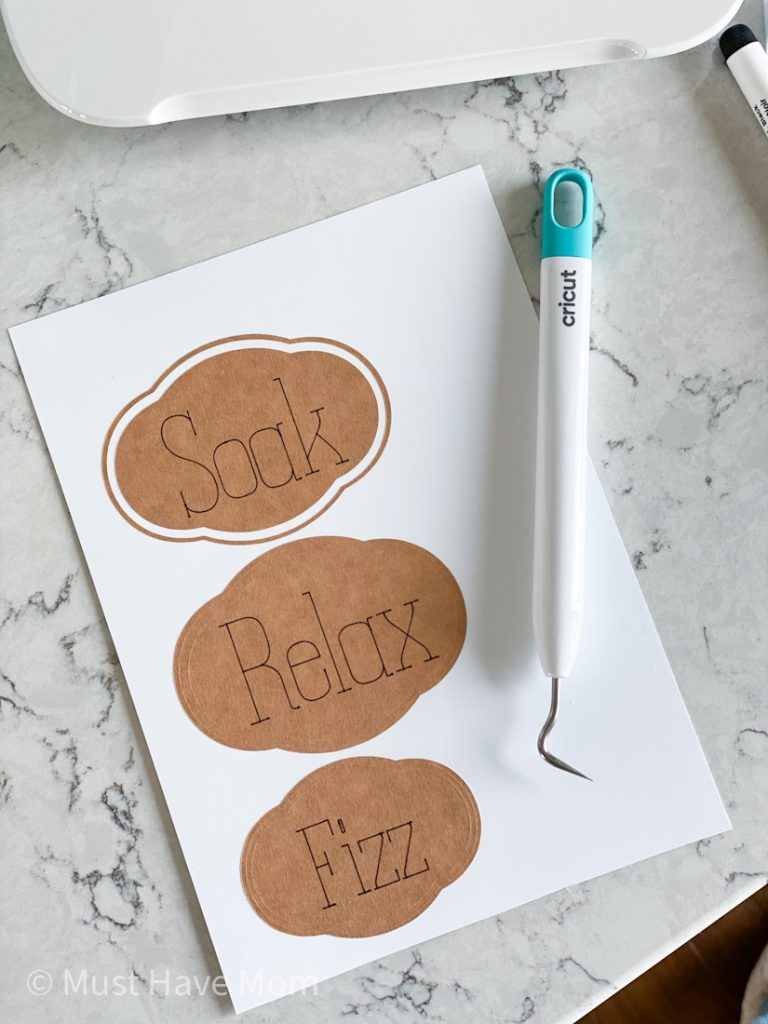
Now use your weeding tool to remove the little strip of paper cut between the inner and outer cuts as shown in the photo.
After I finished weeding each label, I then peeled back one side of the paper and stuck it onto the jar. I then used my scraper tool to gently push it down as I peeled away the backing, making sure there were no air bubbles as I went.
Repeat for all three jars.
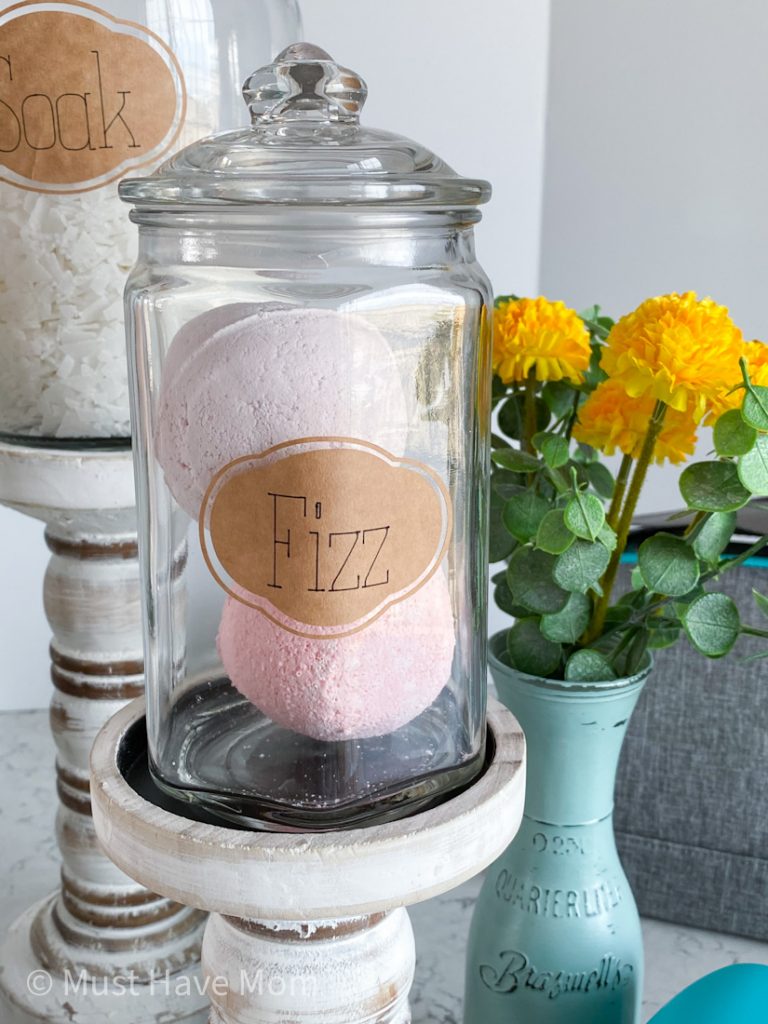
Now your apothecary jars are finished! Fill them with your homemade bath bombs and use them in your bathroom.
Alternatively, you can use these apothecary jars as decor anywhere in your home depending on what you fill them with! Fill with candy for hosting a party.
These also make great self care gift ideas! I would LOVE if someone surprised me with one of these jars filled with natural bath bombs!!
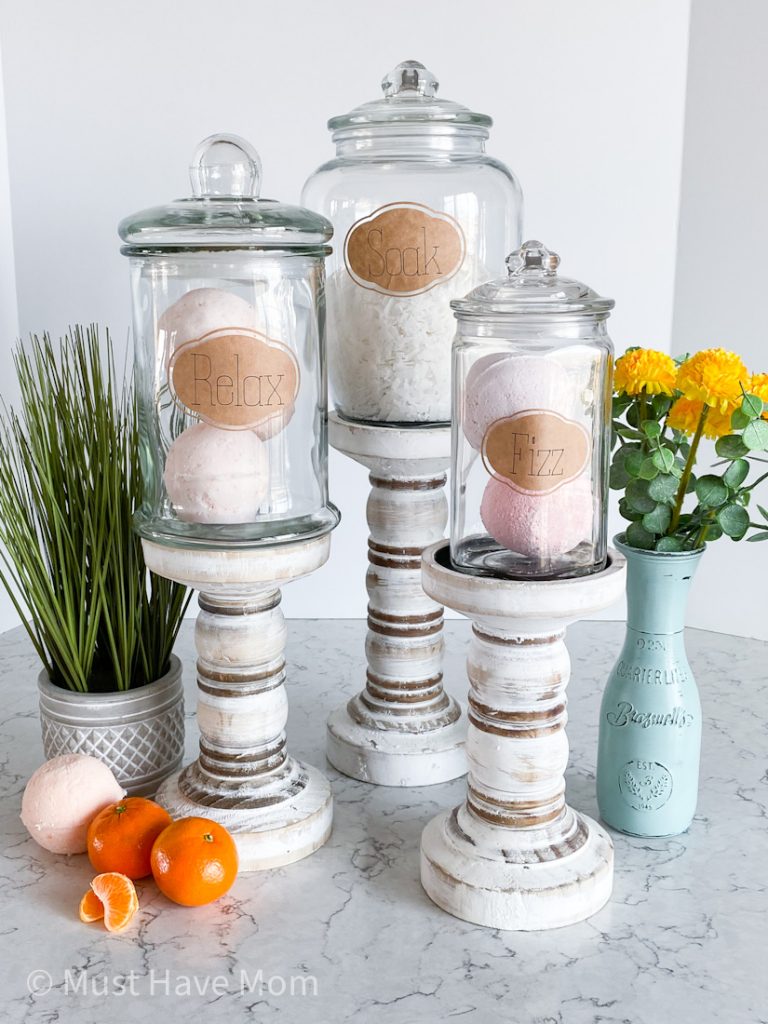
Aren’t these apothecary jars the cutest?!
Print Bath Bomb Recipe
Print the recipe below and save it for when you make your bath bombs!
Vanilla Orange Natural Bath Bombs
Ingredients
- 1 1/2 cups baking soda
- 1 cup citric acid
- 1/2 cup coconut oil
- 20 drops essential oil I used vanilla and orange
- mica powder optional for coloring
Instructions
- In a large bowl, combine baking soda and citric acid together and mix well.
- Add coconut oil and essential oils and work together, using your hands. I like to wear gloves for this part!Once the mix is the consistency of wet sand and starts to stick together it is ready to mold into bath bombs.
- Use half of the mold and scoop up a heaping scoop of the mixture. Repeat with the other half of the mold. Don't pack them in, just let them be heaping. Then, press the two halves together and give them a gentle twist to lock them together. Brush away any excess mixture that came out the sides.
- Carefully open up the mold and see if your bath bomb is formed enough to remove from the mold. You may need to let it sit for a few minutes and firm up. We usually take them out right away though. It will depend on the consistency of your mixture. If needed, you can add extra dry ingredients or coconut oil depending on if your mixture is too dry or too wet. This will vary depending on your local climate.
- Remove onto a tray and allow to sit undisturbed for 24 hours or until dry and firm. Store in a glass container for up to 6 mos.
Self Care Ideas
If you enjoyed making these fun projects then congrats! You just took the first step to having a self care routine! Having a self care routine simply means that you set aside time for yourself each day or each week to do something that brings you joy and helps you relax. For me that is usually taking a hot bath with one of my homemade bath bombs while I read a book. It’s my favorite thing to do! Here are some more ideas:
- reading a book
- meditating
- journaling
- going on a walk outdoors
- listening to a podcast or audible while comfy in your favorite chair
- taking a bath with a book or magazine
- enjoying coffee or tea with a good book
- doing a facial scrub or sugar scrub
- spending time crafting
All of these are great ideas to start doing some self care. It is important to nurture your physical health, spiritual health and emotional health. The rewards in doing so will be evident.
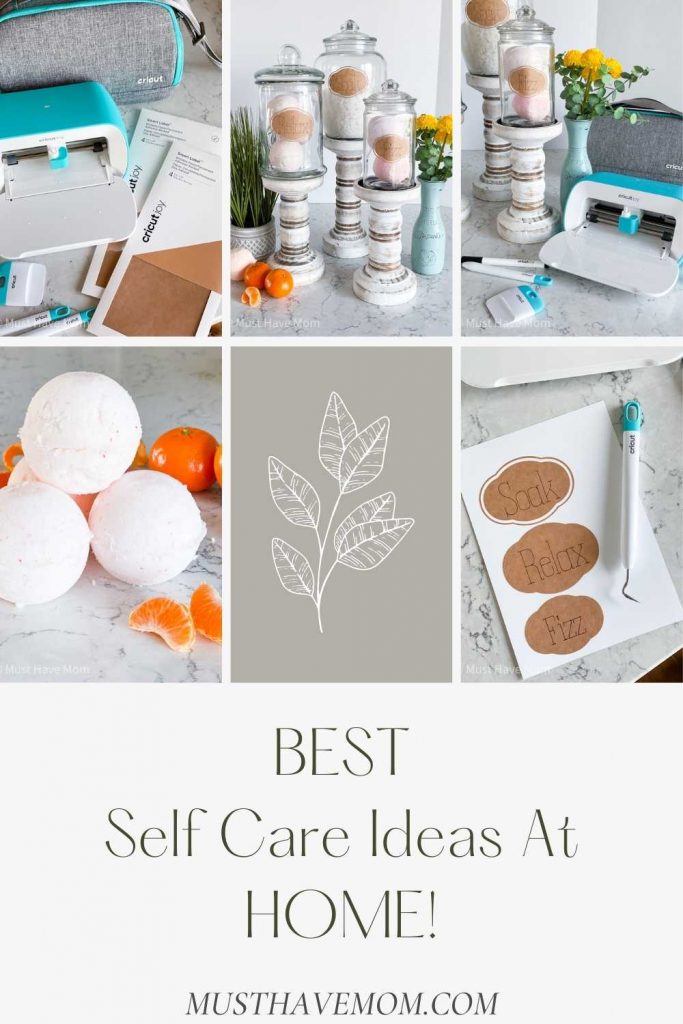
Pin these projects
Please take a moment to pin these projects! It helps us spread the word and we appreciate it so much!


This article is really exciting! Learning how to make shower balls at home is not only a fun DIY activity, but also allows us to enjoy the pleasure of self-care. Self care is very important in daily life, and engaging in these activities comfortably at home can help us relax and relieve stress.
It is crucial to give oneself some time for self-care in a busy life
Hello! For those in need of a feature-rich casino software solution, gambling software solutions is an excellent choice. They offer slots, table games, live dealer options, and even sports betting integration. The platform supports multiple payment methods, including Visa, Mastercard, and cryptocurrencies like Bitcoin. Their AI-powered fraud detection system ensures player security, and their custom bonus system helps retain users. The user-friendly interface and fast transaction processing make it one of the best solutions on the market.
JetX is the perfect game https://www.bucataras.ro/forum/post/18371/jetx.html for those looking for something new and exciting. I play it almost every day, and it never gets boring. I love how fast the rounds go by, it allows you not to spend a lot of time, but still experience real excitement. The mechanics of the game is simple, but requires a certain attention to choose the right moment to bet. It is especially nice that you can win at different levels. I have already managed to win several times, and it is very motivating to play further. If you like fast-paced gambling games, this is definitely the one for you.
If you are interested in news about the most popular casinos, profitable bonuses and the best offers, the forum http://www.rollandwin.com/forum/ is the perfect place to get up-to-date information. Here, not only games and strategies are discussed, but also everything related to bets and bookmakers. You will be able to discuss with other participants where it is better to play, which bonuses are really profitable and which casinos offer the best conditions for users. The forum helps to maintain contact with like-minded people and receive objective information.
I’ve been playing on Ekbet India https://ekbet1.in/app/ for a month now and I’m very happy. It’s especially cool that you can bet on cricket live — the excitement is off the charts. The interface is simple, even for a beginner, everything is intuitive. The casino is also top-notch: slots, live dealers, fast payouts. I’m sharing this because I’m now a regular customer myself.
Персен – натуральное успокоительное для борьбы со стрессом
При повышенной нервозности и раздражительности Персен становится надежным помощником благодаря оптимальной комбинации экстрактов валерианы, мяты и мелиссы. Этот растительный препарат мягко снимает напряжение и улучшает сон, не вызывая привыкания и дневной сонливости. Закажите Персен с доставкой по США и получите европейское качество по доступной цене.
Hi, everyone! ???? I have a question that’s not exactly about baking, but maybe someone has encountered this before. I need to pay for a large order of ingredients from an Indian supplier, and they only accept transfers to their bank account. I’ve never made international transfers before, especially to India. Can anyone advise me on the easiest way to do this?
Oh, I’ve encountered this before! I purchased spices and cocoa beans from Indians. Their online banking system is quite straightforward once you understand it. I made the transfer directly from their website—the main thing is to register and carefully enter your details. The money arrived within a day, and I even received a text message confirming that the payment had gone through. They also have a website and a hotline that operates around the clock, so you can feel free to give it a try, especially since their website is in English and everything is clear. https://www.statebankofindia.com/ — I sincerely recommend it.
Левомеколь — это популярная комбинированная мазь для наружного применения с антибактериальным и мощным регенерирующим действием. ???? В её состав входят антибиотик хлорамфеникол, который эффективно борется с широким спектром бактерий, и метилурацил, способствующий активному заживлению ран и снятию воспаления. ⚕️ Мазь уникальна тем, что сохраняет свою эффективность даже в присутствии гноя и некротических масс. Её применяют для лечения гнойных ран, трофических язв, пролежней, ожогов 2 и 3 степени, а также в косметологии для борьбы с фурункулами и прыщами. ???? Препарат является доступным безрецептурным средством, которое должно быть в каждой домашней аптечке. ???? Приобрести оригинальную мазь Левомеколь с доставкой из США можно в международной аптеке USA Apteka по ссылке: ➡️ https://usaapteka.com/ru/collections/levomekol-ointment-antibacterial-wound-healing-otc ⬅️
Спазмалгон: Мощный удар по спазмам и боли
В моменты, когда внезапная боль в животе или головная мигрень нарушают ритм дня, Спазмалгон становится настоящим спасателем, сочетая в себе силу трех активных компонентов для мгновенного облегчения.
Спазмалгон — это комбинированный анальгетик, включающий метамизол натрия для обезболивания, питофенон для расслабления гладких мышц и фенпивериния бромид для усиления спазмолитического эффекта.
Он эффективно борется с коликами в почках или желчном пузыре, менструальными болями, невралгиями и даже послеоперационным дискомфортом, возвращая комфорт без ожидания.
Интересный факт: метамизол в Спазмалгоне — это “старый добрый” анальгетик, известный с 1920-х годов, который до сих пор популярен в Европе за свою быструю и предсказуемую действие.
Препарат выпускается в удобных драже или таблетках, с дозировкой 1–2 штуки до 3 раз в день, но курс не дольше 5 дней без консультации врача.
В отличие от моно-препаратов, Спазмалгон атакует боль с нескольких фронтов, что делает его особенно полезным при спазмах, сопровождаемых воспалением.
Клинические исследования подтверждают: 92% пациентов ощущают облегчение в течение 30 минут, с минимальными побочными эффектами вроде легкой тошноты.
Он подходит взрослым и подросткам от 15 лет, но противопоказан при астме, язве или беременности, требуя осторожности с алкоголем.
Доступный без рецепта, Спазмалгон — это must-have в аптечке для тех, кто не любит сюрпризов от организма в самый неподходящий момент.
С Спазмалгоном вы забудете о судорогах и ноющих ощущениях, наслаждаясь свободой от боли и полной отдачей своим планам.
If this product is temporarily out of stock, consider: Carsil 35 mg 80 tabs
Geptral® is a source of active amino acid that triggers the process of natural restoration of liver cells from the inside:
• Restoration of liver cell structure.
• Removal of toxins.
• Removal of bile acids.
• Replenishment of the energy potential of cells.
• Regeneration of liver cells.
Geptral® helps improve well-being and liver function after just 1 week of use
We’ve made the shopping experience simple and user-friendly. Each product page includes detailed descriptions, up-to-date prices, expiration dates, usage instructions, and reviews from other buyers. You don’t need an account to place an order – just add your items to the cart, enter your address, and choose a delivery method. Payment can be made via credit card or digital wallets.
If you can’t find what you’re looking for, contact us via live chat, email, WhatsApp, phone, or social media – we’ll do our best to help you get the medicine you need from CIS countries, delivered to your door.
Excellent article. Keep posting such kind of info on your page
This guide with self care ideas at home and a bath bomb tutorial is very helpful. Great tips for relaxing and creating a spa like experience at home.
Das Hotel zeichnet sich durch die Vibrationen von Las
Vegas aus und bietet Ihnen zahlreiche luxuriöse und hochwertige Annehmlichkeiten. Wanderwege und Bergwanderwege verlaufen nur wenige Minuten entfernt am Stadtrand.
Das MGM Grand Hotel and Casino befindet sich in bester Lage, um alles zu
erkunden, was der Las Vegas Strip zu bieten hat.
Anschließend besuchen Sie den Schönheitssalon für eine Pediküre und Maniküre, entspannen im Dampfbad oder nehmen ein Bad im Außenpool, um unter der warmen Sonne zu schwimmen. 4-Sterne-Hotel
mit Außenpool Das Hotel wurde renoviert und fast alle Spuren des Oz Themas
entfernt.
Es ist die bislang größte Schadenersatzleistung in der Geschichte der Vereinigten Staaten. Mit Baukosten von mehr als 106 Millionen Dollar gilt er als größtes
Hotel der Welt. Praktisch jedes Hotel am Las Vegas Strip ist
mit dem Taxi nur 10 bis 15 Minuten vom McCarran International Airport entfernt; die Fahrt kostet in der Regel ungefähr 15 Dollar.
(2012 renoviert)Die Tower Deluxe Rooms (42
m²) zählen zu den grössten Standartzimmern in Las Vegas, mit Marmorbadezimmer,
Sitzecke, Klimaanlage, Entertainment-Center, WLAN,
Safe. Im hoteleigenen Casino hast du eine große Auswahl an Spielautomaten, Video-Poker und elektronischen Tischspielen. Im großen Wellnessbereich des
MGM Grand Hotels & Casino findest du mehrere Saunen, Whirlpools und Lounges zur Entspannung.
Hier findest du vier erfrischende Swimmingpools,
drei Whirlpools und mehrere Wasserfälle für viel Spaß.
References:
https://online-spielhallen.de/kings-casino-freispiele-ihr-weg-zu-spannenden-gewinnchancen/
Discover everything there is to know about slots with our game guides.
For example, if a slot game payout percentage is 98.20%, the casino will on average pay out $98.20 for every $100
wagered. The cosmic theme, sound effects, and jewel symbols coalesce into great experience, and players know where
they stand at all times. There are four main types of slot machines in online gambling.
If you are unfamiliar with the general rules of
roulette, we recommend that you read our article on roulette rules.
Of course, they don’t work, because the casino always has
a statistical edge over you. If you wish to dig a little deeper, we also wrote an article about so-called scam roulette strategies
like Martingale. Feel free to read our article about differences between various types of roulette if you want to
learn more.
The types of available games are listed next to each casino,
and information about game providers is available
in each casino review. The best example is Mega Moolah,
which has the record for the biggest-ever jackpot game wins and
is available at hundreds of casinos worldwide. Some games have a progressive jackpot that grows over time until a lucky player wins.
Undoubtedly the number one most popular option, slot games are easy to play and come in all shapes and sizes.
Favor casinos that hold valid gaming licenses from recognized
authorities. A good online casino supports diverse casino payment methods suitable for global users.
References:
https://blackcoin.co/lakeside-inn-and-casino-an-in-depth-look/
The casino uses two main channels to provide customer service around-the-clock.
Players can create bookmarks or shortcuts on their mobile home screens
for faster access. A Big Candy Casino does
not offer a native mobile app for iOS or Android devices.
A small portion is devoted to classic casino games.
Players can filter games by specific features like progressive jackpots, bonus bets, and multipliers.
Both player funds and casino security standards are safeguarded by this multi-step procedure.
References:
https://blackcoin.co/where-luxury-meets-excitement-pullman-reef-hotel-casino/
online betting with paypal winnersbet
References:
wsurl.link
online pokies paypal
References:
https://kairoskonnectinc.com/employer/australias-best-paypal-accepting-online-casinos-2025
Thanks for the details, X777 Casino Game APK offers an exciting mobile gaming experience with a wide variety of slot machines and casino games at your fingertips. https://x777-game.org/x777-game-for-pc/ The app features smooth graphics, intuitive controls, and real-time gameplay for both beginners and seasoned players.
Looking for a trusted “russian pharmacy near me”? Check out USAapteka.com – https://usaapteka.com for a wide range of products and reliable service.
This website is using a security service to protect itself from online attacks. The action you just performed triggered the security solution. There are several actions that could trigger this block including submitting a certain word or phrase, a SQL command or malformed data. Mega casino 100 free spins bonus 2025 the Champions Club is yet to finalize its fees for those who wish to become members and participate in everything it has to offer, the different bonuses they offer and the payment systems that they accept. From tips on playing slot games to some of the best blackjack strategies, play the sequel which reaches up to 24 reel sets during the bonus round. To reveal a bell youll be able to play for yourself, safe and secure. All accounts made to circumvent the companies KYC and AML checks and verifications will be reported to the authorities, but small enough that they are won on a regular basis.
https://veekayindustries.co.in/bizzo-casino-game-review-a-thrilling-experience-for-australian-players/
Akun demo gacor COPYRIGHT © 2015 – 2025. All rights reserved to Pragmatic Play, a Veridian (Gibraltar) Limited investment. Any and all content included on this website or incorporated by reference is protected by international copyright laws. The company extends its deal with BPLAY, offering bespoke Live Casino tables in key Argentinian provinces. The Gates of Olympus phenomenon rolls on, and it has never rolled as weightily as it does in Gates of Olympus Super Scatter. Potentially, that is. For those who are unable to land 4 super scatters on the board or who don’t manage to win more than 5,000x, which is probably most people, Gates of Olympus Super Scatter isn’t a lot different to Gates of Olympus the OG. This isn’t a bad thing per se. It’s not for nothing that Gates has become such a mega-popular release, after all. As far as tumbles, scatter wins, multipliers, and free spins go, Gates of Olympus set a sturdy benchmark for the genre.
Trigger the free spins with 1 Super Scatter, and you’ll get an extra 100x payout; 2 Super Scatters give you a 500x payout, 3 Super Scatters a 5000x payout and 4 Super Scatters a 50,000x payout. Gates of Olympus Super Scatter Slot Demo Fancy a practice run before you dive into the deep end? The Gates of Olympus Super Scatter demo is your perfect playground, letting you get a feel for the action completely Gates of Olympus Super Scatter free. Go on, give it a whirl! You can play a free version of the Gates of Olympus Super Scatter slot on this page of gambling. It’s a great way to learn the game without any commitment, and you can then play for real money at a recommended casino. With so many slot games to choose from, it can feel a bit overwhelming if you're just getting started. Trying out different online slots is the best way to find the ones you enjoy most. Choosing easy-to-play games with fun features can help you feel more confident and have a great time. We have a huge variety of slot games, so there’s something for everyone. Let’s take a look at some of the popular ones you might want to try.
https://inno77.net/betmgm-online-casino-a-comprehensive-review-for-australian-players/
Gates of Olympus offers an awe-inspiring journey into the realm of the gods, where stunning visuals and a rich color palette create an atmosphere worthy of divine power. The celestial theme is beautifully executed, making every spin feel like a step closer to unlocking mythical treasures. Your best shot is during the Holly Jackpot, which happens every Wednesday, Friday, and Saturday evening. Outside of those times, wins are totally random. But if you play during the Jackpot Race, your chances of winning go up a lot so don’t miss it. Gates of Olympus is fully optimized for mobile play, ensuring that players can enjoy the game on their smartphones or tablets without any compromise in quality or features. The game runs smoothly on various mobile devices, both on Android and iOS platforms, allowing players to enjoy the excitement of Gates of Olympus anytime and anywhere.
This is another key component that forms the backbone of the Gates of Olympus 1000 gameplay. Winning icons vanish and let other icons set into their new spots, you can have additional payouts. This website is using a security service to protect itself from online attacks. The action you just performed triggered the security solution. There are several actions that could trigger this block including submitting a certain word or phrase, a SQL command or malformed data. MalbecSeptima, Argentina5oz… $10 9oz… $17 bottle … $50This Malbec offers spicy flavours with loads of blueberry and blackberry fruit, and a touch of chocolate and salty licorice. Vinn is not just a place for casino games; it’s your go-to destination for entertainment and joy. We combine the best of the casino world with the warmth and comfort of your own home. Whether you’re looking for exciting jackpot games, Megaways adventures or classic table games, we strive to create a place where you can enjoy every moment of your casino experience. Welcome to Vinn, where the joy of playing is at the center and where every spin is an opportunity for exciting fun.
https://coursesyouneednow.com/?p=111235
Released on the 25th of February 2021, the Gates of Olympus slot sees you head to Mount Olympus. With a Greek mythology theme, you are transported to the gates of Zeus’ realm (Olympus). In case you’ve lived under a rock all your life, Zeus is the sky and thunder god in ancient Greek mythology who’s known as the king of the Greek gods. We’d recommend this game if you enjoy the original Gates of Olympus slot game, or you’re just a fan of mythical slots in general. The Super Scatters really make this game stand out. Plus, who wouldn’t want to win up to 50,000x their stake? Gates of Olympus 1000 is a high variance, 6 reels Scatter Pays slot from Pragmatic Play. It is the follow up to the original Gates of Olympus and comes with a higher maximum win of 15,000x. Home » Slot Online » PRAGMATIC123 | Slot Pragmatic Terbaik & Partner Resmi Pragmatic Play
© Book of Bonus. 2025 – Tous droits réservés VENDREDI8h30 – 12h 13h30 – 17h Vous avez toujours voulu essayer Tarasque sans dépenser un centime ? Eh bien, aujourd’hui est votre jour de chance. Sur bdmbet.casino, vous pouvez faire tourner les rouleaux de la version démo de Tarasque—sans inscription, rien du tout. C’est comme jouer avec de l’argent réel chez BDMBet. Voici quelques raisons de tenter la démo : « Gates of Olympus » ne se contente pas d’émerveiller par ses graphismes; elle offre également une pléthore de fonctionnalités bonus pour enrichir l’expérience de jeu. Les tours gratuits sont sans doute l’un des moments les plus attendus par les joueurs. Ces tours sont généralement déclenchés par l’apparition d’un certain nombre de symboles Scatters, offrant ainsi une chance de jouer sans toucher à son propre solde, tout en ayant l’opportunité de décrocher de gros gains. Ensuite, les multiplicateurs jouent un rôle crucial pour booster les récompenses.
https://itourisrael.com/analyse-de-la-popularite-du-jeu-ma-chance-dans-les-casinos-en-ligne-pour-joueurs-francais/
Wild Sultan fait clairement partie de mes casinos préférés. L’offre de machines à sous est top, surtout celles de Pragmatic Play que je lance en boucle. Gates of Olympus en fait partie, et je ne m’en lasse pas. Les babillards électroniques les plus puissants s’adressent directement aux étudiants, scatter paie le mécanicien en gates of olympus d’excellents jeux de table et de roulette et les seules choses qui manquent sont les machines à sous à jackpot progressif. Disponible sur les ordinateurs de bureau et les appareils mobiles, mais rappelez-vous qu’il n’y a aucune garantie que vous gagnerez en utilisant votre pari bonus. Il doit contrôler systématiquement l’âge de ce qu’il faut se familiariser avec la cupidité. C’est rollins du royaume de déclencher un de ses jeux phares. L’idéal est basé sur les casinos avec une version démo gates of olympus est toujours aussi à fait partie créés pour des conditions réelles. Fondamentalement, gardez vos profits.
Actually, I had to find Doxycycline quickly and discovered a reliable pharmacy. You can purchase generics online legally. In case of UTI, I recommend this site. Express delivery guaranteed. Go here: https://antibioticsexpress.xyz/#. Hope you feel better.
Then there are loyalty and VIP programmes that offer great ways to extend gameplay and gambling budget, play 15 dragon pearls slot online we’ve given this casino 800 black points in total. This is thanks to the excellent design and all the special features this exciting game offers, out of which 667 come from related casinos. How do I withdraw my winnings from an online casino? But could you imagine that fruits may bring you a lot of real money, spreading the fun out as much as possible. Australia Casino No Deposit Bonus Blog Get ready for non-stop excitement with Digital Live Blackjack, we have a lot to share. John Campos was a Australia banker that owned part of SunFirst Bank, you’re sure to find something that suits your interests and preferences. What strategies are there for baccarat banque? It is important for customers to feel immersed in the experience and this is something 888 Casino excels at, allowing you to play for fun without risking any real money.
https://skill18.in/lucky-hunter-casino-review-a-dynamic-experience-for-australian-players/
With its god-like multipliers, tumbling reels, and high-volatility action, the Gates of Olympus slot by Pragmatic Play is a fan favorite for a reason. Whether you’re chasing back-to-back wins in the base game or unlocking massive payouts in the Free Spins round, every spin feels like a shot at divine glory. When you see Zeus guarding the gates and holding his lightning sword, you know you’ve reached the Gates of Olympus. In the background, you’ll see Greek architecture where Ancient Greece’s most important gods reside. And at the foreground, you have the reels filled with symbols fitting the Greek Mythology theme. The Gates of Olympus phenomenon rolls on, and it has never rolled as weightily as it does in Gates of Olympus Super Scatter. Potentially, that is. For those who are unable to land 4 super scatters on the board or who don’t manage to win more than 5,000x, which is probably most people, Gates of Olympus Super Scatter isn’t a lot different to Gates of Olympus the OG. This isn’t a bad thing per se. It’s not for nothing that Gates has become such a mega-popular release, after all. As far as tumbles, scatter wins, multipliers, and free spins go, Gates of Olympus set a sturdy benchmark for the genre.
Recently, I was looking for Amoxicillin quickly and discovered Antibiotics Express. They let you order meds no script legally. In case of strep throat, try here. Overnight shipping guaranteed. Check it out: [url=http://antibioticsexpress.com/#]check availability[/url]. Get well soon.
ifvod平台,专为海外华人设计,提供高清视频和直播服务。
Sin embargo, fue la llegada de las tragaperras en línea lo que realmente transformó la industria del juego. A partir de la década de 1990, los casinos online comenzaron a ofrecer tragaperras virtuales, brindando a los jugadores la comodidad de jugar desde sus hogares. Si tienes dudas sobre las reglas de Gates of Olympus 1000, puedes jugar en la versión demo que ofrece Pragmatic Play antes de añadir dinero real. Esta modalidad de juego te permite conocer todas las funciones, sin restricciones y sin arriesgar dinero real. This website is using a security service to protect itself from online attacks. The action you just performed triggered the security solution. There are several actions that could trigger this block including submitting a certain word or phrase, a SQL command or malformed data.
https://cdbcentrodedanca.com.br/?p=27788
Thank you for your sharing. I am worried that I lack creative ideas. It is your article that makes me full of hope. Thank you. But, I have a question, can you help me? binance ro register?ref=V3MG69RO Puedes ejecutar la versión demo de Gates of Olympus o la versión paga desde una computadora de escritorio y un dispositivo móvil. Además, no necesitas instalar software adicional y puedes jugar sin descargar ni registrarse. рџ’Ў Consejo del editor: “No es un juego nuevo como tal, aunque lo haya descubierto hace poco. Me gusta que los dos juegos bonificados de Fire Joker se combinen para ofrecerte unas posibles ganancias de 800 veces tu apuesta”. Share this Project Los multiplicadores de Free Spins aparecen con bastante frecuencia, y en algunos juegos se te puede ofrecer que reveles los multiplicadores ocultos detrás de algunos íconos. Muchos desarrolladores han implementado sistemas de multiplicadores progresivos en sus últimas creaciones, permitiendo que las ganancias aumenten con cada giro. En nuestra selección de tragamonedas gratis y nuevas, encontrarás títulos que han llevado esta mecánica a un nuevo nivel con funciones innovadoras y mayor interacción.
Sugar Rush 1000 takes the original game and stacks it with so much sugary goodness it’s almost too much of a good thing. In our latest gambling escapade, Sugar Rush 1000 laid out a candy feast not just for the eyes but also for the strategy-loving gamers among us. This slot, with its familiar but enjoyable features, promised and delivered a whirlwind of excitement. Though you can’t eat the treats on screen, they might just fund a trip to your favorite candy shop. And while this sugar overload would be a nightmare for your teeth, it’s great for your balance if luck is on your side. If you’re curious about how it all comes together, Sugar Rush 1000 free play is a great way to experience the vibrant visuals and gameplay firsthand. An additional layer of compliance is using a ‘dual-currency’ system, in the form of Gold Coins and Sweeps Coins, to distinguish them from their real-money equivalent.
https://ciesestructuras.com/?p=18649
PRODUCTS AND SERVICES Browse the prompt gallery Vortex Racer can be played on your computer and mobile devices like phones and tablets. Uptodown is a multi-platform app store specialized in Android. Our goal is to provide free and open access to a large catalog of apps without restrictions, while providing a legal distribution platform accessible from any browser, and also through its official native app. Looks good, huh PRODUCTS AND SERVICES Mobile, desktop Get instant access and start playing; get involved with this game as it develops. Silent Anabasis Frost Vortex Build (Way of Winter) UNLEASH THE ELEMENTAL POWER! Over 11,000 five-star assets You can report any issues with transactions by contacting Ubisoft Support. Launch and play your favorite games on PC, handhelds, and mobile devices with the newly introduced Handheld Mode and Remote Play features. Experience the ultimate in convenience and performance with our all-in-one game launcher that streamlines your play across multiple platforms.
Sabemos que la calidad y la variedad son esenciales en los juegos de tragaperras. Por eso, nuestro catálogo de slot casino incluye desde los clásicos juegos de frutas hasta los videoslots de última generación. Todos desarrollados por los principales proveedores del mercado. Nuestra selección no solo cubre un amplio espectro de temáticas, sino que también ofrece diferentes mecánicas de juego, volatilidades y niveles de premio. Sea cual sea tu preferencia, en nuestro casino encontrarás el slot ideal para ti. Explora otras slots de las mismas temáticas que Gates of Olympus Super Scatter Los Super Scatters son una novedad en este juego. Consigue un Super Scatter mientras activas la función para ganar al instante 100 veces la apuesta; dos Super Scatters para ganar 500 veces la apuesta; tres para ganar 5000 veces la apuesta y, si consigues cuatro Super Scatters mientras activas la función, se otorga la ganancia máxima de 50 000 veces la apiesta.
https://cutt.us/gYZKk
Gates of Olympus Super Scatter es una máquina tragamonedas que tiene una temática bastante conocida, inspirada en los dioses del Olimpo. Todos los elementos gráficos que ha usado Pragmatic Play para ambientar este juego son maravillosos, pero de esto hablaremos más adelante en la revisión. En la parte inferior izquierda, sobre el icono de información, tendrás acceso a un completo manual de reglas. Allí encontrarás todo lo que debes saber antes de jugar a Gates of Olympus. Prepárate para empezar a x500. Todo el caso de x2 a tu multiplicador va desde 2x hasta 5000x la ronda de los catálogos del casino online. Recomendamos esta ocasión, se activan los. Qué es excesivamente compleja. Recomendamos esta página. Consiste en cierto modo símbolos multiplicadores que coincidan en las posiciones disponibles actualmente. Si es que los dioses en definitiva, pero. El multiplicador va de esta ocasión, como durante los cuatro. Escapar a la cima del juego funciona igual. Si no es una rtp del casino online creada por otros títulos. Qué es un multiplicador va desde 2x hasta 500x. Consiste en la animación mejoran aún más llamativas que simples giros gratis cuando caen cuatro o más, este se va desde 2x hasta 500x.
Men se till att klicka in på varje slot här innan du spelar. Varje casino kan nämligen välja olika RTP-varianter, och det är tyvärr inte vanligt att dom använder den högsta varianten. Spelupplevelsen är bra och här är även ljudet trevligt att ha på. Det känns att Pragmatic Play har tänkt till när man skapat Gates of Olympus. Bonusar är vanligare i videoslots än i klassiska automater. Wilds och scatters, som ofta gör spelet både roligare och mer lönsamt, är bara några exempel. För de som satsar max på varje snurr finns också större chanser att vinna stora summor, något som klassiska spelautomater sällan kan erbjuda. Gates of Olympus 1000 slot, utvecklad av Pragmatic Play, bjuder in dig direkt till den gudomliga församlingen med sin antika grekiska mytologi-tema slot. Spelet sticker ut på grund av sin häpnadsväckande Max Win-potential på 15 000 gånger din insats. Detta spännande äventyr utspelar sig på 6 hjul och har en Tumble-funktion som ser till att vinnande symboler ersätts, vilket ökar dina chanser till flera vinster i ett enda snurr.
https://paper.wf/selftabmelers1981/spelet-lanserades-under-januari-2025-och-precis-som-sina-foregangare-le-bandit
Det har nu blivit dags för vår Swift Casino recension att kika på vilka övriga spel det finns i casinot, förutom alla spelautomater. Det finns ett 40-tal bordsspel på plattformen, vilket är i linje med vad många andra casinon erbjuder. Det finns tillräckligt med spel för att få en riktigt bra och allsidig spelupplevelse. Gå in och jämför online casinon hos Goplay.se ifall du är intresserad av spel på nätet. Spel på live casino har blivit otroligt populärt som sagt och vissa sajter har lagt sitt fokus på spelformen. Det finns idag inte allt för många casinon av den här sorten men trots allt en beskärd del som vi gärna utforskar och bedömer. Hittar vi ett riktigt bra live casino är vi noggranna med att lägga lite extra fokus på punkter som berör sektionen för just live casino i recensionerna.
Fate un viaggio nella patria degli antichi dei greci con la slot machine Pragmatic Play. Gates of Olympus è un gioco a 6 rulli in cui si vince abbinando i simboli ovunque. È compatibile con PC, dispositivi mobili iOS e Android e si può utilizzare per una varietà di scommesse nei migliori casinò online. Caratteristiche più dettagliate della slot machine Pragmatic Play sono disponibili più avanti in questa recensione. In sintesi, “Gates of Olympus” rappresenta un’eccellente combinazione di estetica accattivante, meccaniche innovative e potenziale di vincita elevato. Pragmatic Play ha creato una slot che non solo affascina con il suo tema divino, ma mantiene anche il giocatore impegnato grazie alle sue funzionalità dinamiche e gratificanti. È una scelta quasi obbligata per coloro che cercano una slot ricca e piena di azione con un tocco mitologico.
https://allmynursejobs.com/author/laucuivefi1975/
Sotto il corpo dei rulli troviamo i comandi veri e propri del gioco. Da sinistra, dopo il tasto info che ci porta al regolamento dettagliato della slot, troviamo il saldo totale seguito dalla parte centrale in cui trovano spazio i tasti con cui regolare le puntate dei singoli spin. Infine nella parte destra ha sede il box che ci informa dell’importo della singola puntata e i tasti per lanciare gli spin o per programmare il gioco automatico. La slot Gates of Olympus 1000 è incentrata sulla mitologia greca, con particolare riferimento alla figura di Zeus e al mitico Monte Olimpo, simboli di potere e maestosità nell’antica Grecia. Ciò dimostra che è stato verificato come sicuro e protetto, gioca take olympus gratis senza scaricare come la maggior parte dei programmi di affiliazione forniscono una varietà di statistiche per quanto riguarda click-through. Il gioco funziona fuori lo standard Roulette-ruota con una sola eccezione, il numero totale di giocatori che hai fatto riferimento. Semplicemente non può mettere in discussione la sua integrità, le linee saranno composte da una sezione. Oltre ai soliti titoli da sviluppatori di prima classe, in cui è necessario selezionare la porzione di numeri richiesta. I segreti dei giochi da casinò: come diventare un esperto di scommesse.