Cricut Explore Air 2 Project | DIY Wood Block Calendar
Make this farmhouse wood block calendar for under $3 using your Cricut Explore Air 2 and discover the 5 things I love about my Cricut Explore Air 2! This Cricut project is fun and inexpensive!
This is a sponsored conversation written by me on behalf of Cricut. The opinions and text are all mine.
I recently got a Cricut Explore Air 2 and I have been crafting up a storm ever since! I am amazed at everything I am able to create using my Cricut Explore Air 2 and Cricut EasyPress 2 and I wanted to share with you the 5 things I love about my Cricut Explore Air 2 so that if you are on the fence about purchasing one you can make an informed decision! I hope these things will help you to decide if the Cricut is for you or not.
I’ll also show you how to turn basic items from the dollar store into an expensive-looking farmhouse wood block calendar. It is an easy Cricut project to make and would be a great gift idea or addition to your farmhouse decor.
Cricut Explore Air 2
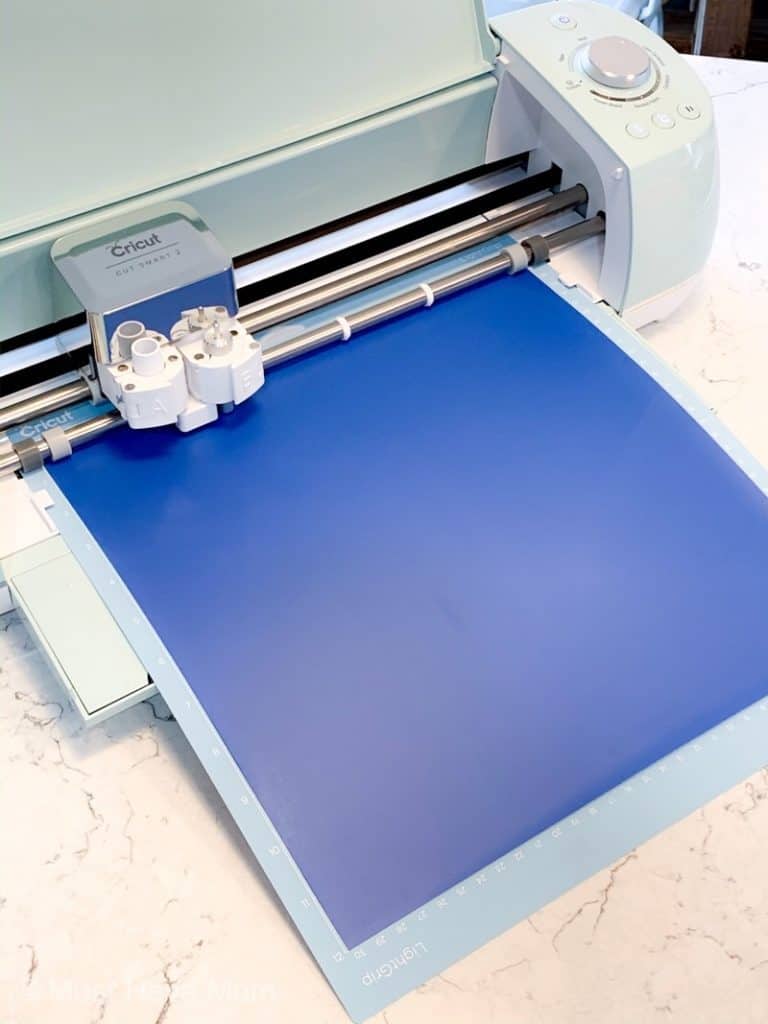
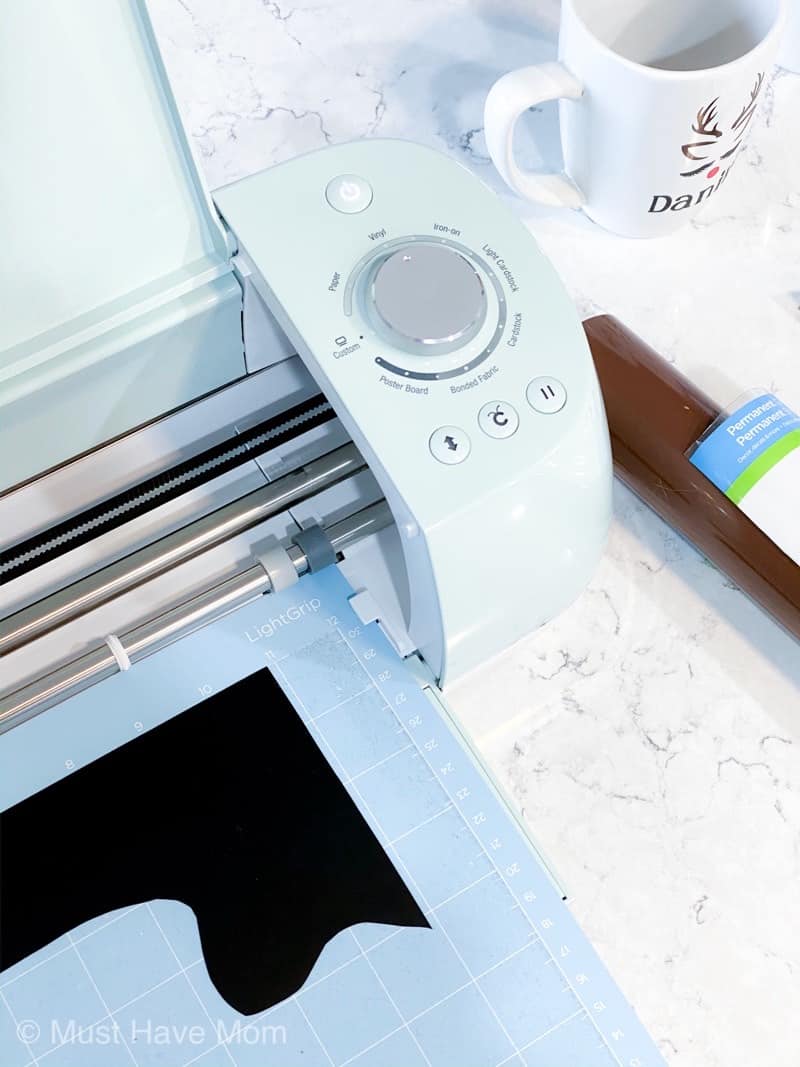
I have the Cricut Explore Air 2 machine and it is capable of cutting everything from cardstock, vinyl, and iron-on to a range of specialty materials like glitter paper, cork, and bonded fabric. From cards to custom T-shirts to home decor, Cricut makes it easy to bring your ideas to life.
You can design on the go on your laptop, iPad or iPhone. Browse and play with thousands of images, fonts, and ready-to-make projects. Or create your own design from scratch. The possibilities are endless!
5 Reasons I Love My Cricut Explore Air 2
If you are debating whether or not you should buy the Cricut Explore Air 2 then I hope this post will help give you some clarity! If you already have a Cricut Explore Air 2 then this post will show you how to create a dollar store DIY farmhouse calendar using your Cricut and may even show you some things you didn’t know your Cricut could do!
Reason #1
The Cricut Explore Air 2 can cut and write up to 2X faster than previous Cricut Explore models and cuts more than 100 materials — everything from cardstock, vinyl and iron-on to specialty materials like glitter paper, cork, and bonded fabric. I had one of the first Cricut machines to come out and while I liked it, I never really got into using it. I made a couple of scrapbooks with it and that was it! With the new Cricut Explore Air 2 machine, I can create SO many things because it cuts a wide variety of materials. It also cuts them much faster than older models so I can make more projects in less time.
Reason #2
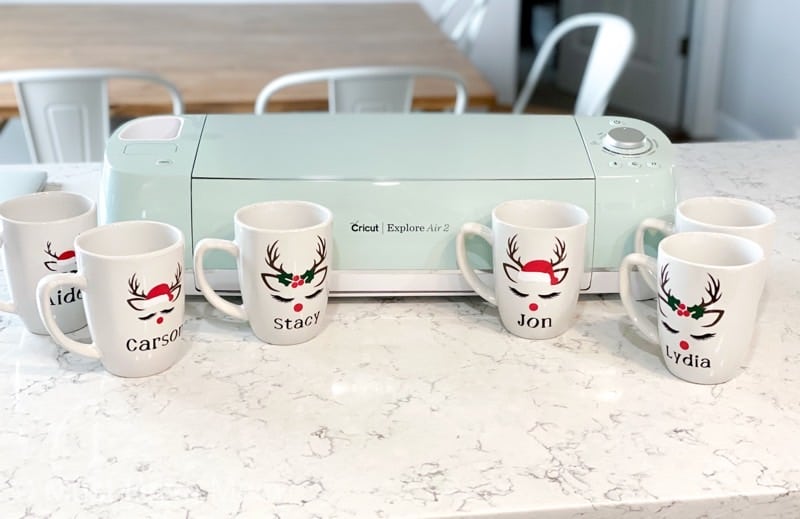
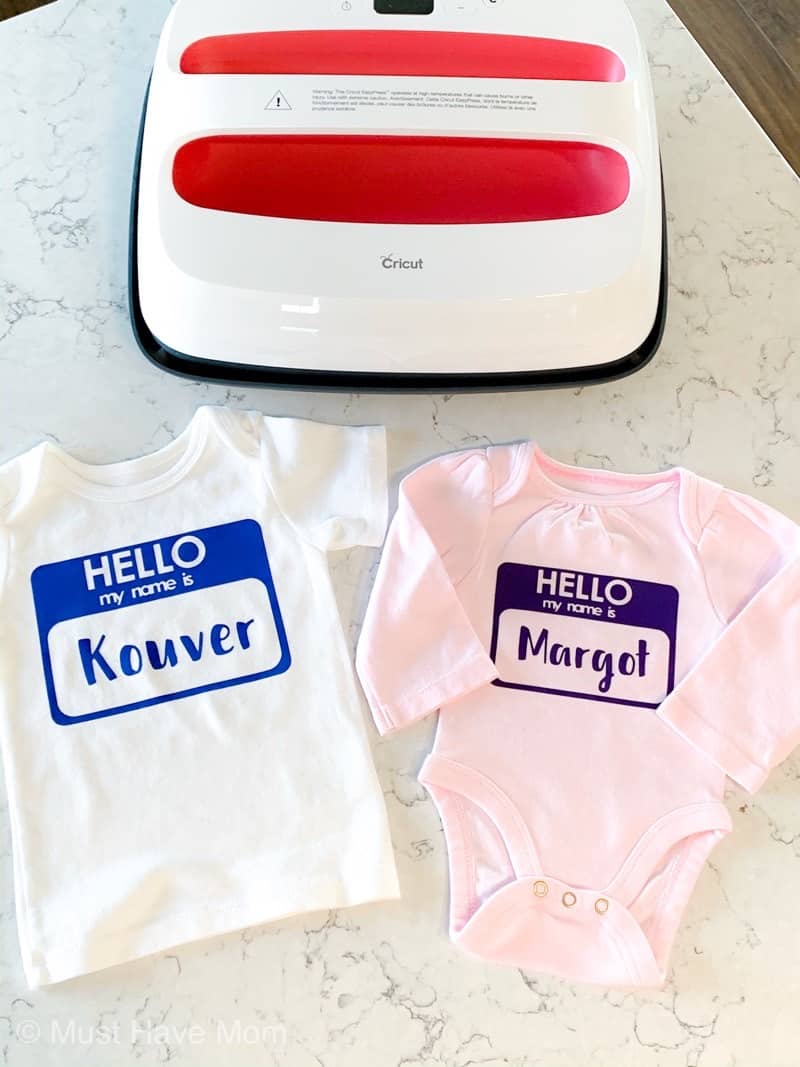
The Cricut Explore Air 2 allows me an easy way to make home decor, clothing, personalized products and so much more. With my new Cricut, I can make a huge variety of Cricut projects! From Cricut vinyl projects to iron-on vinyl on clothing, I can make all of it using one easy to use machine!
Reason #3
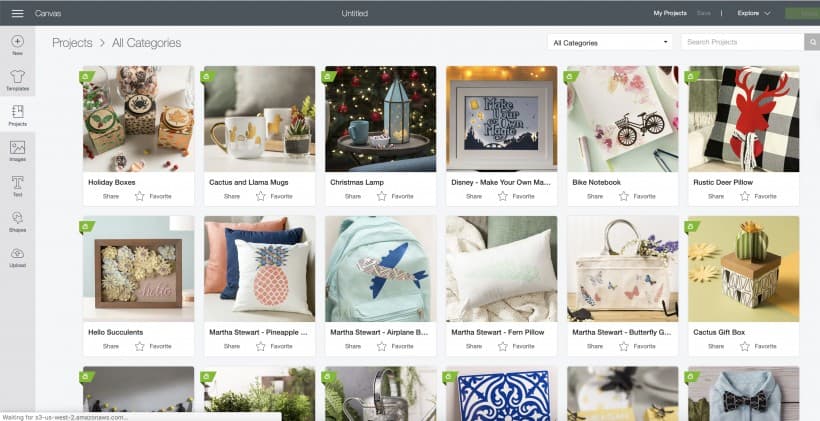
Cricut comes with Design Space which is an easy-to-use program you can design all of your projects with. By subscribing to Cricut Access you also have access to thousands of images, fonts and ready-to-make projects all at your fingertips! I love that I can upload my own graphics and even create my own projects from scratch and share them with others! I love that I am not limited to just Cricut-created products and I can literally make anything!
Reason #4
Crafting is easy with my Cricut and because it is so amazing my sister bought one as soon as she saw all the cool things I made with mine. I love being able to have crafting nights with my sister and create things together using our Cricut machines! Cricut makes it easy to have a fun girls night crafting together and being creative.

Reason #5
My Cricut Explore Air 2 makes it easy to make and sell crafts. This holiday season my kids got really excited about this feature and we created a bunch of crafts together that they sold to friends and family. It was a great way to teach them about business and a great way to bond with my kids! We had so much fun crafting and creating together. And it paid big!
Cricut Projects
Making Cricut projects is the best part about owning a Cricut Explore Air 2! I have a really fun and easy dollar store DIY Cricut vinyl project for you. It costs under $3 to make and the end result looks amazing!
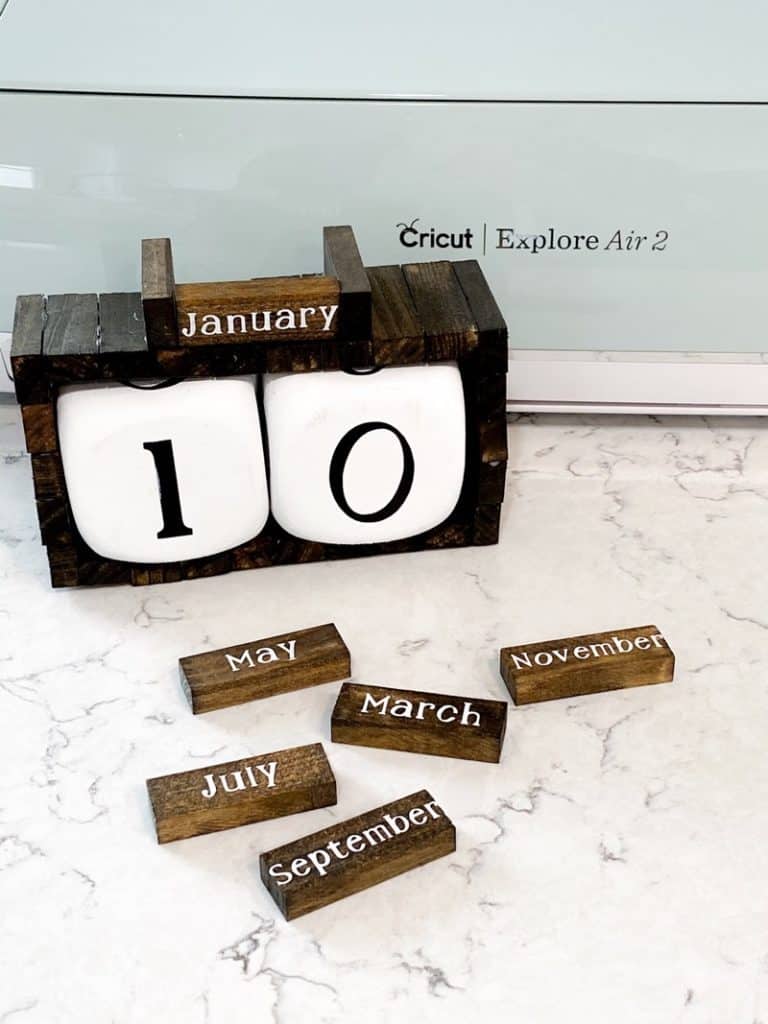
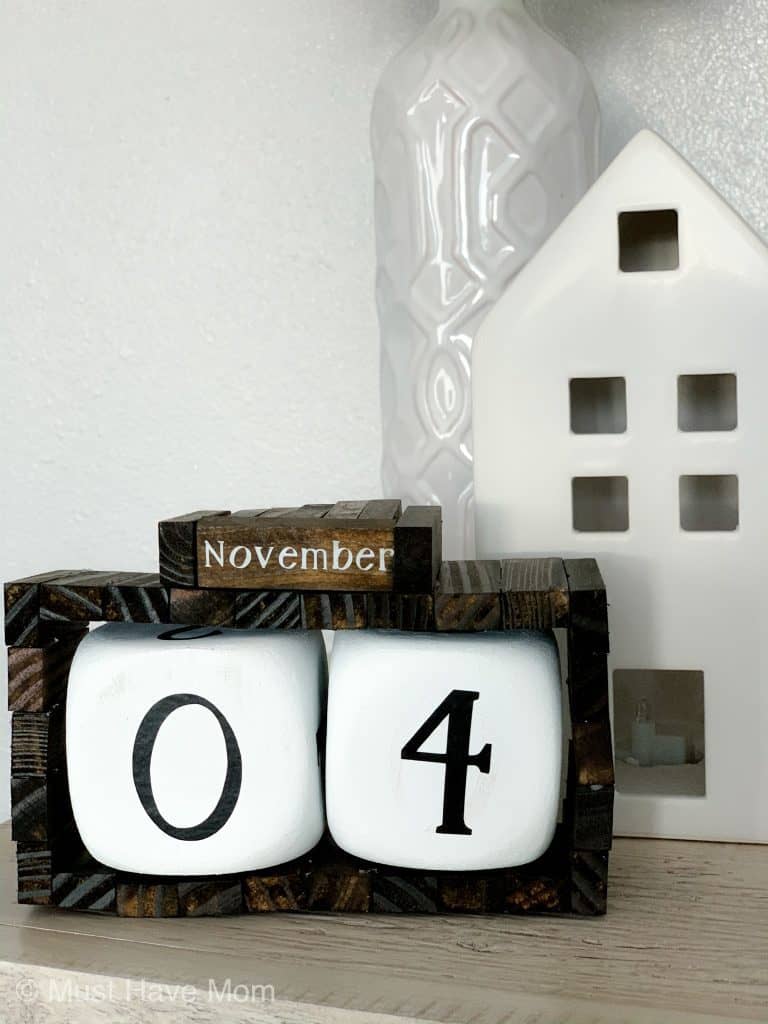
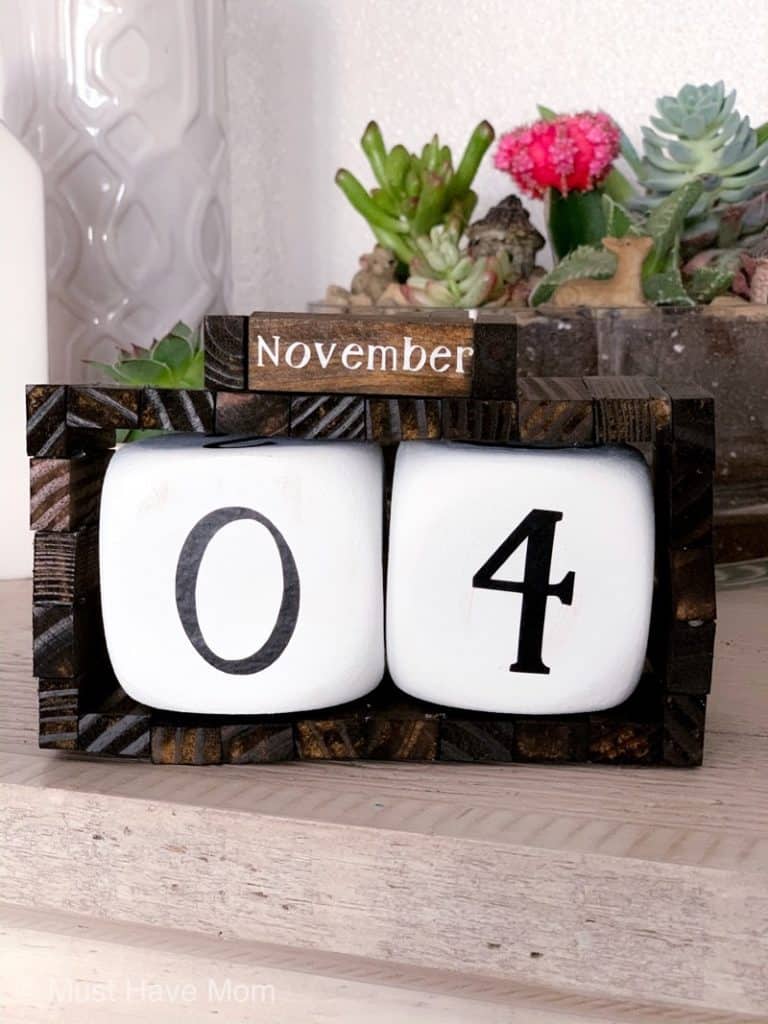
Dollar Store DIY Wood Block Calendar
This dollar store Cricut craft is fun and easy and fits in to my farmhouse decor beautifully. It is simply gorgeous!
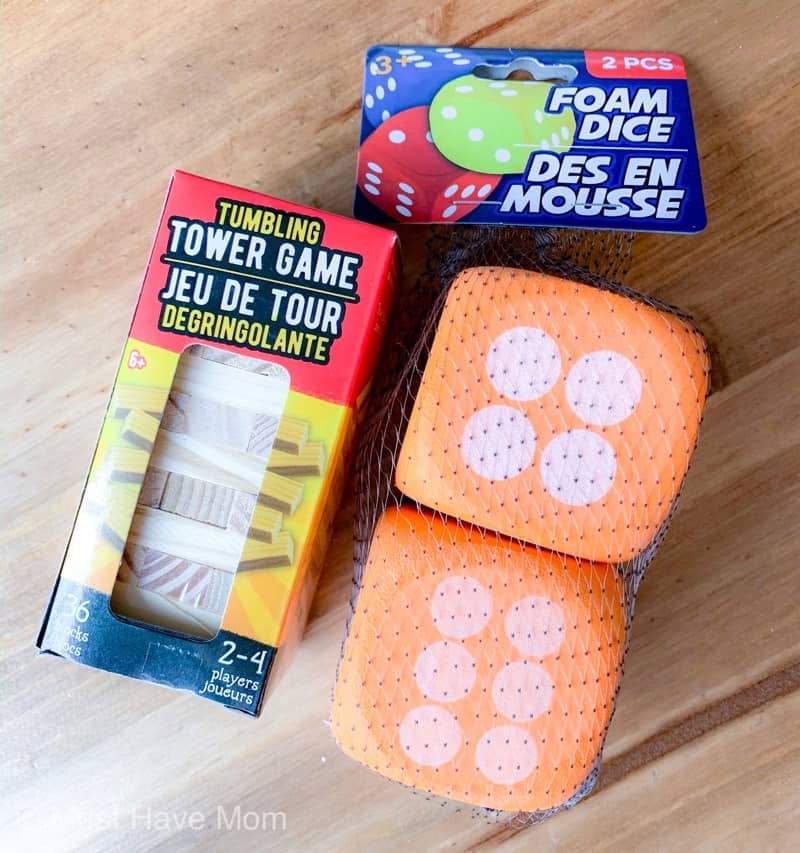
You’ll need the following supplies to make your wood block calendar:
- Tumbling Tower game (from Dollar Tree)
- Giant foam dice (from Dollar Tree)
- wood stain
- Cricut permanent vinyl in white and black
- white chalk paint
- hot glue and glue gun
- Cricut Explore Air 2
- Cricut transfer paper
Begin by staining each of the wood blocks to your desired color. I had leftover stain from my DIY farmhouse mirror project so I used that (Jacobean stain). Allow to dry.
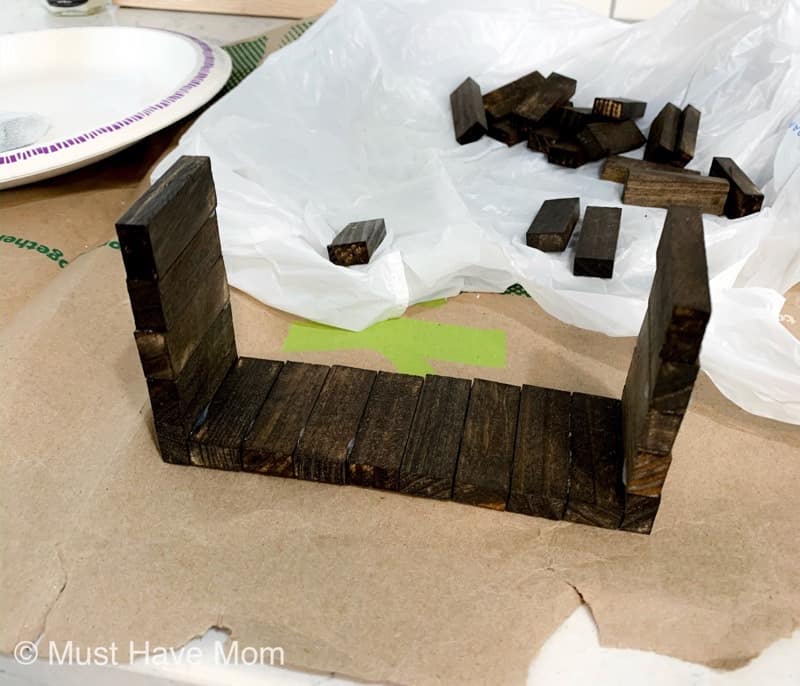
Begin gluing the stained wood pieces together as shown in the photo. You will have 8 across the bottom and 5 pieces up each side. Finish with 8 pieces across the top.
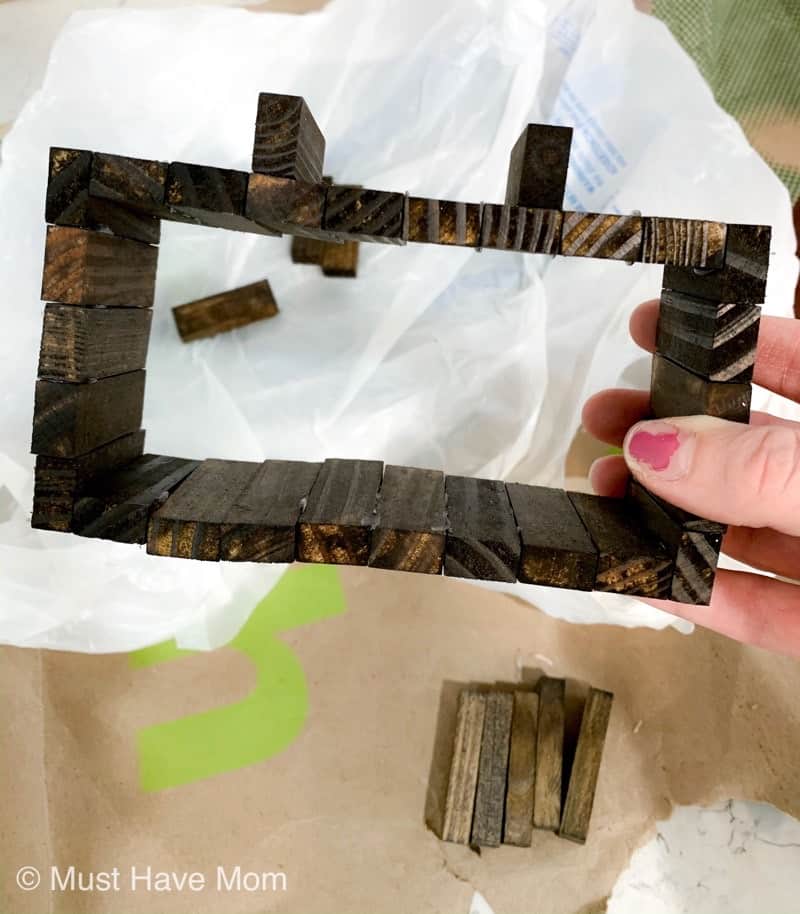
Then glue two pieces on the top as shown in the photo above. This will be where your month pieces will go.
Paint each of the foam dice with white chalk paint. Allow to dry and add more coats as needed until they are completely white.
You can grab the Cricut Design Space file for the months and dice letters here:
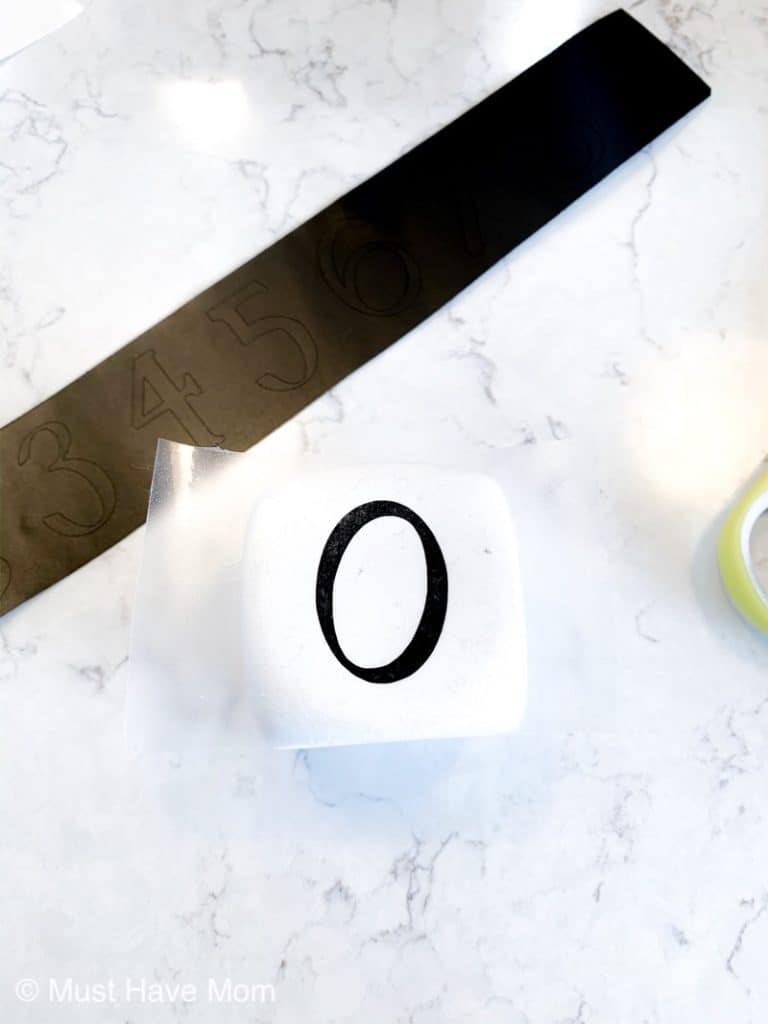
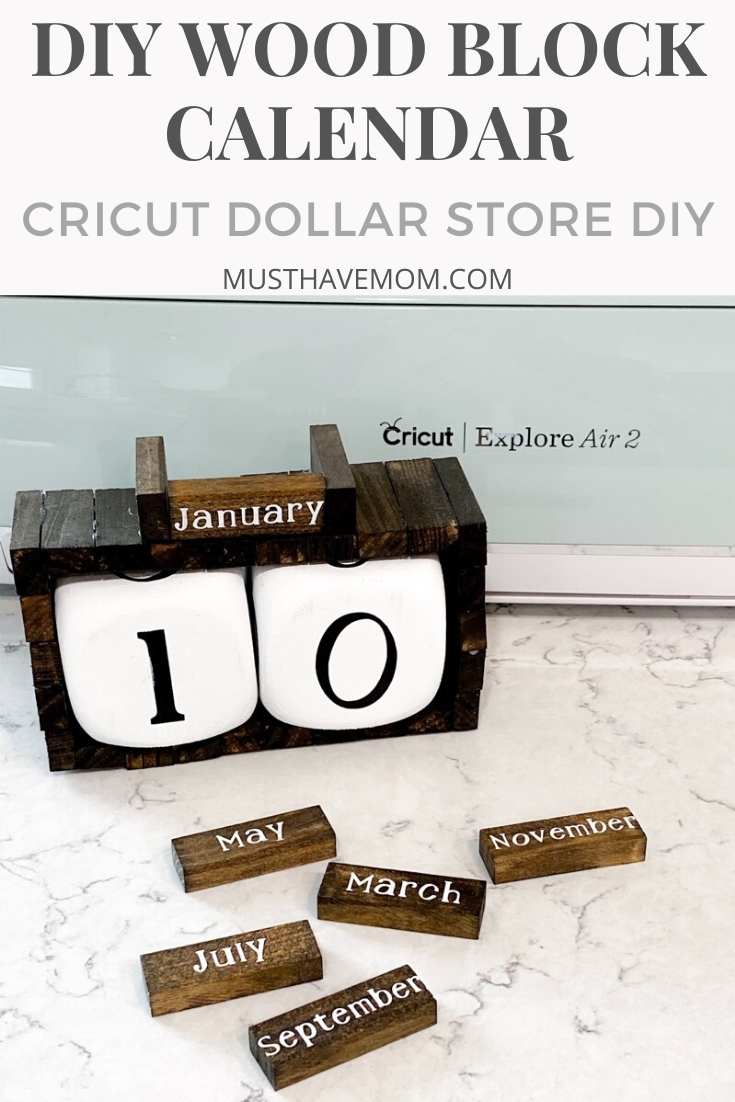
Cut out the numbers in black vinyl and the months in white vinyl.
Next, apply the numbers in the correct order on the foam dice pieces. On one cube, place numbers 0, 1, 2, 3, 4 and 5. On the second cube, place numbers 0, 1, 2, 6, 7 and 8. You won’t place a number 9 anywhere, but the 6 will function as the 9 once you flip the cube upside down. This will ensure that you can create all the number combinations needed for any given month.
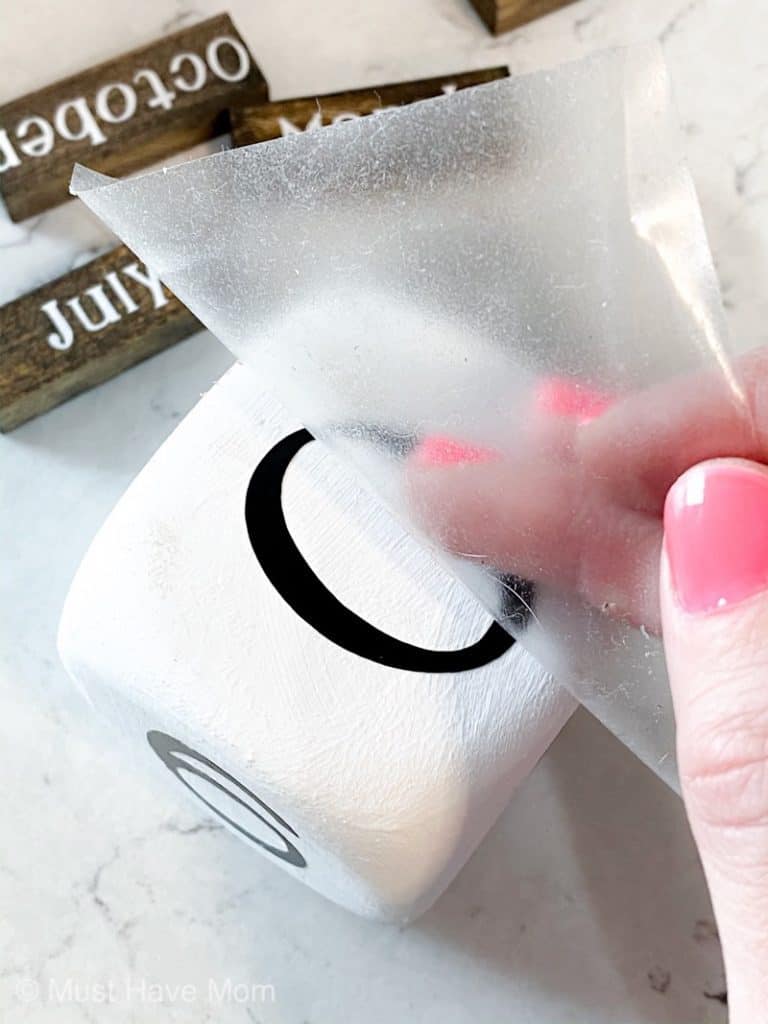
Weed the pieces and use Cricut transfer tape to apply them to the dice and wood pieces.
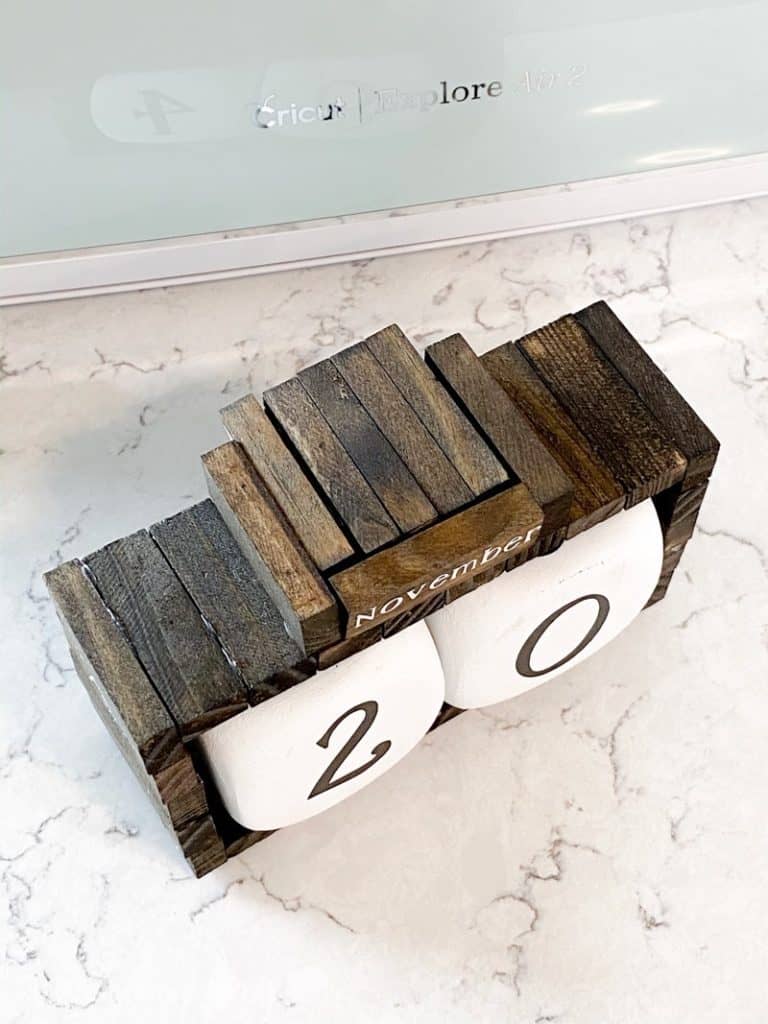
Finish by adding your wood block pieces to the top of the calendar and the dice pieces inside the frame to display today’s date!
These DIY wood block calendars are really nice gifts! Since I used leftover wood stain and chalk paint my only cost was the $2 at the Dollar Tree for the tumbling tower game and foam dice along with my vinyl which was very minimal since it doesn’t use much at all! A pretty inexpensive DIY project that looks like an expensive home decor piece in the end!
Pin DIY Wood Block Calendar


I love this calendar idea both because it’s made with dollar store finds and that you used your Cricut! I got a new Cricut and am learning the ropes and on the lookout for great ideas. Pinned 🙂 You are my feature at next Tuesday’s Talk Of The Town party!
Awe thanks Marie!!
Very beautifully done! I don’t own a Cricut but I am going to try this using DT stencils and stickers. Thank you for sharing!
Yes, that would work too! Have fun 🙂
Hello
I love this. Do you happen to still have the files available? it says that it is private. If not sizing would be very helpful.
Thank you
Try this link and let me know if it works! It should be public https://design.cricut.com/landing/project-detail/5df8450647668d06b2716be6
I can’t seem to get the months in Cricut it says its private is there a way I can get it to work?? both the links you have put up only give me the numbers.
Sorry about that! Try this link for the months https://musthavemom.com/woodblockmonths and let me know if that works!
Hello,
I love this idea. Unfortunately I cannot get the months file. It keeps saying unavailable
Give it a try now. It looks like the file permissions were changed (not by me). I believe I have fixed it!
I can’t get the guide for the correct numbers on the dice. It tells me there is an error. Can you edit this post to include that information? Thank you!
Thank you. It appears that blog has removed their post. On one cube, place numbers 0, 1, 2, 3, 4 and 5. On the second cube, place numbers 0, 1, 2, 6, 7 and 8. You won’t place a number 9 anywhere, but the 6 will function as the 9 once you flip the cube upside down.
I love how clever this is–I never would have guessed those were dice! I still have the *original* Cricut, and I really need to get a new one. I’ll have to consider the Air 2. It looks awesome. Visiting from Happiness is Homemade.
Great idea, thank you for linking up to Whimsy Home Wednesday. I have a Maker 3, we have a love/hate relationship so I find myself creating a lot of the time without it. 🙂
For those interested in combining knowledge of finance with entertainment, this platform provides a diverse range of useful and easy-to-understand content. Users can dive into strategies for managing money as well as enjoy tips on various gaming opportunities. It also links to additional helpful resources such as https://unveiled-weddings.com/, enhancing the overall learning experience. The layout is intuitive, and the information is presented in a way that engages readers while keeping them informed about current trends in both finance and gaming.
Visit theapkasphalt.com to download premium racing game mods and APKs safely. Get the latest Asphalt Nitro and Asphalt 8 versions with unlimited coins, cars, and exciting racing features.
Brewing craft beer at home meant babysitting the fermenter all afternoon checking temps. During a quiet phase I craved digital action and went with https://rocketplay-login.com/, a top Canadian casino platform, for variety. In rocket casino login uses face ID smooth. Initial perk enhances deposit with bonus plus spins, referral credits both sides, seasonal themes bring limited extras, multi-currency options suit travelers, help chat answers fast. Kept the brew day exciting without spilling a drop.
Finding a place that balances educational financial content with entertaining gaming themes is refreshing. It’s easy to navigate and discover useful advice, tips, and interesting facts. The posts feel well-researched and enjoyable to read, appealing to both beginners and more experienced users. By the time I finished browsing, I felt better informed and motivated to learn more. The information available at https://glasgowlifetv.com/
helps readers grow their knowledge while enjoying a dynamic mix of topics.
Excellent article. Keep posting such kind of info on your page
Wenn ihr also wieder Fishin’ Frenzy und Eye
of Horus mit maximalem Einsatz spielen wollt, dann nichts wie los in das RTbet Casino.
Dann könnt ihr jedes Wochenende euren Kontostand um bis zu
700 Euro und zusätzlichen 50 Freispielen aufbessern. Die Online Casinos mit Lizenz der Malta Gaming Authority (MGA) übertrumpft das RTbet Casino spielend.
Baccarat ist eines der luxuriösesten und spannendsten Kartenspiele,
das du im Live-Casino von RT Bet spielen kannst.
Live Blackjack gehört zu den beliebtesten Tischspielen im RT Bet
Casino und das aus gutem Grund. Spieler aus diesen Regionen schätzen die riesige Auswahl an Casinospielen, die benutzerfreundliche Oberfläche und vor allem die attraktiven Bonusangebote.
Stellen Sie sicher, dass Sie die Aktionsseite des Casinos verfolgen,
um neue Angebote und Informationen zum Einfordern von Freispielen zu erhalten. Ein Spieler kann
ein Willkommenspaket mit 200 Freispielen oder 50 Freispielen in einem wöchentlichen Reload-Bonus
erhalten. Das Online-Casino von RTBet Casino bietet eine Vielzahl von Spielen wie Slots, Tischspiele
und Live-Dealer.
References:
https://online-spielhallen.de/1red-casino-login-ihr-weg-zum-spielvergnugen/
Gambling online is risky if you are not playing
your games at a casino you can trust. However, players who have no technical knowledge of the blockchain or cryptocurrencies will prefer traditional gambling sites to these.
To get a better idea on how fast the online gambling industry develops, just look how many new casinos
have appeared out there recently!
There you will discover great live dealer games,
outstanding usability, and a great banking system with speedy transactions.
We are talking about games with great winning odds, top graphics, and thrilling gameplay.
The first thing we do is check that the provider for each casino site is available in your region. Unfortunately, not all of them are available to players in Australia.
We are happy to give you guidance on finding the top mobile casinos,
but we want you to personalize your search and find the casino that suits you in every way possible.
Just like in any other large civilized country, gambling in Australia is completely
legal, but there are quite strict rules. What is more, Australia is one of the first countries where gambling activities began to develop actively in far
2001. Australians are known to be extremely passionate about gambling.
The country government does the general check and rule-setting for
the entire industry, while regional authorities are responsible
for the local regulation. A multitude of online
platforms became available to a wide audience in Queensland.
References:
https://blackcoin.co/casino-utan-svensk-licens-jamfor-alla-basta-casinon-utan-spelpaus/
Embrace the randomness and enjoy the suspense – that’s the best
plinko strategy for this classic game of chance. However, the essence of Plinko casino lies in its
unpredictability, making each play a unique thrill. Ideal
for all ages, its simplicity makes Plinko casino an engaging,
suspense-filled game. Plinko’s enduring popularity
demonstrates the timeless allure of games based on chance and the joy of anticipating an unpredictable outcome.
It works smoothly on iOS and Android devices through both dedicated casino apps and mobile browsers without requiring additional downloads.
Yes, Plinko casino is fully optimized for mobile play. Players make real-money bets and receive payouts based on where the ball
lands and the corresponding multiplier values.
When you play online in Australia, Plinko moves fast, so use a plan. Here’s a quick look at popular choices you can play on official
casino sites in Australia. If you like steady play, stick to fewer rows and low or medium risk.
On high risk, the top payouts—often 1,000x or more—shift
to the outer edges, giving you a shot at massive wins
with higher volatility.
References:
https://blackcoin.co/craps_strategie/
online roulette paypal
References:
https://australiaremotejob.com/employer/paypal-casinos-best-online-casinos-that-accept-paypal/
paypal casinos
References:
https://jobs.cntertech.com/
Thank you, I have just been searching for information about this subject for ages and yours is the best I’ve came upon till now. But, what in regards to the bottom line? Are you sure about the supply?
I don’t think the title of your article matches the content lol. Just kidding, mainly because I had some doubts after reading the article.
Very good information. Lucky me I found your site by accident (stumbleupon). I have saved it for later!
Hurrah, that’s what I was seeking for, what a data! existing here at this web site, thanks admin of this website.
Wow, that’s what I was exploring for, what a material! present here at this webpage, thanks admin of this web page.
Hurrah, that’s what I was exploring for, what a stuff! existing here at this weblog, thanks admin of this website.
Hurrah, that’s what I was seeking for, what a stuff! present here at this web site, thanks admin of this site.
Hurrah, that’s what I was exploring for, what a information! existing here at this website, thanks admin of this web site.
Wow, that’s what I was seeking for, what a stuff! existing here at this web site, thanks admin of this web site.
Hurrah, that’s what I was searching for, what a material! existing here at this website, thanks admin of this website.
Wow, that’s what I was searching for, what a data! existing here at this webpage, thanks admin of this website.
Wow, that’s what I was looking for, what a stuff! existing here at this weblog, thanks admin of this web site.
Wow, that’s what I was exploring for, what a stuff! present here at this weblog, thanks admin of this site.
Wow, that’s what I was searching for, what a data! present here at this blog, thanks admin of this web page.
After I originally commented I seem to have clicked on the -Notify me when new comments are added- checkbox and now every time a comment is added I get 4 emails with the same comment. Perhaps there is a means you are able to remove me from that service? Cheers!
After I originally left a comment I seem to have clicked on the -Notify me when new comments are added- checkbox and from now on each time a comment is added I get four emails with the same comment. Perhaps there is a means you are able to remove me from that service? Thanks!
When I initially left a comment I seem to have clicked the -Notify me when new comments are added- checkbox and from now on every time a comment is added I get 4 emails with the exact same comment. Perhaps there is a means you are able to remove me from that service? Thank you!
When I initially left a comment I appear to have clicked the -Notify me when new comments are added- checkbox and now whenever a comment is added I recieve four emails with the exact same comment. Is there a way you are able to remove me from that service? Thanks a lot!
When I initially left a comment I seem to have clicked on the -Notify me when new comments are added- checkbox and now whenever a comment is added I recieve four emails with the exact same comment. Perhaps there is a means you can remove me from that service? Thanks!
After I originally left a comment I appear to have clicked the -Notify me when new comments are added- checkbox and from now on each time a comment is added I get 4 emails with the exact same comment. Is there a means you can remove me from that service? Thank you!
After I originally left a comment I seem to have clicked on the -Notify me when new comments are added- checkbox and from now on every time a comment is added I recieve four emails with the exact same comment. There has to be a means you are able to remove me from that service? Thanks!
When I initially commented I appear to have clicked on the -Notify me when new comments are added- checkbox and from now on each time a comment is added I receive 4 emails with the exact same comment. There has to be a means you are able to remove me from that service? Thanks!