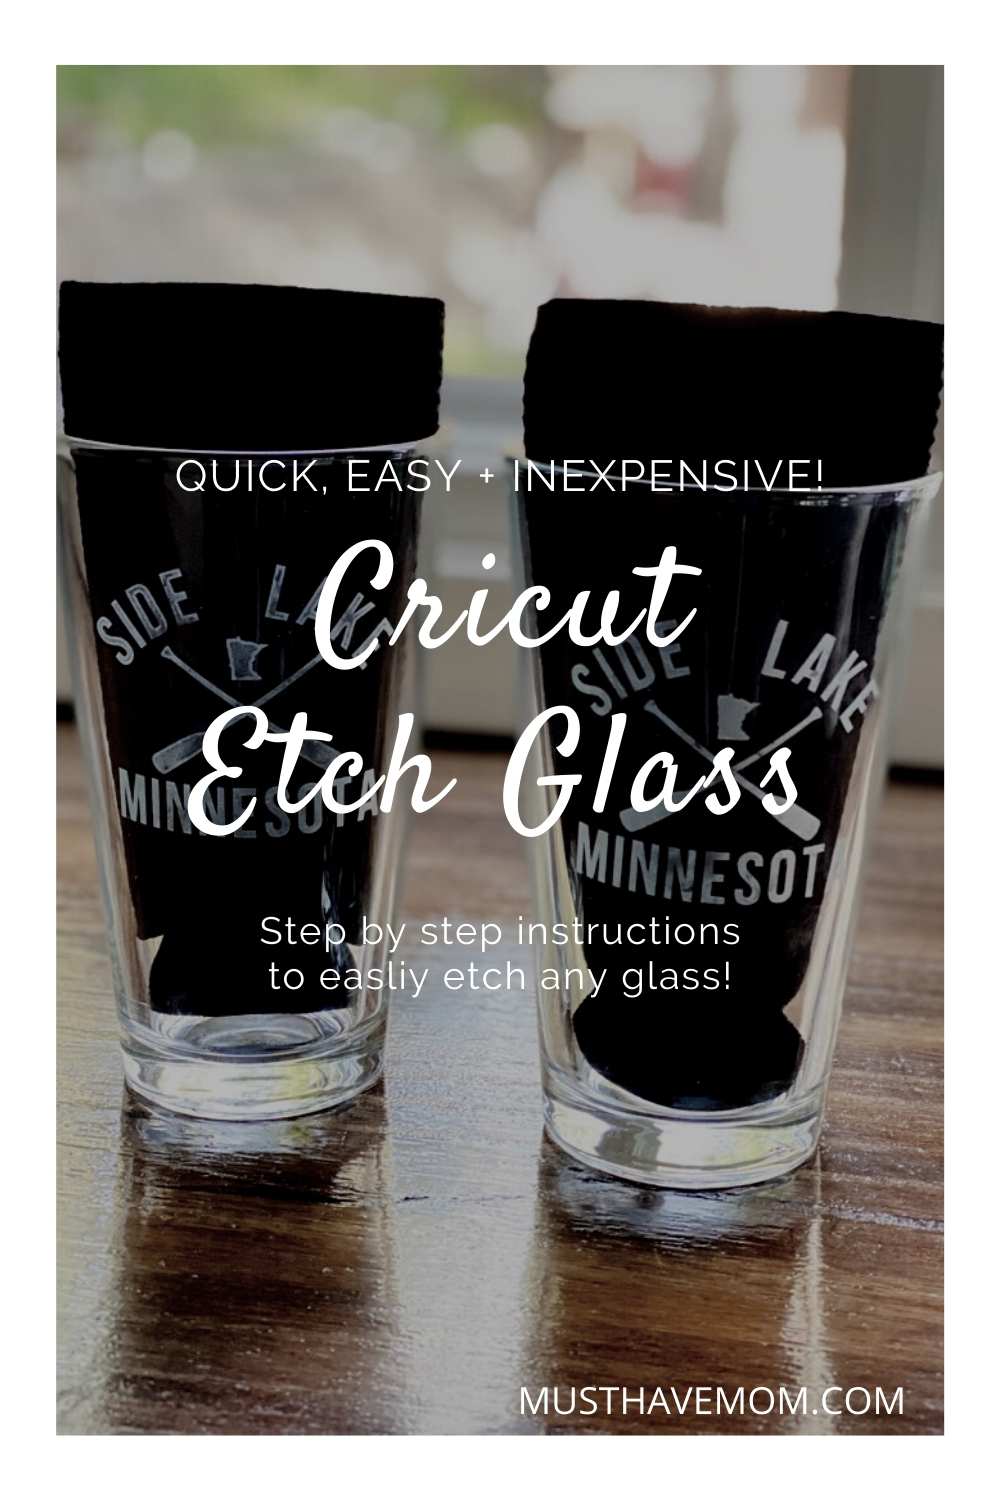
How To Etch Glass With Cricut
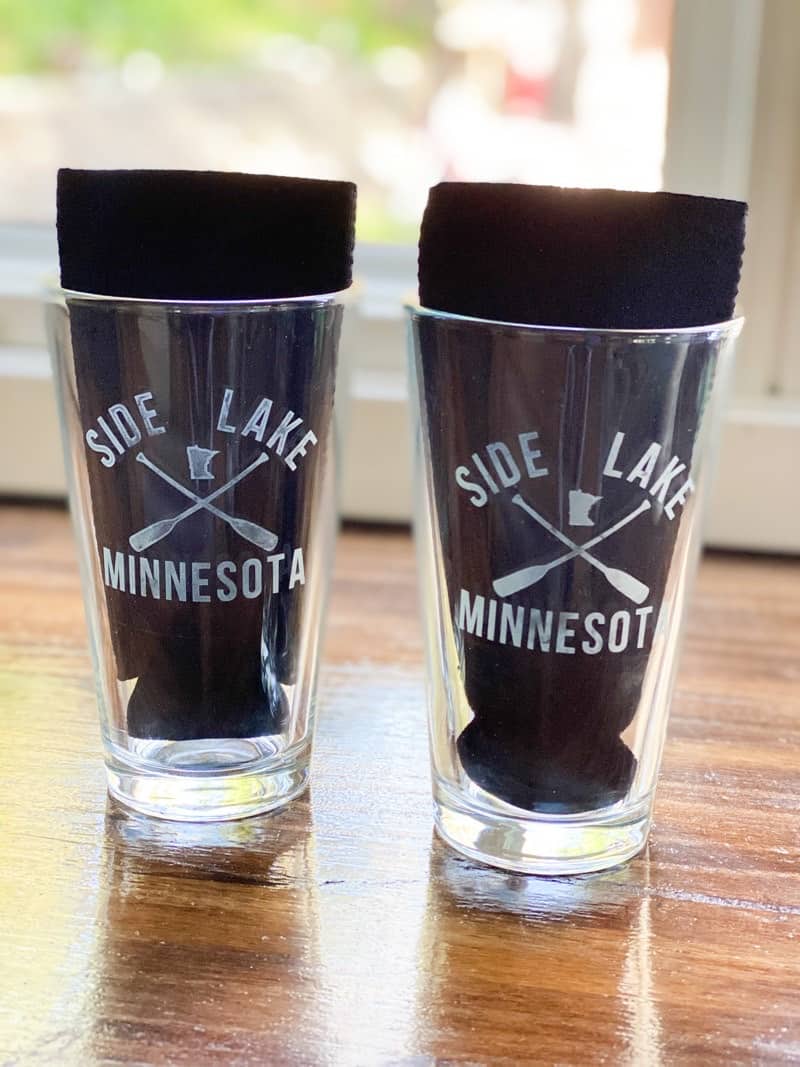
Did you know that glass etching is super easy? I made some personalized drinking glasses by using my Cricut to do the glass etching stencils. I was so amazed at how easy it was. I’ll show you how you can etch glass too! (you don’t NEED a Cricut either)
I absolutely love all the things I can make using my Cricut. Glass etching is the latest project I have added to the list. You can also see some of my other favorite Cricut projects like this Elephant birth announcement, this DIY stacked books farmhouse decor or a DIY wood block calendar. The options are endless!! Today I’ll show you how to etch glass!
How To Etch Glass
Let’s learn how to etch glass so you can make your own personalized glasses. This works on pretty much any glass with the exception of some Pyrex glass. You can use this glass etching method to create personalized drinking glasses, etched wine glasses, add a last name to a glass baking dish, etc. It makes GREAT gifts and the results are permanent and don’t ever come off. The glass will be etched and will withstand washing and everything.
Cricut Glass Etching Supplies
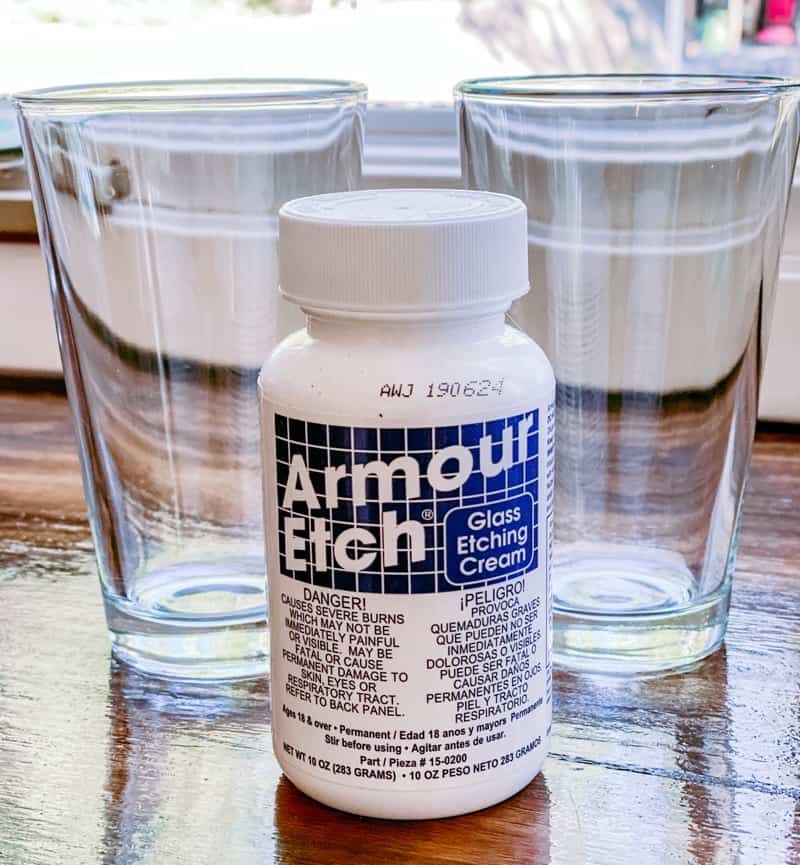
To make etched drinking glasses you’ll need the following supplies.
- drinking glasses (I got mine here)
- Cricut vinyl (I used this stuff)
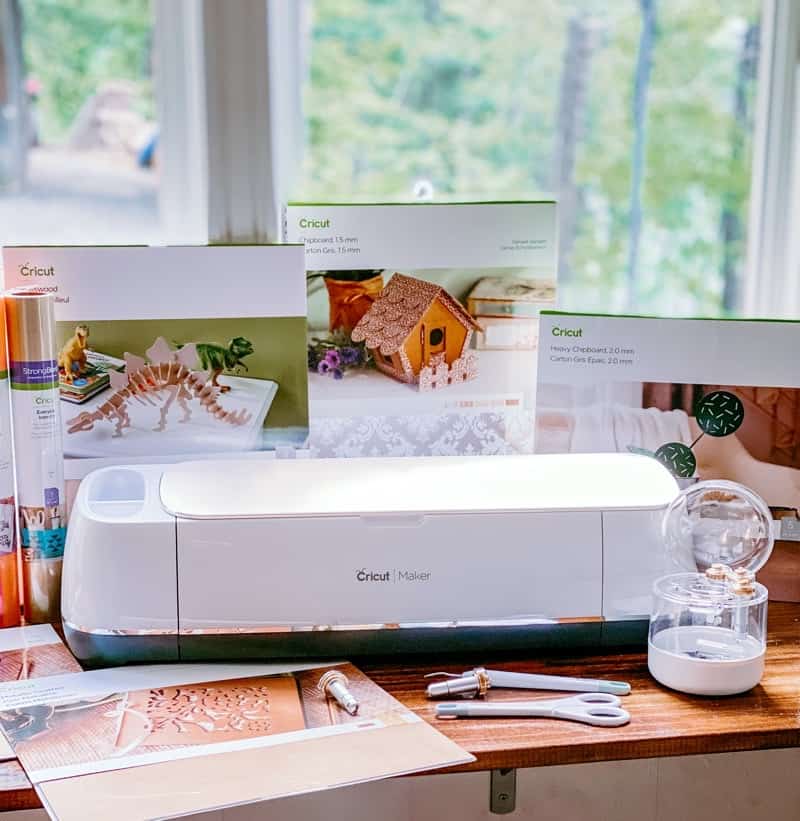
- Cricut Maker or Explore Air 2 or Joy (or if you don’t have a Cricut you can use stick-on stencils)
- glass etching cream (I used this one)
- small paintbrush
- water source nearby (sink)
One note about finding quality glasses to etch: I have had the best luck finding nice, heavy, durable glasses at Dollar Tree! They have a huge selection of glassware in all different varieties so check them out. You can even order them online now!
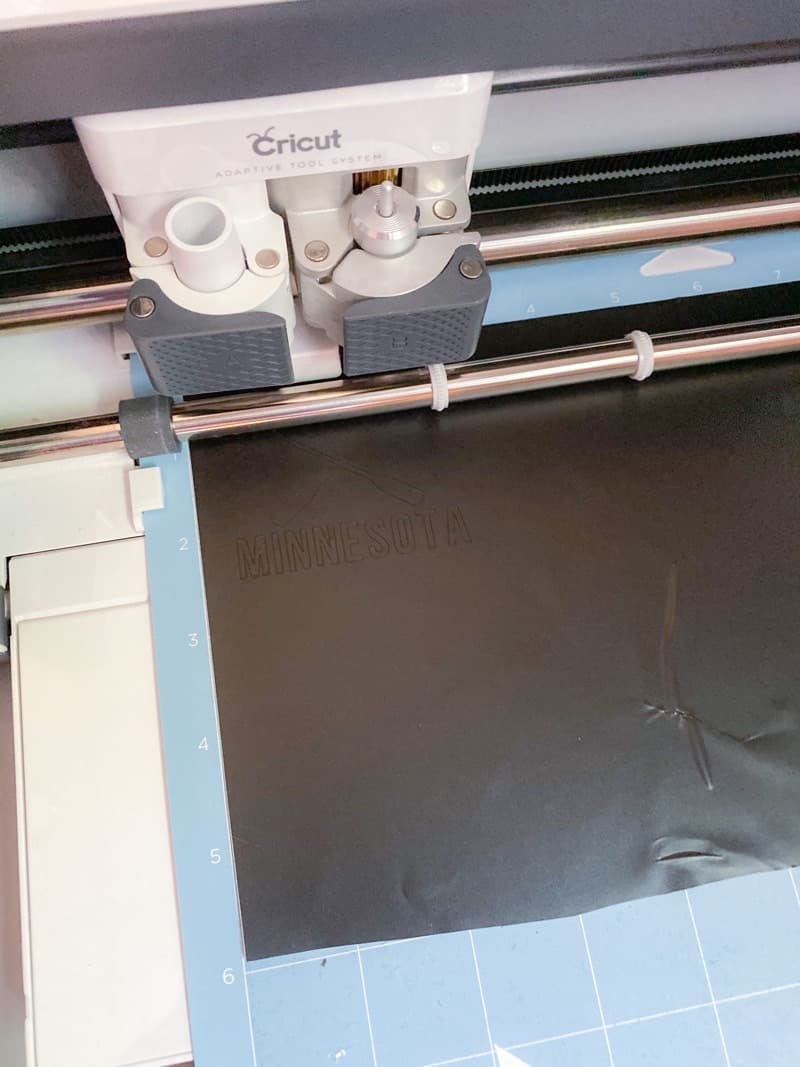
You’ll begin by designing the logo or name you want to etch onto your glass in Cricut Design Space. I chose to make a design featuring the name of our lake that our cabin is on along with a set of crossed paddles. Choose whatever suits you best!
Then, cut the design using your Cricut machine onto vinyl. I used some scraps of permanent vinyl that I had leftover from another project. I’m sure removable vinyl would also work.
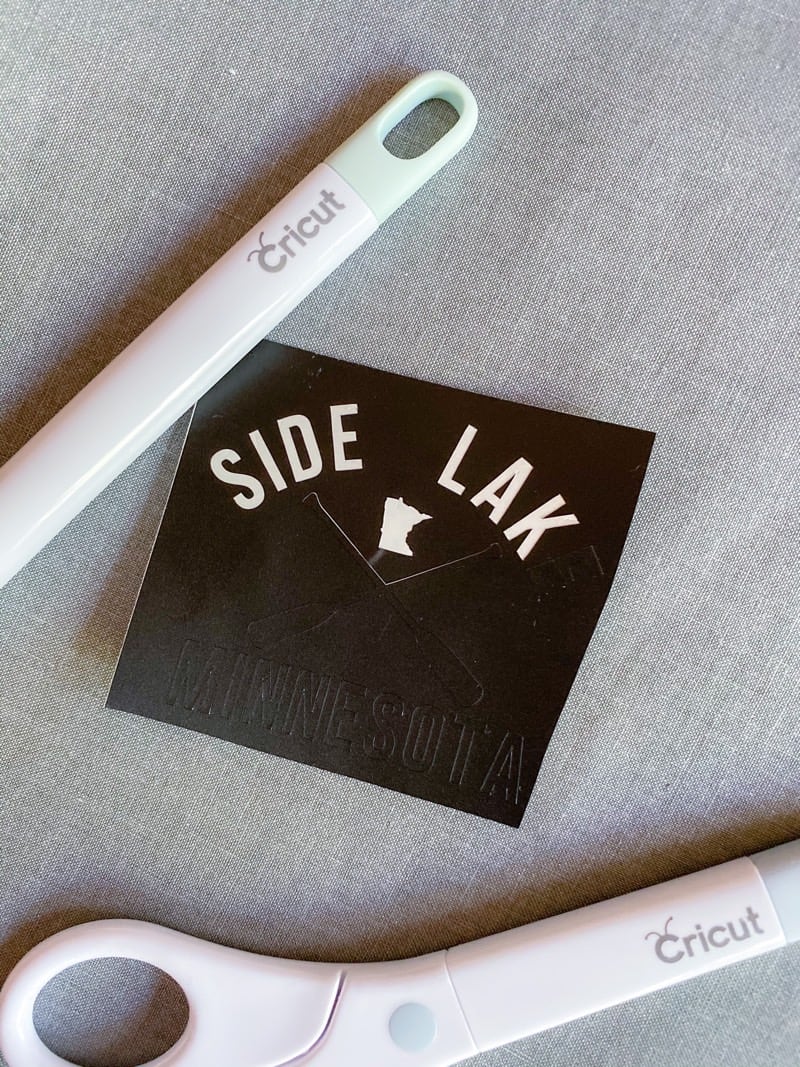
Next, you need to REVERSE WEED your vinyl. Don’t weed how you normally would! You’ll need to remove the letters to create a stencil. It’s the opposite weeding of what we would normally do.
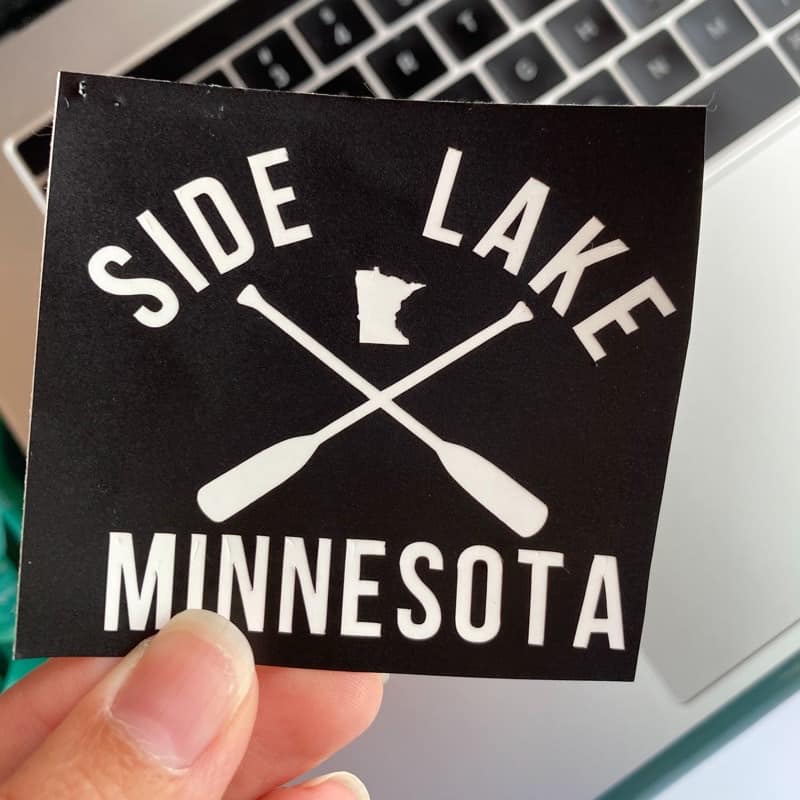
When you are finished your vinyl should look something like this. Be sure to allow yourself more room around the edges than I did as well. It will leave you more room to make sure the etching cream doesn’t spill over the edge of the vinyl.
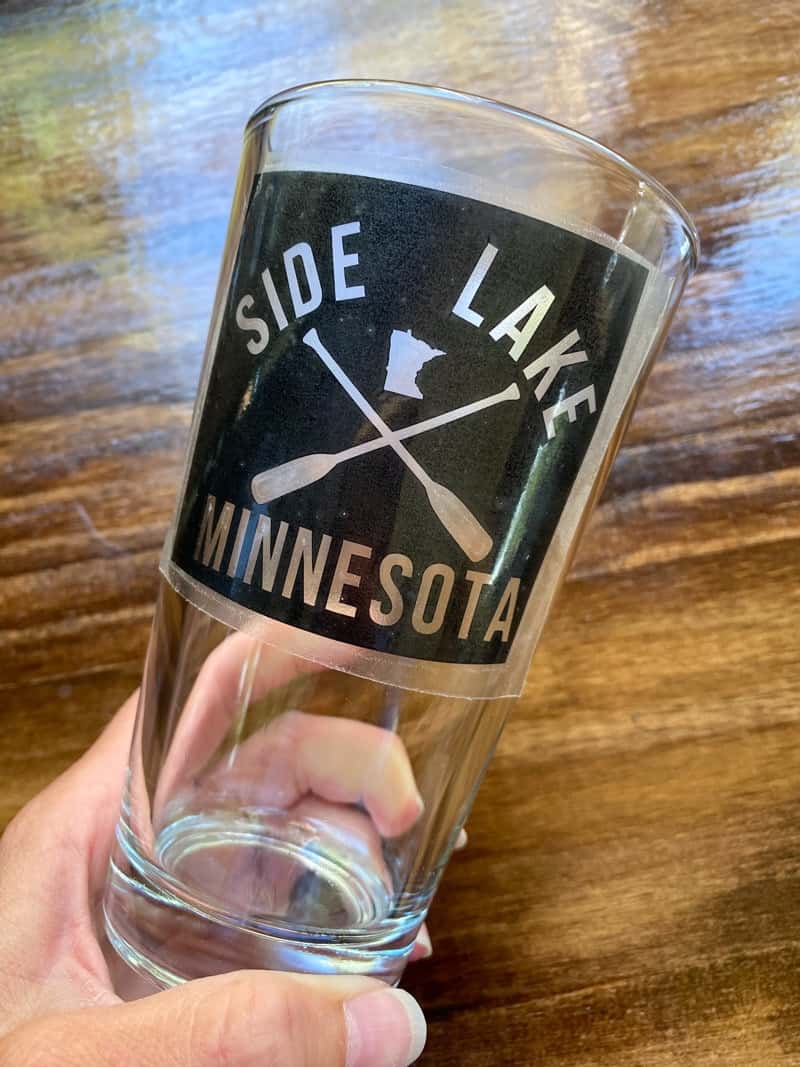
Then, use transfer tape to apply your stencil to the glass you will be etching. Smooth it down nicely and then peel away the transfer tape, leaving the vinyl behind.
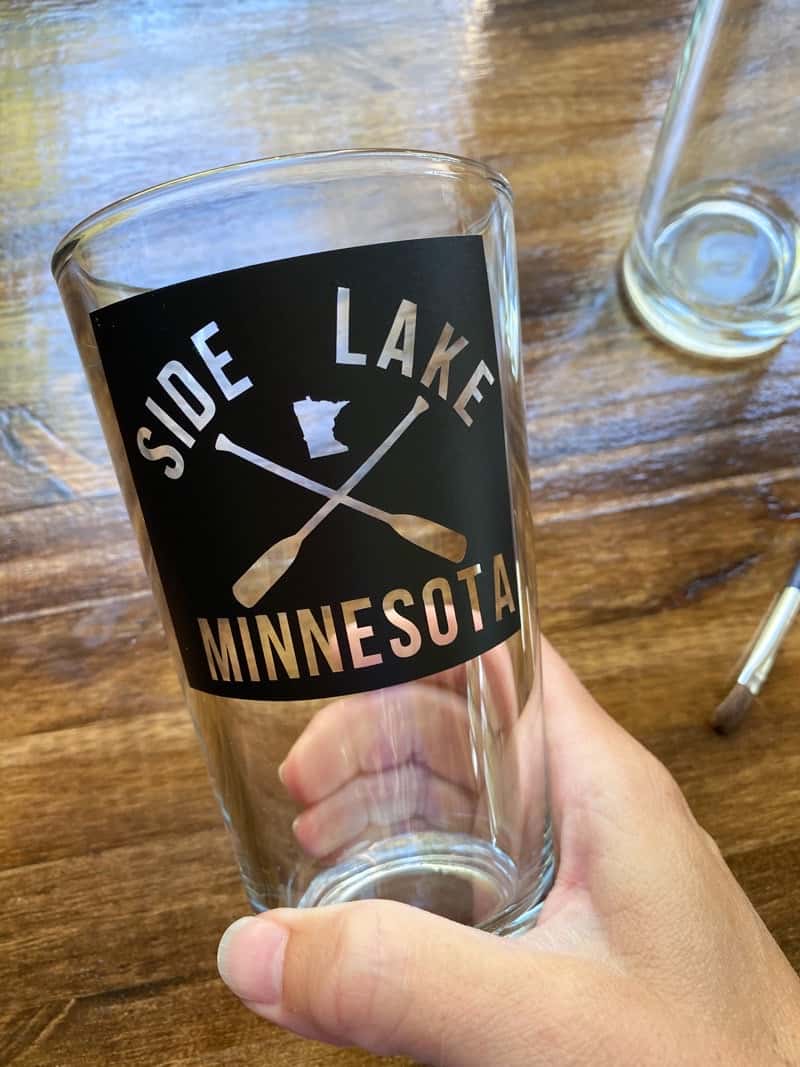
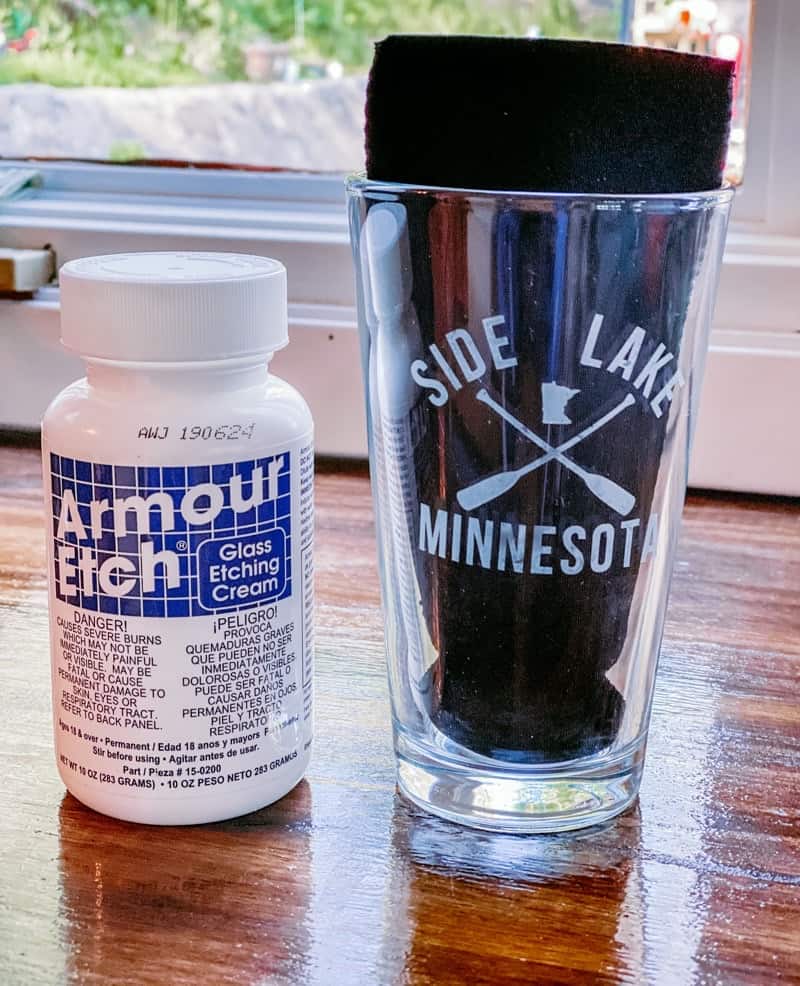
Your glass should look like this. It is now time to apply the glass etching cream. You’ll want to move next to the sink, in a well-ventilated area.
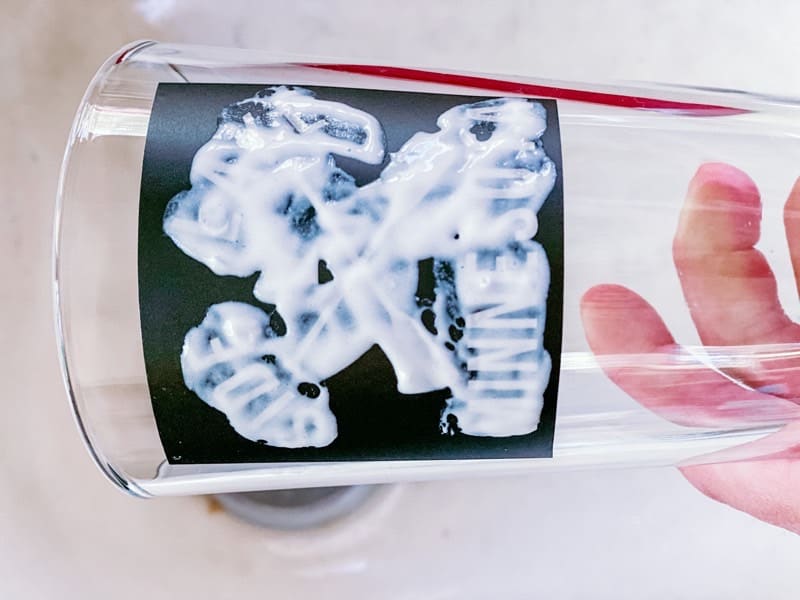
Use a paintbrush to apply the glass etching cream over the stencil. Be careful not to get any outside of the stencil. Put on a thick coat and set the timer for 1 minute. The Armour Etch instructions state not to leave it on longer than a minute however I found that for the particular glass I was using that 3 minutes delivered a beter result. You’ll need to test out different times for your glass. Check it after 1 minute.
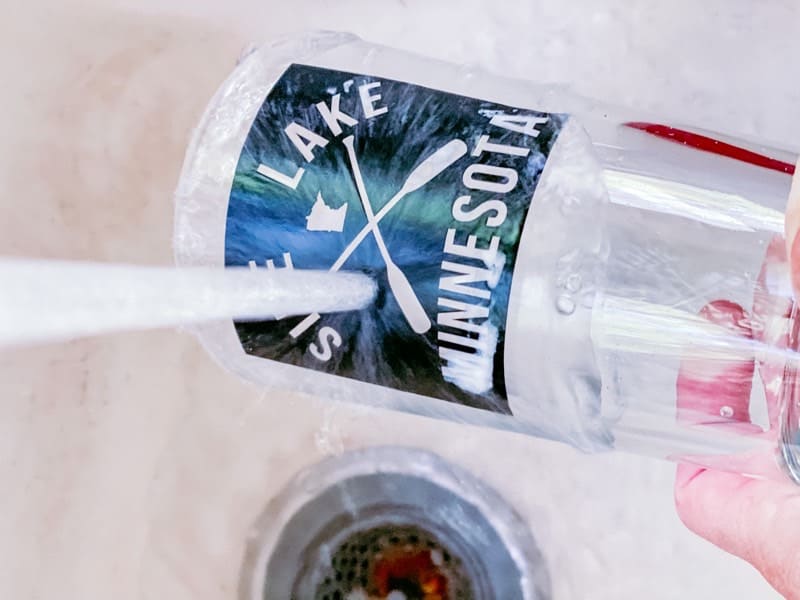
Once the timer goes off it is time to rinse away the glass etching cream. Hold the glass under running water and rinse away all of the glass etching cream until the glass is clean.
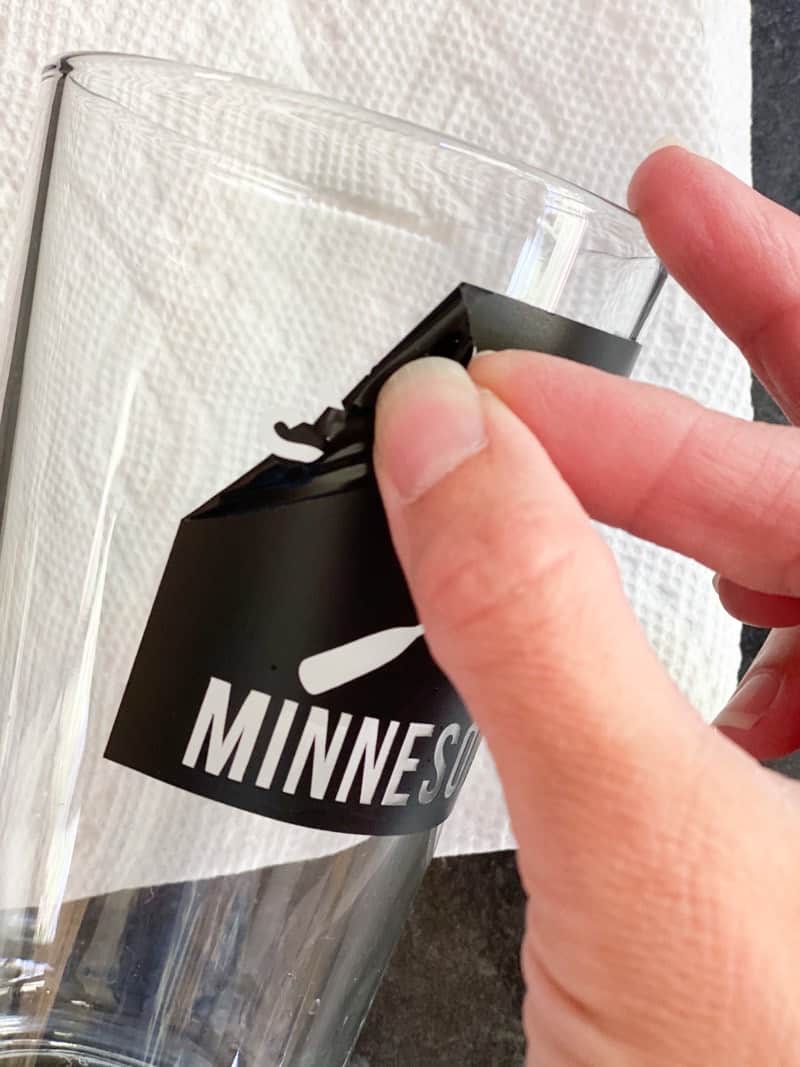
Then, remove the vinyl stencil from the glass to reveal the etched design.
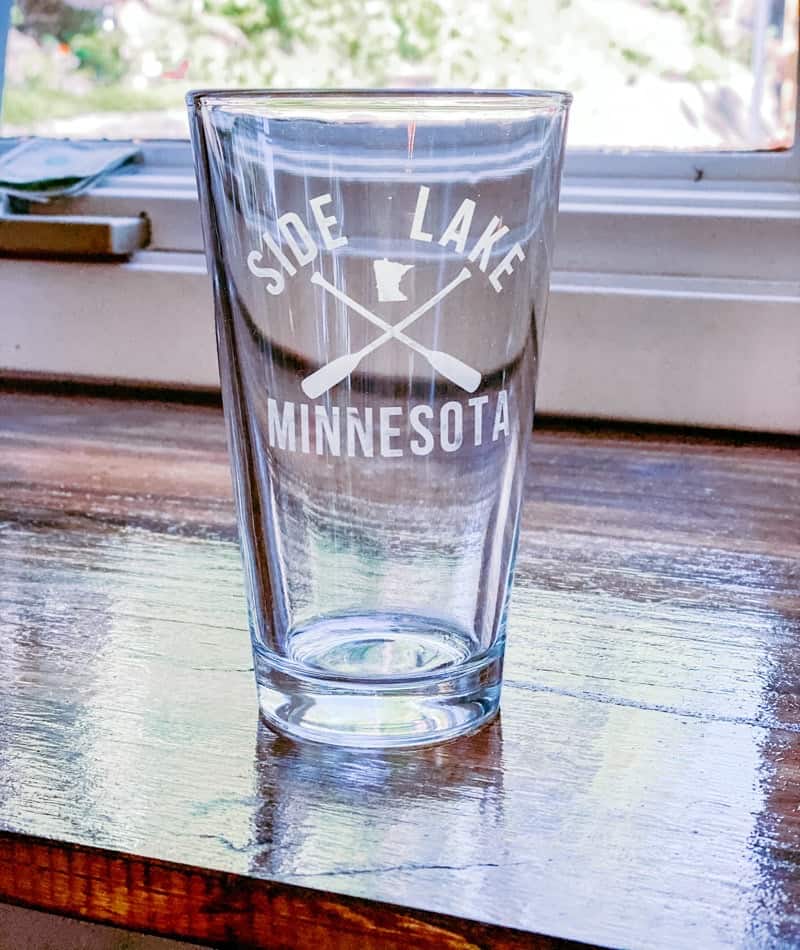
That’s it! Now you are done. See how easy that was?! Now repeat for each glass.
When you are finished you have gorgeous, gift-worthy glasses! The design options are endless. I’m considering etching my last name onto all of my glass bakeware that I bring places so I won’t lose any more dishes! I love that the etching is permanent.
I am going to be glass etching all sorts of things now! It opens up the door to create all kinds of neat things. What will you make?
Pin Glass Etching
Please pin the image below for easy finding later!


Hi, I love this project. I’m confused about how the permanent vinyl comes back off of the glass? Would it be better to use removable vinyl?
Thanks so much,
Paula
The permanent vinyl will peel right off! It is better to use permanent vinyl instead of removable so that it forms a tight seal.
Looks amazing ! I now need a cricut. I am happy to feature your etched glasses at Love Your Creativity. Happy New Year!
You won’t have any trouble removing the permanent vinyl! It is preferable to use vinyl that is permanent rather than vinyl that is removable since it creates a more secure seal.
@Poor Bunny
Geography enthusiasts will love Worldguessr! From spotting unique terrains to identifying road signs and languages, this game is a dream for those passionate about the world.
Can you reuse the stencil you made from the permanent vinyl?
Glass etching with Cricut sounds like a fun and creative project! Personalized glasses are such a unique touch.
Hello, I am very fond of this project. I am at a loss to understand how the permanent vinyl may be removed off the glass. Would using fnaf removable vinyl be the more optimal choice?
If your wolf microwave oven is not heating your food, you can consider the Subzerorepair247.com care will help you figure out the cause of the problem and how to solve it
Dependable SLS Baha Mar transportation is perfect for travelers seeking comfort and ease. Whether heading from Baha Mar to SLS or back, enjoy a seamless ride with our luxury fleet.
Rent the ultimate party bus for your next Miami event. Explore a variety of options that cater to your celebration needs. From spacious buses to chic styles, enjoy a night of luxury, fun, and unforgettable memories with friends and family.
Transform your event with Miami Party Bus Service. From Bachelorette Party Buses to Prom Party Buses, our luxury and affordable options cater to all occasions. Celebrate Sweet 16s or host a bachelor party in style with Miami\u2019s top bus rentals.
Explore Miami’s vibrant party bus scene with options for affordable rentals. Visit bestmiamipartybus.com for rental inquiries and services. Find the perfect party bus rental in Miami, FL, to suit your budget and event needs, ensuring a memorable celebration experience.
Enjoy the height of elegance with Luxury Limo Service in Miami. We offer Affordable Luxury Limousine Miami for all events and travel needs. Whether you need a Miami Executive Limo Service or a VIP Chauffeur Limo Miami, expect premium treatment. Book our Premium Black Car Service Miami for seamless, stylish journeys.
Navigate Washington DC and Maryland affordably with KV Limo’s transportation services. From charter buses to motor coaches, explore reliable options that prioritize comfort and accessibility. KV Limo ensures your travel needs are met seamlessly and affordably.
Experience seamless airport transfers in the Bahamas. Our reliable shuttle service, private cars, and luxury vehicles ensure comfortable transportation from the airport to your hotel. Stress-free travel for a perfect start to your trip.
Choose Bahamas Limousines for stylish transport across the islands. Our luxury limousine rental Bahamas, perfect for weddings and private limo tours in Bahamas, includes elegant, chauffeur-driven Bahamas limousines.
Airport transfers service Nassau Bahamas providing express transportation (Private Hire), services for to and from Bahamas Airports, Bahamas Cruise Ports to and from anywhere in the Bahamas.
Our shuttle service Nassau to Atlantis offers affordable and family-friendly Nassau shuttle to Atlantis. Enjoy seamless Paradise Island shuttle services for stress-free travel to Atlantis Paradise Island.
We are a professional full-service transportation company and we provide the best party transportation in Abu dhabi, Sharjah, and Dubai.
Dubai Limo Services offer exquisite Limo Rental Dubai packages. Whether you seek a Hummer Limo Rental Dubai or Rolls Royce elegance, our Dubai Limousine Rental Services cover every event. Rent a Limousine in Dubai to redefine your luxury experience.
Mercedes Sprinter rentals in Dubai and UAE offer luxury and space for group travel. Enjoy the best Mercedes Sprinter Dubai services, ideal for events, corporate needs, or leisure. Trusted providers ensure smooth rides with top-tier comfort and reliability.
Choose Van Services Dubai for comfortable and Affordable Van Services Dubai. Whether you need a Van with Driver Dubai for airport transfers or a Chauffeur Van Service Dubai for events, we’ve got you covered.
Book your luxury airport transfer Dubai for a premium experience. With options like Rolls Royce and Bentley, our private airport transfer Dubai services ensure a smooth, stylish ride to your hotel. Enjoy top-tier service for a memorable arrival.
Embrace comfort with Rolls Royce Airport Transfer Dubai. Our Rolls Royce Chauffeur Dubai ensures professional, stress-free journeys. Select Rolls Royce Airport Pickup Dubai or Rolls Royce Airport Taxi Dubai for convenience. Luxury Airport Transfer Dubai Rolls Royce guarantees elegance. Hire Rolls Royce for Dubai Airport for an unforgettable arrival in true luxury.
Our main priority is to provide comfort, and elegance in our luxury cars and limousines. Our goal is to offer seamless airport transfers in Dubai for both personal and professional trips.
Luxury Stretched and Sedan Limousine Service in Dubai, United Arab Emirates. Dubai Limousine has Stretched Limousines for rent.
Book your Shuttle from Ontario Airport to LAX today for stress-free travel. We offer clean vehicles, experienced drivers, and coverage in Chino and Fontana. Whether it’s Ontario to LAX or LAX to ONT, we’ve got your airport transfer handled.
Experience hassle-free travel with our Riverside to LAX Shuttle, offering dependable transportation from Riverside to LAX and back. Whether you need a car service from Riverside to LAX, shuttle from Corona to LAX, or LAX to Moreno Valley shuttle, we ensure timely and comfortable airport transfer solutions.
Need professional Houston Yellow Cab service? Choose Yellow Cab Houston, Yellow Cab Houston TX, Houston Taxi Yellow Cab, Houston Yellow Cab Service, Houston Yellow Taxi, or Yellow Taxi Houston for safe, reliable, and convenient rides. Our drivers ensure timely pickups for airport transfers, city trips, and daily Houston commutes.
Book your airport ride with Houston Airport Cab and Houston Airport Taxi. Our Airport Cab Houston and Airport Taxi Cab Houston ensure professional, on-time service. Choose Cab Service to Houston Airport, Houston Airport Drop-off Taxi, Houston Airport Pickup Cab, Houston Airport Pickup Taxi, Houston Cab to Airport, Houston Taxi to Airport, Taxi Service Houston Airport, and Houston Cab Services.
Executive chauffeur service Dubai offers premium chauffeur hire Dubai Marina and corporate chauffeur Dubai for executives. With private chauffeur Dubai, VIP airport transfer Dubai, and luxury sedan chauffeur Dubai, experience comfort and reliability every time.
VIP Transfer Dubai offers elite comfort with corporate VIP transfer, luxury chauffeur driven car Dubai, and Dubai VIP limousine. Travel in elegance with our professional chauffeurs.
Hire a driver in Dubai easily with Call Driver in Dubai. We provide airport driver service Dubai, chauffeur service Dubai, and driver on demand Dubai. Choose our affordable, professional driver Dubai for hourly or monthly rides, ensuring comfort and safety.
Das ist nötig, um im gewählten Online-Casino (ob mit oder ohne Verifizierung) mit Echtgeld zu spielen.
Das bedeutet, dass kein langwieriger Anmeldeprozess mit Schufa-Abfrage nötig
ist, um erst mal ein paar Runden zu spielen. Du kannst dich bei No-KYC-Online-Casinos anmelden und spielen, ohne Ausweisdokumente vorlegen zu müssen.
Ein Casino ohne Verifizierung ist eine Online-Glücksspielplattform,
auf der du spielen kannst, ohne amtliche Ausweisdokumente wie Reisepass,
Führerschein oder Personalausweis zur Identitätsprüfung vorlegen zu müssen.
Beide Glücksspiel-Systeme setzen voraus, dass
eure Identität beim lizenzierten Online Casino
umgehend verifiziert werden muss. Casinoonline.de ist
Teil der #1 Online Casino Authority®, dem weltweit größten Casino-Affiliate-Netzwerk.
In sogenannten Social Casinos dürfen Sie die Spielautomaten und
Tischspiele mit Spielgeldeinsätzen ausprobieren. Auch in einem
Casino online ohne ID Registrierung kommen branchenübliche Verschlüsselungen zum Einsatz und auch die Zahlung mit Trustly bietet eine verlässliche Sicherheit mit TÜV geprüftem Datenschutz.
Die Verantwortung für den sicheren Umgang mit Ihren sensiblen Bankdaten und Passwörtern liegt dabei genauso bei Ihnen selbst.
Dreifacher Willkommensbonus bis 1000 € + 350 FS – Einzahlung ab 20 EUR
Spieler, die den Bonuscode nicht mit ihrer ersten Einzahlung auf der Einzahlungsseite eingeben, können den Bonus nicht
erhalten, nachdem die Einzahlung erfolgreich bearbeitet wurde.
Die Mindesteinzahlung für die Teilnahme an dieser Aktion beträgt
20 €/$/£ (oder entspricht EUR) Der Rolling Slots
Willkommensbonus hat Umsatzbedingungen von 45x.
Für die vierte Einzahlung bei Rolling Slots können Spieler
einen 60% Match-Bonus bis zu €800 mit einer Einzahlung von mindestens €20 erhalten. Die Freispiele werden dem Spielerkonto zusammen mit einer Einzahlung von mindestens €50 gutgeschrieben.
References:
https://online-spielhallen.de/bruno-casino-cashback-dein-weg-zu-mehr-spielguthaben/
In einem Online Casino ohne Einschränkung könnt ihr durchaus mitspielen,
wenn dieses Casino auch eine EU Lizenz besitzt. Tischspiele und Spiele in Live Casinos dürfen die Online Casinos dann nicht mehr anbieten. Bisher konntet ihr ohne Probleme
in einem Online Casino ohne Limit spielen. Auch bei den Einzahlungen gibt es
keine monatlichen Limits für Spieler und zudem werden noch mehr Zahlungsanbieter
in Online Casinos ohne Einzahlungslimit angeboten. Diese Casinos sind ohne
Einschränkungen für euch, sodass ihr dort
weitaus entspannter und abwechslungsreicher spielen könnt.
Willst Du in Online Casinos ohne Limit spielen, dann musst
Du Anbieter mit deutscher Lizenz ausschließen. Während deutsche Casinos durch die Regulierung stark eingeschränkt sind, bieten EU-Casinos das
komplette Spektrum moderner Online-Glücksspiele.
Diese EU-Casinos als Alternative bieten deutschen Spielern mehr Freiheit
beim Spielen, ohne die strengen deutschen Beschränkungen. Alle gelisteten Anbieter
besitzen EU-Lizenzen und bieten deutsche Spieler eine Alternative zu
den beschränkten deutschen Casinos. Regulär handelt es sich um den typischen 100-prozentigen Neukundenbonus von bis
zu 500 Euro und 200 Freispielen.
References:
https://online-spielhallen.de/avantgarde-casino-erfahrungen-ein-detaillierter-spielerbericht/
Bremen ist eine weltbekannte Hansestadt – nicht nur wegen des berühmten Märchens der Gebrüder Grimm.
Von der A27 einfach die Ausfahrt Bremen Überseestadt nehmen und
auf der B6 ins Stadtzentrum fahren. Das Bellini oder LUV sind
nur zwei Beispiele für Restaurants, die Euch leckere Menüs auf die Teller zaubern. Für die Zeit danach bietet die Bar auf jeden Fall den richtigen Mix.
Im Mittelpunkt steht zwar immer das Spiel im Automatencasino und an den Tischen beim Großen Spiel.
Wie in Online Poker Casinos finden auch in der Spielbank regelmäßig
Turniere statt.
Der Eintritt kostet drei Euro pro Person und wenn Sie sich Gedanken über die Kleiderordnung
machen, gilt es zwischen Automatenspielen und klassischen Tischspielen zu unterscheiden. Neben den fünf großen Spielotheken in Bremen, die wir Ihnen auf unserer Seite im Detail
vorstellen werden, bieten Ihnen zahlreiche Spielotheken Echtgeld-Automatenspiele an. Als Glücksspielfan haben Sie
im Stadtstaat Bremen keinerlei Probleme, eine passende Adresse für
Ihr Spielvergnügen zu finden. Während Sie keine traditionellen geführten Touren finden werden, bietet die Interaktion mit
dem Personal eine persönliche Reise durch die reichen historischen Einblicke
des Spielbanks. Den Weg zur Spielbank Bremen zu finden, ist
ein Kinderspiel und taucht Sie ein in das Herz des lebhaften Unterhaltungsviertels
von Bremen. Stellen Sie sich den Herrenabend
dienstags vor, wo Kameradschaft so frei fließt wie die Willkommensdrinks, und Freispiele den Männern ein aufregendes Spielerlebnis bieten.
Dieser Ort ist nicht nur ein Spielbank; er spiegelt Bremens Entwicklung von einem Schlüsselspieler im
maritimen Handel zu einem lebendigen Unterhaltungszentrum
wider. Mit seiner eleganten Mischung aus traditionellen Tischspielen und modernen Spielautomaten verspricht dieser Ort eine
Nacht voller Aufregung. Die Schlachte bietet zwischen Martinikirche und Überseestadt darüber hinaus Theater und Varieté,
Weser- und Hafenrundfahrten, Übernachtungen am und auf dem
Wasser sowie Konzerte und Veranstaltungen. Im Automatensaal ist es noch entspannter in Bezug auf die Kleiderordnung, denn da
können Gäste in lockerer Freizeitkleidung spielen. In der Spielbank Bremen an den Tischen können Fans
des Rouletts die amerikanische Variante spielen und zwar mit einem Mindesteinsatz von nur einem
Euro. An den Spielautomaten kann man schon mit einem Cent Mindesteinsatz spielen und an der Multi-Rouletteanlage mit
12 Touchscreen Monitoren bereits ab 50 Cent.
References:
https://online-spielhallen.de/legiano-casino-freispiele-ihr-leitfaden-zum-gewinnen/
Wenn Sie lieber eine andere Zahlungsmethode nutzen möchten, finden Sie laut DrückGlück Erfahrungen eine breite Auswahl.
Als wir in unserem Test selbst mit PayPal
bei DrückGlück bezahlt haben, erhielten wir unser Guthaben umgehend auf unserem Spielerkonto und konnten sofort loslegen. Die Zahlungsmethode steht sowohl für
Einzahlungen als auch für Auszahlungen zur Verfügung.
DrückGlück ist eine der GGL-lizenzierten Online-Spielotheken in Deutschland, bei dem Sie mit
PayPal einzahlen können. So werden auch Einsteiger keine Probleme dabei haben, ihr Spielerkonto mit PayPal aufzuladen.
Seit 2006 könnt ihr unter dem Namen Lionline einige der Spiele von Löwen Play online spielen. Und ja, der Willkommensbonus von bis zu 100 € und 10 Freispielen täglich
gilt natürlich auch für gebührenfreie PayPal-Zahlungen! Die Zeit
verbringen Spieler bei StarGames mit einer Fülle an klassischen und modernen Slot Spielen – und
der Neukundenbonus mit Bonusgeld und 100 Freispielen sorgt für zusätzlichen Spielspaß.
References:
https://online-spielhallen.de/greatwin-casino-login-ihr-zugang-zu-spannung-und-unterhaltung/
This is such a fantastic and easy-to-follow tutorial! The results look so professional and are perfect for personalized gifts. Can’t wait to try this on some old glassware I have. Thanks for sharing! 😊
Lucky Green Casino’s payment system is designed to
make every transaction seamless and worry-free. Every hand and spin at Lucky Green Casino feels genuine and
exciting, making it a true all-in-one gaming hub. The more
you play, the more benefits you unlock — a system that makes every spin count.
Here, you can play with real dealers in real-time, streaming from professional studios in HD quality.
Players can explore hundreds of pokies covering every theme imaginable, from adventure and
mythology to fantasy and nostalgia. The platform’s unique mix of modern design, responsive performance, and
vibrant entertainment ensures that every visit feels exciting
and rewarding.
The platform’s game aggregation system delivers smooth performance across all devices without requiring software downloads.
This diverse approach ensures regular content updates while providing players
access to unique titles unavailable at many competing casinos.
Aviator leads this category as the most popular crash game, challenging players
to cash out before the plane crashes. Bar Roulette 2000X presents Lucky Green’s most unique live offering, combining traditional roulette gameplay with
enhanced multiplier potential. Evolution Gaming and Pragmatic
Play Live power the majority of live games, including multiple blackjack variants, European and American roulette,
baccarat, and poker games. The pokies selection dominates the library with over 1,800 titles spanning classic three-reel slots, modern video slots, and progressive jackpot
games.
References:
https://blackcoin.co/fairgo-no-deposit-bonuses-in-australia-a-comprehensive-guide/
Note that RTP rates on slots may vary by casino app from percentages cited by software providers.
With seamless integration between each vertical (where available), FanDuel brings it all into one wallet that
simplifies playing across platforms. Also, check for responsible
gambling tools and fair bonus terms. And don’t worry, you don’t have to break the bank—some
casinos let you start as little as $1, so you can enjoy the action without big risks.
Upload speed is important for online gaming, video or voice calls, and uploading large files like videos to YouTube or backing up
photos. For example, fast download speeds mean smooth video streaming, smooth online gaming,
and fast web browsing. Resources for help and support are readily available if you or someone you
know is struggling with problem gambling. Players can review how much
they have wagered, deposited, and withdrawn over time.
This will provide players with greater access to safe, high-quality gaming platforms and innovative
features. Avoid unlicensed or offshore casinos, as
they may not offer the same level of security or legal recourse.
Licensed casinos are held to high standards, ensuring a safe and fair gaming
environment. Playing in a regulated state offers numerous
benefits, including player protections, secure banking, and access to dispute resolution. Always check your state’s laws
before signing up at an online casino. Currently, states
like New Jersey, Pennsylvania, Michigan, and West Virginia have fully regulated online casino markets.
References:
https://blackcoin.co/fairgo-no-deposit-bonuses-in-australia-a-comprehensive-guide/
Email support handles detailed questions requiring comprehensive responses, while
live chat provides instant problem-solving. Technical support documentation covers mobile compatibility, browser requirements,
and troubleshooting steps. Our team can assist with AUD transactions, local payment methods, and Australia-specific gaming
queries.
Top online casino for real money Stay Casino is totally safe
to play. With multiple access points –
desktop, mobile browser, and dedicated apps – you can enjoy seamless play
anytime. These measures ensure players can enjoy the casino responsibly.
New Australian players receive a 100% bonus up to AU$500 +
100 free spins. Australian players who prefer gaming
on the go can use the Stay Casino app login available for both iOS and Android.
Stay Casino is the perfect destination if you’re looking for a top-notch gambling experience.
E-wallet payments like Skrill or Neteller are handled in less than 24 hours.
Curaçao eGaming gives Casino a licence, and it uses SSL encryption and certified payment methods.
These deals let you play some slots for free and keep your winnings after
you fulfil the wagering requirements. Stay Casino is easier for
everyone because they speak various languages and allow different
types of payment. It is easier to trust the platform because it has good customer service, safe gambling, and responsible gambling.
We conduct a thorough investigation of the casino operator every five years, as required by the Casino Control Act 1991, also
known as reviews. These standards cover poker machines, table
games, monitoring systems, and other gaming equipment.
Learn about the technical standards ensuring the integrity of
gaming operations at Crown Melbourne. Understand the legal framework and regulations governing Crown Melbourne’s casino
operations. If you have any concerns about the conduct of
gaming at the Melbourne Casino, please contact us.
Use your Crown Rewards card or account across Crown Melbourne and Crown Online Casino to
collect points and redeem exclusive offers. Crown’s “Play Safe” initiative ensures
that gaming remains an enjoyable experience while promoting
awareness and help-seeking behaviour among guests. Visitors have access
to support services, including multilingual counselors, time-limit tools,
and a voluntary self-exclusion program. Players receive access to personal hosts, luxury hotel upgrades,
exclusive tournaments, and reward tiers not available
to the general public.
Crown does not operate an online casino or provide online gambling in any form.
We have expanded our monitoring and surveillance capabilities, with access to the extensive network of CCTV cameras
to monitor gaming activity and detect signs of
patrons experiencing gambling harm. We also monitor activities across the casino and have access
to various casino databases and records, including access to all
CCTV cameras recording Crown’s operations. Find out the training requirements for Responsible Service of Gaming (RSG) at
casinos, including initial and refresher courses. Australia’s most iconic casino experience is now available on any device — anytime, anywhere.
Guests enjoy 24-hour concierge, valet parking,
and access to the luxurious Crown Spa, indoor pool, and exclusive lounges.
References:
https://blackcoin.co/vip-betting-insights/
It offers a variety of gaming options, as well as hotels, restaurants, pubs, and nightclubs.
Guests can enjoy a drink and relax on the rooftop terrace, which offers beautiful views of the city.
Featuring panoramic views of Perth’s city skyline and a rooftop infinity pool, Doubletree By Hilton Perth Waterfront is situated in Elizabeth Quay,
with access to local attractions and experiences…
Just show your Crown Rewards Card when you pay or play and you can start earning points, which
you can redeem for Crown experiences like dining, gaming, hotel stays and much more.
Escape to a world of excitement during your next stay and enjoy one of the many experiences on offer,
including theatre shows, live music, gaming, live sports, an indulgent spa treatment or a visit
to one of our many restaurants or bars on site. Just show your Crown Rewards Card when you pay
or play and you can start earning points, which you can redeem for Crown experiences like
dining, gaming, hotels stays and much more.
Ibis Styles East Perth has a fitness centre, shared lounge, a restaurant
and bar in Perth. The Ritz-Carlton, Perth features a restaurant, outdoor swimming pool, a fitness centre and bar in Perth.
Enjoy a relaxing morning with a hotel breakfast buffet, or treat yourself to an afternoon beverage at the hotel bar.
Do I need my registered mobile number to login to the e-Filing Portal?
Refer to the Register DSC user manual to learn more. For Individual users, if PAN is not linked with the Aadhaar,
you will see a pop-up message that your PAN is made inoperative as
it is not linked with your Aadhaar. You will receive the EVC
on your mobile number registered with your bank
/ demat account. For Individual users, if PAN is not linked with the Aadhaart, you will see a pop-up message that
your PAN is made inoperative as it is not linked with your Aadhaar.
References:
https://blackcoin.co/60_platinum-club-vip-casino_rewrite_1/
The Sovereign Room has been upgraded and now includes four additional private gaming rooms and extra dining and lounge[clarification needed] amenities.
The number of poker tables has been steadily increased
and now stands at 40 tables. Recent rebuilding
works have added extra gaming areas for the main gaming floor with the addition of the Oasis Lounge and the 36
Degrees Bar although these new areas have not increased the number of tables or
machines available in total. The casino features two gaming floors — the main gaming floor
on level one for general entry and the Sovereign Room on level three.
In December 1994, a consortium of Leighton Properties and Showboat was announced by the NSW Casino
Control Authority as the successful applicant for New South Wales’ first casino licence.
If casino gambling is your thing, the Star is the venue
to be at in Sydney.
The Trans and gender-diverse communities are starting to feel vulnerable, so let’s continue
to work on making The Star a safe and inclusive place for everyone, esp.,
for trans and gender-diverse team members. What advice can you give as an outgoing Co-Lead?
In turn, I aspired to be that source of encouragement and affirmation for others,
fostering an environment where authenticity is celebrated and safeguarded.
Whether your fun is fine dining, a quick bite, or discovering a new favourite,
you’ll find it here. With over 20 dining options across The Star and partner precinct operators, the venue is a true culinary
playground where every taste has its moment. For three decades, our Pyrmont foreshore
precinct, now known as The Star Sydney, has been a pillar of
hospitality and entertainment in Sydney’s CBD.
If you are travelling to and about Sydney and want everything that a casino has to
offer, then be sure to check out the Star. The Star Casino in Sydney is presently the
only true casino in the NSW. Other casual dining options include Fat Noodle
and Pizzaperta for great pizza. Visit the Harvest Buffet, one of the most popular dining spots, well
known for its seafood buffet all weekend long—the all-you-can-eat buffet!
Electronic gaming features bingo, roulette and slot machines.
References:
https://blackcoin.co/free-100-pokies-no-deposit-sign-up-bonus/
Baking soda volcanoes are one of the classic science projects for kids, and they’re also one of
the most popular. Are you looking for cool science experiments for kids at home
or for class? Condominiums in the area typically range
from SGD 1,700 to 2,400 per square foot, with rentals averaging SGD 3,000–6,
000 per month for standard units. The area is also known for
religious institutions, from churches and temples
to mosques, reflecting its diverse community. Katong is well connected by road through the East Coast Parkway (ECP)
and Kallang-Paya Lebar Expressway (KPE). Its streets are vibrant with food
outlets, cafés, and shops reflecting its Peranakan heritage.
Drinking water and sewerage in the city is managed by TasWater, but many organisations and levels of government are involved at different
stages. The Calvary Hospital is operated by Little Company of Mary Health Care
at its main campus the Calvary-St John’s Private Hospital in Lenah Valley, and has an older location in South Hobart (the former Homoeopathic Hospital).
The company also owned another hospital in the city, the St Helen’s Private Hospital, which featured a mother-baby unit but
it was closed in 2023.
The TMAG building, built in 1902 as a new Second Empire style Customs House, is situated on Constitution Dock and incorporates the Bond (1824) and Commisariat Store buildings
(1810), the latter of which contributed to Hobart’s early street layout when the Hobart
Rivulet passed beside it. Salamanca Place contains many Georgian era buildings, as well
as Kelly’s Steps, which were built in 1839 to provide a short-cut to Battery Point,
a largely residential suburb known for its weatherboard cottages and
multi-storey terraces. It is most notably defined by its large
areas of native bushland owing to its location. During the 20th century, the city itself has received
snowfalls at sea level on average only once every 5 years;
however, outer suburbs lying higher on the slopes of Mount Wellington receive
snow more often, owing to the more exposed location coupled with their higher altitude.
References:
https://blackcoin.co/galaxy-96-casino-a-comprehensive-review/
online casino that accepts paypal
References:
allsolution.xyz
online casino usa paypal
References:
mapnova.com.co
mobile casino paypal
References:
itjobforfresher.com
paypal casinos online that accept
References:
https://seoulthegowoon.com
online american casinos that accept paypal
References:
https://bengalhive.com/employer/the-best-australian-payid-gambling-portal/
paypal casino uk
References:
https://stayzada.com/bbs/board.php?bo_table=free&wr_id=551079
View explicit material safely by choosing verified adult websites.
Opt VIAGRA FOR YOU reliable sources for discreet entertainment.
Adult webplatforms bieden een verscheidenheid aan video’s voor volwassen entertainment.
Kies voor betrouwbare webbronnen voor een veilige ervaring.
Review my web site – VIAGRA FOR YOU
We are a slots reviews website on a mission to provide players with a trustworthy source of online gambling information. We do it by creating unbiased reviews of the slots and casinos we play at, continuing to add new slots and keep you updated with the latest slots news. With several powerful entries in this slot series, including max win boosters and visually enhanced sequels, there’s a Play’n GO Rise of Olympus slot for everyone to enjoy. Play Fortunes of Olympus for free at VegasSlotsOnline. Spin over 10,000 free slots, including popular slot games by RTG and Ancient Greek-themed buy-feature slots with free spins and big prizes. Congratulations player! You have made it all the way to Mount Olympus and played Age of the Gods Wheels of Olympus. This mythical game is filled with ancient history, ruins and rewards. No doubt you’re well pleased with your mobile accessibility – it’s not easy scampering up and down Mount Olympus in search of golden treasures.
https://katsufitness.cl/2025/12/31/tcl99-online-casino-game-review-for-australian-players/
People are more inclined to the premium version of the Gates of Olympus app because they can get free pay out buckets and they do not have to invest their own money in the game; it also provides them with an extended limit of daily spins. Whether you’re a fan of the original Gates of Olympus or new to the world of Zeus, this app provides an authentic and thrilling slot experience. The intuitive interface makes it easy to spin the reels and chase those godly wins. People are more inclined to the premium version of the Gates of Olympus app because they can get free pay out buckets and they do not have to invest their own money in the game; it also provides them with an extended limit of daily spins. The size of the Gates of Olympus is 50 MB. With the emergence and development of mobile casinos, downloading the Gates of Olympus app to your Android or iPhone device has become a breeze. All you need to do is choose a reliable provider of gaming entertainment with slots from Pragmatic Play, visit its official website and install a suitable version of the APK.
Frisse adult websites bieden geavanceerde inhoud
voor volwassenen. Kies voor gegarandeerde platforms voor veilig kijken.
Feel free to visit my blog; VIAGRA FOR YOU
When someone writes an article he/she retains the
image of a user in his/her mind that how a user can know it.
Thus that’s why this post is outstdanding. Thanks!
Feel free to visit my web-site; buy xanax without prescrition
Thank you for some other informative website. The place else could I get that kind of info
written in such a perfect means? I have a challenge that I am just now running on, and I’ve been at the look out for such information.
Review my blog Download Windows 11 Cracked
To be honest, I was looking for Doxycycline quickly and discovered this amazing site. It allows you to order meds no script legally. For treating strep throat, check this shop. Express delivery to USA. Check it out: Antibiotics Express pharmacy. Get well soon.
Just now, I needed Zithromax without waiting and found Antibiotics Express. You can purchase generics online legally. For treating UTI, check this shop. Overnight shipping available. Visit here: http://www.antibioticsexpress.com. Hope you feel better.
Recently, I was looking for Amoxil urgently and stumbled upon this reliable site. You can get Amoxicillin 500mg fast. If you are in pain, highly recommended: read more. Cheers.
Hey all! I found a great online drugstore if you need generics at a discount. The site provides reliable delivery on Rx drugs. To save money, highly recommended: [url=https://pharmiexpress.xyz/#]online drugstore[/url]. Hope this helps.
Get the best Bachelor Party Limo Bus Miami and experience top-rated luxury. Our Miami Party Bus for Bachelor and Bachelorette Parties ensures a stress-free, high-energy celebration with premium amenities and unbeatable Best Bachelor Party Bus Deals in Miami.
Searching for value? Our Miami Party Bus Rental Prices deliver fun without financial stress. Choose from affordable party bus Miami packages and experience the best party bus deals Miami. We offer cheap party bus rental Miami options with hourly party bus rates Miami to match every celebration and budget.
Choose our Bus Service in Baltimore, Maryland, for exceptional Charter Bus Service and Group Transportation. Our Shuttle Bus Services, Motor Coach Bus rental, Wedding Transportation, and Airport Transfer options provide comfort and reliability, ensuring a smooth journey for all your travel needs.
Arrive in style with Nassau Limousine Service. Whether it’s a private limo Nassau airport pickup or a Nassau luxury limo rental, our VIP limousine Nassau Bahamas rides offer premium comfort and elegance with trusted limousine service Nassau Bahamas.
Choose chauffeur service Reef Island for exceptional convenience and class. Reef Island Chauffeur Services ensure stress-free travel with experienced drivers and premium vehicles, available for all your transport needs.
Bahamas Premium Transfers is proud to serve private transportation from Nassau Airport to Atlantis Resort with professional cheuffeur.
Start your Atlantis stay with a smooth Dubai Airport to Hotel Transfer. From Dubai Airport to Atlantis Hotel Shuttle to Private Car Service from Dubai Airport to Hotel, travel comfortably with our range of transport options.
Aktual Pin Up giriş ünvanını axtaranlar, bura baxa bilərsiniz. Bloklanmayan link vasitəsilə hesabınıza girin və oynamağa başlayın. Xoş gəldin bonusu sizi gözləyir. Keçid: https://pinupaz.jp.net/# Pin Up online uğurlar.
Salam dostlar, siz də keyfiyyətli kazino axtarırsınızsa, mütləq Pin Up saytını yoxlayasınız. Ən yaxşı slotlar və sürətli ödənişlər burada mövcuddur. İndi qoşulun və ilk depozit bonusunu götürün. Oynamaq üçün link: https://pinupaz.jp.net/# rəsmi sayt uğurlar hər kəsə!
Pin-Up AZ ölkəmizdə ən populyar kazino saytıdır. Saytda çoxlu slotlar və Aviator var. Qazancı kartınıza tez köçürürlər. Proqramı də var, telefondan oynamaq çox rahatdır. Giriş linki https://pinupaz.jp.net/# Pin Up rəsmi sayt tövsiyə edirəm.
п»їHalo Slotter, lagi nyari situs slot yang mudah menang? Rekomendasi kami adalah Bonaslot. Winrate tertinggi hari ini dan terbukti membayar. Isi saldo bisa pakai Pulsa tanpa potongan. Daftar sekarang: п»їslot gacor hari ini semoga maxwin.
Salamlar, siz də keyfiyyətli kazino axtarırsınızsa, məsləhətdir ki, Pin Up saytını yoxlayasınız. Yüksək əmsallar və rahat pul çıxarışı burada mövcuddur. İndi qoşulun və bonus qazanın. Daxil olmaq üçün link: https://pinupaz.jp.net/# pinupaz.jp.net uğurlar hər kəsə!
2026 yılında popüler olan casino siteleri hangileri? Detaylı liste web sitemizde mevcuttur. Bedava bahis veren siteleri ve yeni adres linklerini paylaşıyoruz. İncelemek için siteyi incele kazanmaya başlayın.
Selam, ödeme yapan casino siteleri bulmak istiyorsanız, bu siteye mutlaka göz atın. Lisanslı firmaları ve fırsatları sizin için inceledik. Güvenli oyun için doğru adres: türkçe casino siteleri iyi kazançlar.
Aktual Pin Up giriş ünvanını axtaranlar, bura baxa bilərsiniz. İşlək link vasitəsilə qeydiyyat olun və oynamağa başlayın. Xoş gəldin bonusu sizi gözləyir. Keçid: https://pinupaz.jp.net/# burada qazancınız bol olsun.
Pin Up Casino Azərbaycanda ən populyar platformadır. Saytda minlərlə oyun və Aviator var. Qazancı kartınıza tez köçürürlər. Proqramı də var, telefondan oynamaq çox rahatdır. Rəsmi sayt https://pinupaz.jp.net/# Pin Up kazino tövsiyə edirəm.
Bonaslot adalah bandar judi slot online nomor 1 di Indonesia. Ribuan member sudah merasakan Jackpot sensasional disini. Transaksi super cepat hanya hitungan menit. Link alternatif login sekarang gas sekarang bosku.
Yeni Pin Up giriş ünvanını axtarırsınızsa, bura baxa bilərsiniz. İşlək link vasitəsilə hesabınıza girin və oynamağa başlayın. Xoş gəldin bonusu sizi gözləyir. Keçid: [url=https://pinupaz.jp.net/#]burada[/url] uğurlar.
Online slot oynamak isteyenler için kılavuz niteliğinde bir site: [url=https://cassiteleri.us.org/#]güvenilir casino siteleri[/url] Nerede oynanır diye düşünmeyin. Onaylı casino siteleri listesi ile rahatça oynayın. Detaylar linkte.
Canlı casino oynamak isteyenler için kılavuz niteliğinde bir site: buraya tıkla Nerede oynanır diye düşünmeyin. Editörlerimizin seçtiği bahis siteleri listesi ile rahatça oynayın. Tüm liste linkte.
п»їHalo Bosku, cari situs slot yang gacor? Rekomendasi kami adalah Bonaslot. RTP Live tertinggi hari ini dan pasti bayar. Deposit bisa pakai Pulsa tanpa potongan. Daftar sekarang: п»ї[url=https://bonaslotind.us.com/#]login sekarang[/url] salam jackpot.
Selam, sağlam casino siteleri arıyorsanız, bu siteye kesinlikle göz atın. Lisanslı firmaları ve fırsatları sizin için inceledik. Güvenli oyun için doğru adres: https://cassiteleri.us.org/# siteyi incele iyi kazançlar.
Salam dostlar, siz də keyfiyyətli kazino axtarırsınızsa, məsləhətdir ki, Pin Up saytını yoxlayasınız. Canlı oyunlar və rahat pul çıxarışı burada mövcuddur. Qeydiyyatdan keçin və bonus qazanın. Sayta keçmək üçün link: Pin Up rəsmi sayt uğurlar hər kəsə!
Online slot oynamak isteyenler için kılavuz niteliğinde bir site: https://cassiteleri.us.org/# türkçe casino siteleri Hangi site güvenilir diye düşünmeyin. Onaylı casino siteleri listesi ile sorunsuz oynayın. Tüm liste linkte.
Pin Up Casino ölkəmizdə ən populyar kazino saytıdır. Burada çoxlu slotlar və canlı dilerlər var. Qazancı kartınıza tez köçürürlər. Mobil tətbiqi də var, telefondan oynamaq çox rahatdır. Giriş linki Pin Up online tövsiyə edirəm.
2026 yılında popüler olan casino siteleri hangileri? Cevabı web sitemizde mevcuttur. Bedava bahis veren siteleri ve yeni adres linklerini paylaşıyoruz. İncelemek için https://cassiteleri.us.org/# türkçe casino siteleri fırsatı kaçırmayın.
Yeni Pin Up giriş ünvanını axtaranlar, doğru yerdesiniz. Bloklanmayan link vasitəsilə hesabınıza girin və qazanmağa başlayın. Pulsuz fırlanmalar sizi gözləyir. Keçid: bura daxil olun qazancınız bol olsun.
Situs Bonaslot adalah agen judi slot online nomor 1 di Indonesia. Ribuan member sudah merasakan Maxwin sensasional disini. Proses depo WD super cepat hanya hitungan menit. Situs resmi п»ї[url=https://bonaslotind.us.com/#]klik disini[/url] jangan sampai ketinggalan.
Bu sene en çok kazandıran casino siteleri hangileri? Detaylı liste web sitemizde mevcuttur. Bedava bahis veren siteleri ve güncel giriş linklerini paylaşıyoruz. Hemen tıklayın https://cassiteleri.us.org/# güvenilir casino siteleri fırsatı kaçırmayın.
п»їHalo Slotter, lagi nyari situs slot yang gacor? Rekomendasi kami adalah Bonaslot. RTP Live tertinggi hari ini dan terbukti membayar. Deposit bisa pakai OVO tanpa potongan. Daftar sekarang: п»їhttps://bonaslotind.us.com/# slot gacor hari ini semoga maxwin.
Salam Gacor, lagi nyari situs slot yang mudah menang? Rekomendasi kami adalah Bonaslot. Winrate tertinggi hari ini dan pasti bayar. Deposit bisa pakai Dana tanpa potongan. Login disini: https://bonaslotind.us.com/# Bonaslot semoga maxwin.
Pin Up Casino Azərbaycanda ən populyar kazino saytıdır. Saytda minlərlə oyun və canlı dilerlər var. Qazancı kartınıza anında köçürürlər. Mobil tətbiqi də var, telefondan oynamaq çox rahatdır. Rəsmi sayt https://pinupaz.jp.net/# Pin Up AZ tövsiyə edirəm.
Salam Gacor, cari situs slot yang gacor? Rekomendasi kami adalah Bonaslot. RTP Live tertinggi hari ini dan pasti bayar. Deposit bisa pakai OVO tanpa potongan. Daftar sekarang: https://bonaslotind.us.com/# Bonaslot link alternatif semoga maxwin.
Info slot gacor hari ini: mainkan Gate of Olympus atau Mahjong Ways di Bonaslot. Situs ini gampang menang dan resmi. Promo menarik menanti anda. Kunjungi: п»ї[url=https://bonaslotind.us.com/#]Bonaslot rtp[/url] raih kemanangan.
Aktual Pin Up giriş ünvanını axtaranlar, doğru yerdesiniz. Bloklanmayan link vasitəsilə hesabınıza girin və qazanmağa başlayın. Xoş gəldin bonusu sizi gözləyir. Keçid: https://pinupaz.jp.net/# Pin Up giriş hamıya bol şans.
Bocoran slot gacor malam ini: mainkan Gate of Olympus atau Mahjong Ways di Bonaslot. Situs ini gampang menang dan resmi. Promo menarik menanti anda. Kunjungi: [url=https://bonaslotind.us.com/#]bonaslotind.us.com[/url] dan menangkan.
Bu sene en çok kazandıran casino siteleri hangileri? Detaylı liste platformumuzda mevcuttur. Bedava bahis veren siteleri ve yeni adres linklerini paylaşıyoruz. Hemen tıklayın [url=https://cassiteleri.us.org/#]listeyi gör[/url] kazanmaya başlayın.
Selam, ödeme yapan casino siteleri arıyorsanız, bu siteye mutlaka göz atın. Lisanslı firmaları ve fırsatları sizin için listeledik. Güvenli oyun için doğru adres: [url=https://cassiteleri.us.org/#]casino siteleri 2026[/url] bol şanslar.
Selamlar, sağlam casino siteleri arıyorsanız, hazırladığımız listeye mutlaka göz atın. Lisanslı firmaları ve fırsatları sizin için listeledik. Dolandırılmamak için doğru adres: https://cassiteleri.us.org/# türkçe casino siteleri bol şanslar.
Aktual Pin Up giriş ünvanını axtaranlar, doğru yerdesiniz. Bloklanmayan link vasitəsilə hesabınıza girin və oynamağa başlayın. Pulsuz fırlanmalar sizi gözləyir. Keçid: Pin Up uğurlar.
Online slot oynamak isteyenler için rehber niteliğinde bir site: [url=https://cassiteleri.us.org/#]bonus veren siteler[/url] Hangi site güvenilir diye düşünmeyin. Editörlerimizin seçtiği bahis siteleri listesi ile rahatça oynayın. Tüm liste linkte.
Salam dostlar, əgər siz etibarlı kazino axtarırsınızsa, mütləq Pin Up saytını yoxlayasınız. Canlı oyunlar və sürətli ödənişlər burada mövcuddur. Qeydiyyatdan keçin və bonus qazanın. Sayta keçmək üçün link: https://pinupaz.jp.net/# Pin-Up Casino uğurlar hər kəsə!
Selam, güvenilir casino siteleri bulmak istiyorsanız, hazırladığımız listeye mutlaka göz atın. Lisanslı firmaları ve fırsatları sizin için inceledik. Dolandırılmamak için doğru adres: türkçe casino siteleri bol şanslar.
Aktual Pin Up giriş ünvanını axtarırsınızsa, bura baxa bilərsiniz. İşlək link vasitəsilə qeydiyyat olun və oynamağa başlayın. Pulsuz fırlanmalar sizi gözləyir. Keçid: [url=https://pinupaz.jp.net/#]Pin Up rəsmi sayt[/url] hamıya bol şans.
Bocoran slot gacor malam ini: mainkan Gate of Olympus atau Mahjong Ways di Bonaslot. Situs ini anti rungkad dan resmi. Bonus new member menanti anda. Kunjungi: п»ї[url=https://bonaslotind.us.com/#]klik disini[/url] raih kemanangan.
Bonaslot adalah bandar judi slot online nomor 1 di Indonesia. Ribuan member sudah mendapatkan Maxwin sensasional disini. Transaksi super cepat kilat. Link alternatif Bonaslot login gas sekarang bosku.
Info slot gacor hari ini: mainkan Gate of Olympus atau Mahjong Ways di Bonaslot. Situs ini anti rungkad dan aman. Bonus new member menanti anda. Akses link: п»ї[url=https://bonaslotind.us.com/#]Bonaslot link alternatif[/url] dan menangkan.
Pin-Up AZ ölkəmizdə ən populyar platformadır. Saytda minlərlə oyun və Aviator var. Qazancı kartınıza tez köçürürlər. Proqramı də var, telefondan oynamaq çox rahatdır. Rəsmi sayt https://pinupaz.jp.net/# sayta keçid yoxlayın.
Hər vaxtınız xeyir, siz də yaxşı kazino axtarırsınızsa, mütləq Pin Up saytını yoxlayasınız. Yüksək əmsallar və sürətli ödənişlər burada mövcuddur. İndi qoşulun və bonus qazanın. Sayta keçmək üçün link: https://pinupaz.jp.net/# rəsmi sayt uğurlar hər kəsə!
Hər vaxtınız xeyir, əgər siz yaxşı kazino axtarırsınızsa, məsləhətdir ki, Pin Up saytını yoxlayasınız. Canlı oyunlar və rahat pul çıxarışı burada mövcuddur. İndi qoşulun və bonus qazanın. Oynamaq üçün link: burada uğurlar hər kəsə!
Situs Bonaslot adalah agen judi slot online nomor 1 di Indonesia. Banyak member sudah mendapatkan Maxwin sensasional disini. Proses depo WD super cepat hanya hitungan menit. Situs resmi п»їBonaslot login gas sekarang bosku.
Halo Bosku, cari situs slot yang hoki? Coba main di Bonaslot. Winrate tertinggi hari ini dan pasti bayar. Deposit bisa pakai Dana tanpa potongan. Login disini: [url=https://bonaslotind.us.com/#]bonaslotind.us.com[/url] salam jackpot.
Online slot oynamak isteyenler için kılavuz niteliğinde bir site: https://cassiteleri.us.org/# siteyi incele Hangi site güvenilir diye düşünmeyin. Editörlerimizin seçtiği bahis siteleri listesi ile rahatça oynayın. Tüm liste linkte.
Aktual Pin Up giriş ünvanını axtarırsınızsa, bura baxa bilərsiniz. Bloklanmayan link vasitəsilə hesabınıza girin və oynamağa başlayın. Xoş gəldin bonusu sizi gözləyir. Keçid: https://pinupaz.jp.net/# Pin Up giriş hamıya bol şans.
Pin-Up AZ ölkəmizdə ən populyar platformadır. Saytda çoxlu slotlar və canlı dilerlər var. Pulu kartınıza anında köçürürlər. Proqramı də var, telefondan oynamaq çox rahatdır. Giriş linki https://pinupaz.jp.net/# Pin Up online yoxlayın.
HÉ™r vaxtınız xeyir, siz dÉ™ yaxşı kazino axtarırsınızsa, mÉ™slÉ™hÉ™tdir ki, Pin Up saytını yoxlayasınız. Æn yaxşı slotlar vÉ™ sürÉ™tli ödÉ™niÅŸlÉ™r burada mövcuddur. Ä°ndi qoÅŸulun vÉ™ bonus qazanın. Oynamaq üçün link: ətraflı mÉ™lumat uÄŸurlar hÉ™r kÉ™sÉ™!
Online slot oynamak isteyenler için rehber niteliğinde bir site: https://cassiteleri.us.org/# güvenilir casino siteleri Nerede oynanır diye düşünmeyin. Editörlerimizin seçtiği casino siteleri listesi ile sorunsuz oynayın. Tüm liste linkte.
Bu sene en çok kazandıran casino siteleri hangileri? Cevabı web sitemizde mevcuttur. Bedava bahis veren siteleri ve güncel giriş linklerini paylaşıyoruz. İncelemek için güvenilir casino siteleri kazanmaya başlayın.
п»їHalo Slotter, lagi nyari situs slot yang hoki? Coba main di Bonaslot. Winrate tertinggi hari ini dan terbukti membayar. Isi saldo bisa pakai OVO tanpa potongan. Daftar sekarang: п»їlogin sekarang salam jackpot.
Selam, güvenilir casino siteleri arıyorsanız, hazırladığımız listeye mutlaka göz atın. Lisanslı firmaları ve fırsatları sizin için listeledik. Dolandırılmamak için doğru adres: [url=https://cassiteleri.us.org/#]güvenilir casino siteleri[/url] iyi kazançlar.
Yeni Pin Up giriş ünvanını axtaranlar, doğru yerdesiniz. Bloklanmayan link vasitəsilə qeydiyyat olun və oynamağa başlayın. Xoş gəldin bonusu sizi gözləyir. Keçid: https://pinupaz.jp.net/# bura daxil olun hamıya bol şans.
Bonaslot adalah bandar judi slot online terpercaya di Indonesia. Banyak member sudah mendapatkan Jackpot sensasional disini. Transaksi super cepat kilat. Situs resmi п»їhttps://bonaslotind.us.com/# slot gacor hari ini jangan sampai ketinggalan.
2026 yılında popüler olan casino siteleri hangileri? Cevabı platformumuzda mevcuttur. Deneme bonusu veren siteleri ve güncel giriş linklerini paylaşıyoruz. Hemen tıklayın [url=https://cassiteleri.us.org/#]casino siteleri[/url] fırsatı kaçırmayın.
Hello everyone, I just discovered an awesome website to buy medication. For those seeking and want cheap antibiotics, Pharm Mex is a game changer. No prescription needed plus it is safe. Check it out: click here. Have a nice day.
Hi, I recently discovered a useful website for purchasing prescription drugs securely. If you are looking for cheap meds, this store is the best choice. Great prices and it is very affordable. Link here: [url=https://onlinepharm.jp.net/#]visit website[/url]. I hope you find what you need.
Hey everyone, I wanted to share a useful source for meds where you can buy generics cheaply. For those who need no prescription drugs, this store is worth a look. Fast delivery plus huge selection. Visit here: https://onlinepharm.jp.net/#. Have a nice day.
Hey guys, I recently stumbled upon a great source from India to buy generics. If you want to buy medicines from India at factory prices, IndiaPharm is worth checking. They offer secure delivery worldwide. More info here: indiapharm.in.net. Good luck.
To be honest, I recently found a trusted website to save on Rx. For those seeking and need generic drugs, this store is highly recommended. No prescription needed and secure. Take a look: https://pharm.mex.com/#. Appreciate it.
Hi, To be honest, I found a useful online drugstore to order pills hassle-free. If you need cheap meds, this store is highly recommended. Secure shipping and huge selection. Link here: [url=https://onlinepharm.jp.net/#]international pharmacy online[/url]. Thanks!