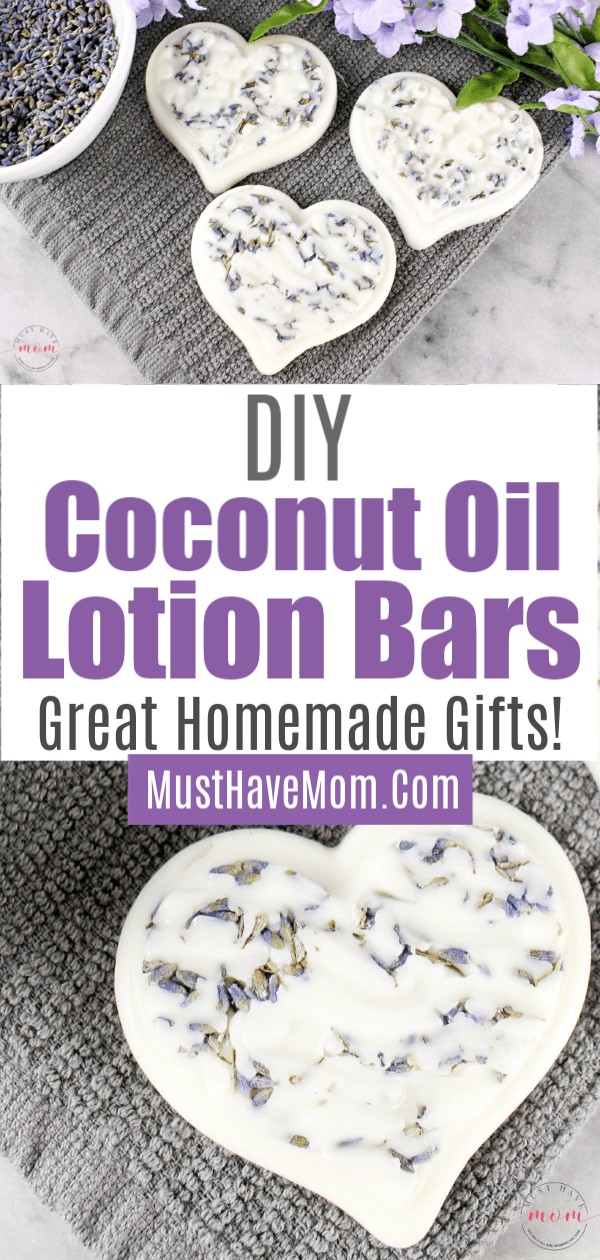
DIY Coconut Oil Lotion Bars – Great For Homemade Gifts!
If you’ve read any posts on my blog recently you would have seen that I have switched our diets to clean eating. Taking it one step further, I am now trying to make sure those products we use every day are free of chemicals and other things that may be harmful. These DIY coconut oil lotion bars fit the bill and they also make a great homemade gift idea! I’ll show you how easy and inexpensive they are to make yourself!
Coconut Oil Lotion Bars
One of the best things about making your own lotion bars besides knowing exactly what is in them, is they last a longer than traditional bottles of lotion, they are mess free even when the kids are using them, and they really work.
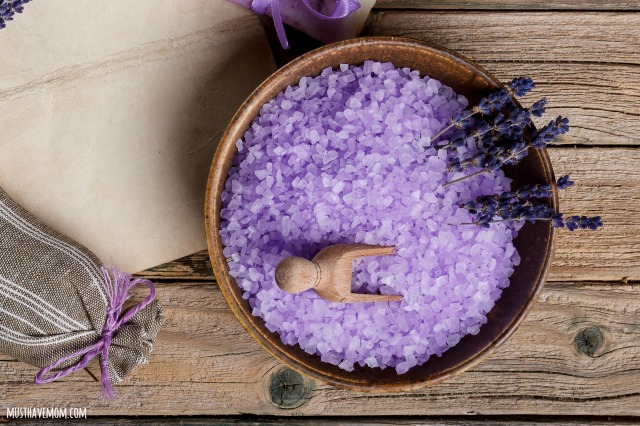
Coconut oil has long been used for skin care. It is naturally antibacterial and antifungal, and it is an excellent moisturizer. Adding it to your lotion bars gives you all these benefits!
Lotion bars also make fun and easy homemade gifts. These DIY coconut oil lotion bars make great gifts for baby showers, birthdays, Mother’s Day, Christmas, or any other occasion you can think of.
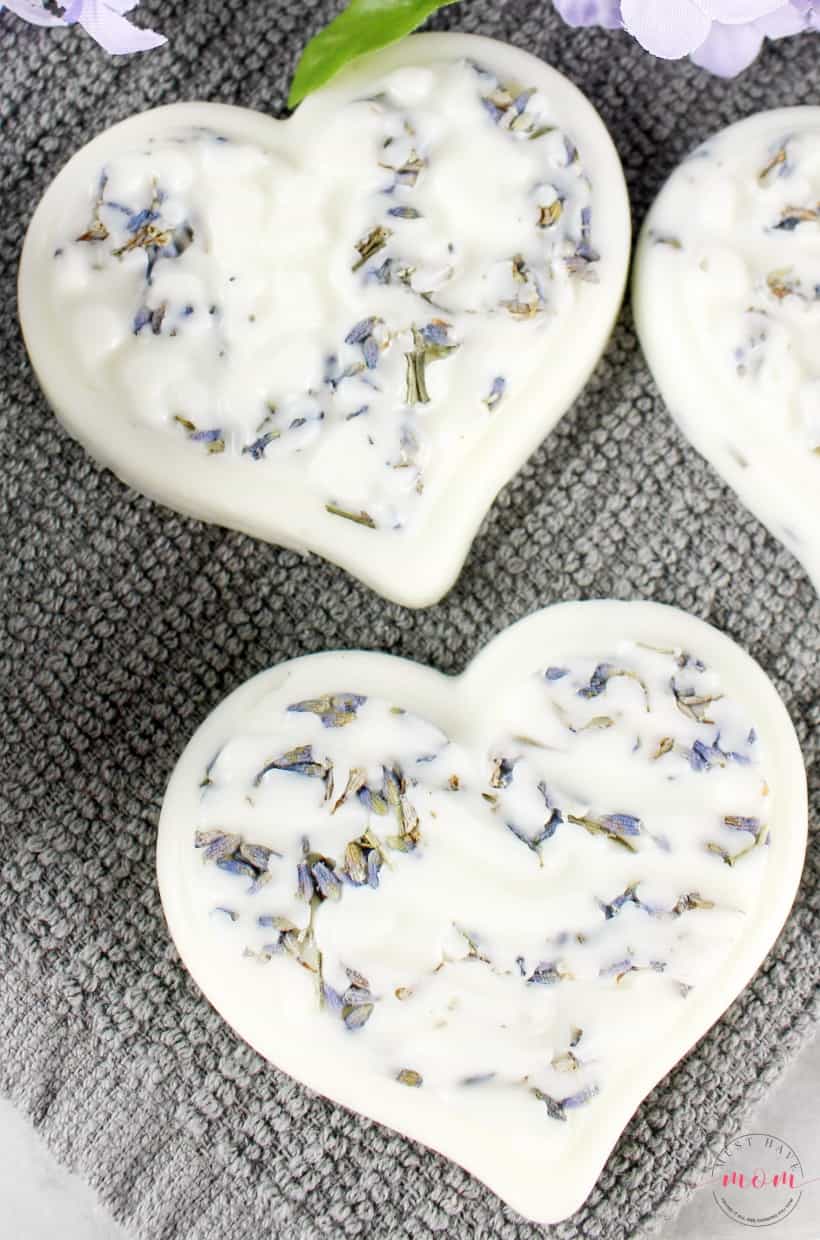
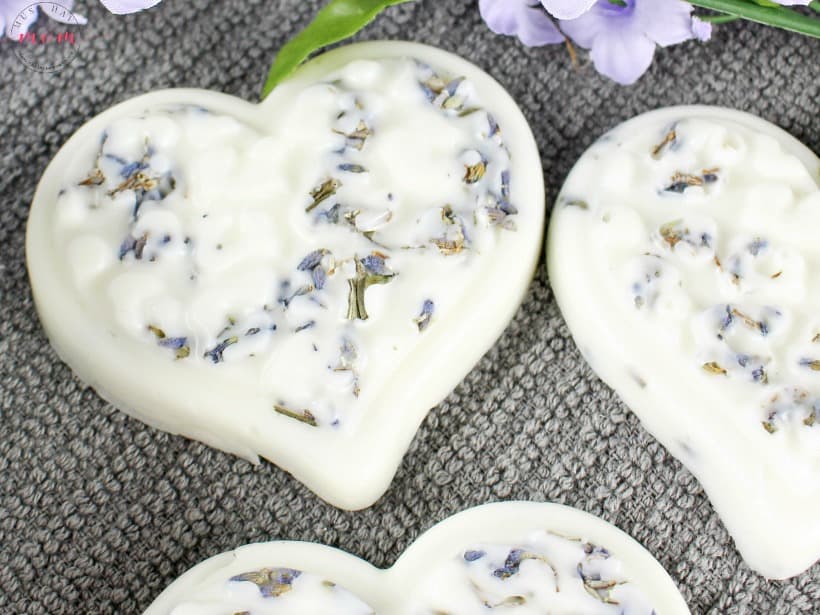
DIY Coconut Oil Lotion Bars
Yields: 6 -12 (depending on size of mold)
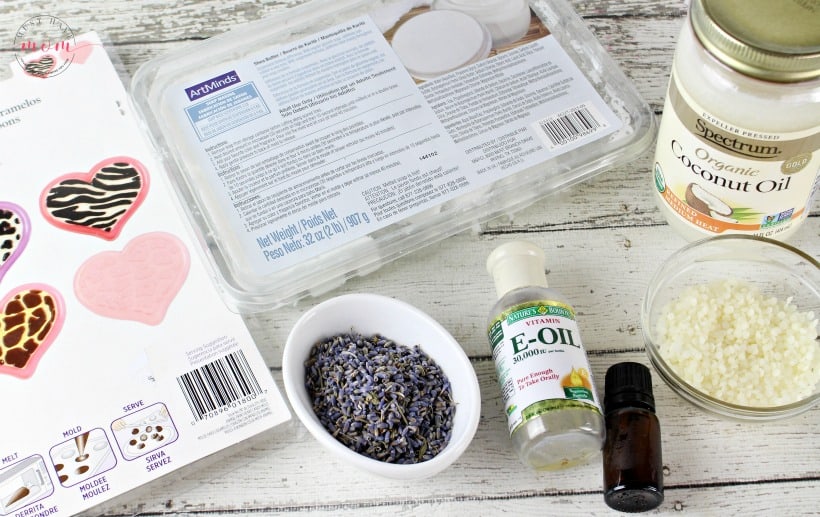
INGREDIENTS
- Heart-shaped molds
- 1/2 cup coconut oil
- 1/2 cup shea butter
- 1/2 cup beeswax pellets
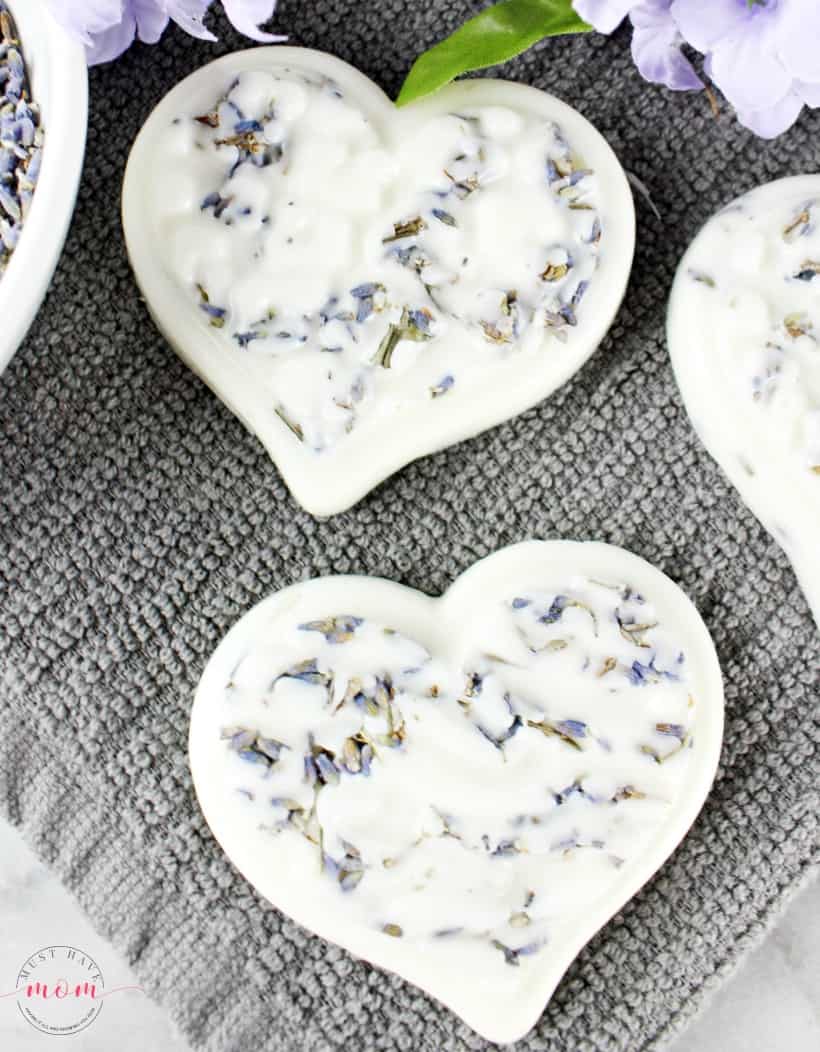
- 1/4 cup dried lavender buds
- 10-12 drops lavender essential oil
- 3-4 drops Vitamin E oil
Coconut Oil Lotion Bars Directions

1. Sprinkle approximately 1/2 Tablespoon of dried lavender buds into the bottom of each heart-shaped mold. Set aside.
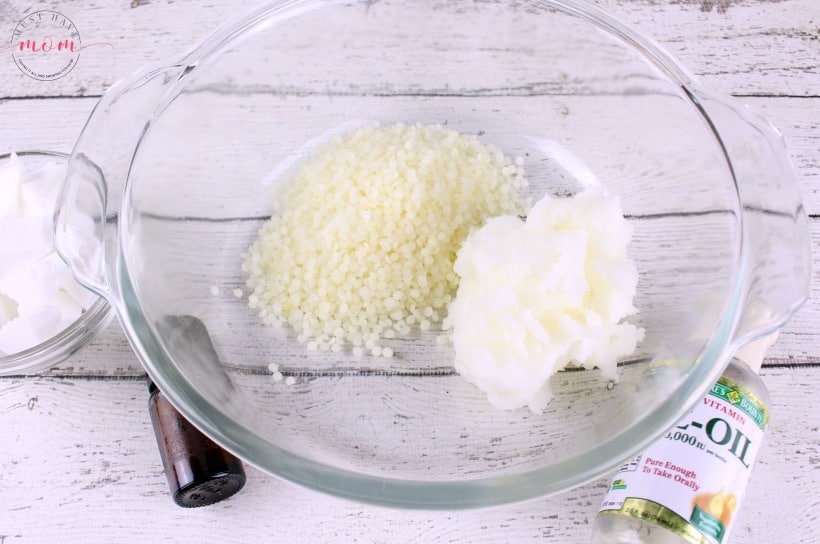
2. Place the coconut oil and beeswax pellets in a microwave safe bowl. Microwave on HIGH, in 20 second increments, until completely melted. Be sure to stir after each increment.
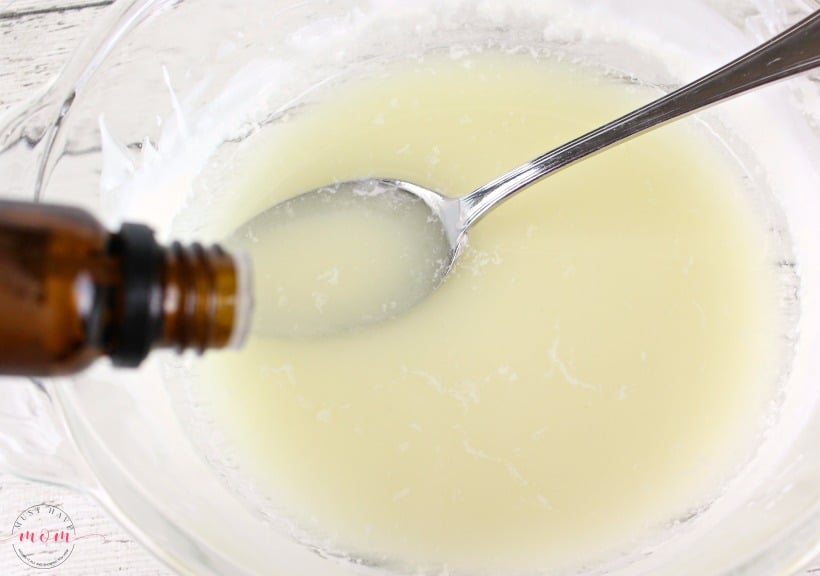
3. Add the shea butter to the melted oil and microwave on HIGH for an additional 20 seconds. Stir until completely melted. Because the oil was already hot, it won’t take long for the shea butter to melt. Then add the lavender oil to the mixture and stir it in.
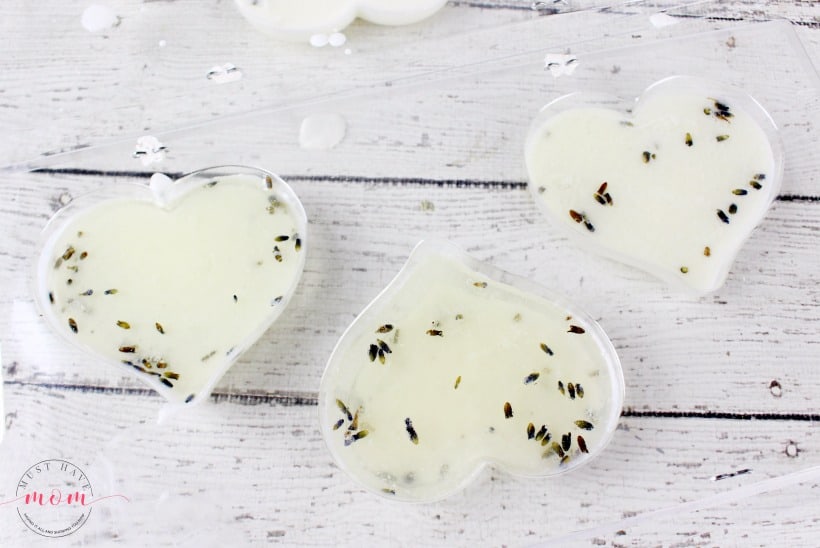
3. Pour the melted mixture into each heart-shaped mold, filling up to the top. Allow to harden at room temperature for 4 hours or chill for 2 hours.
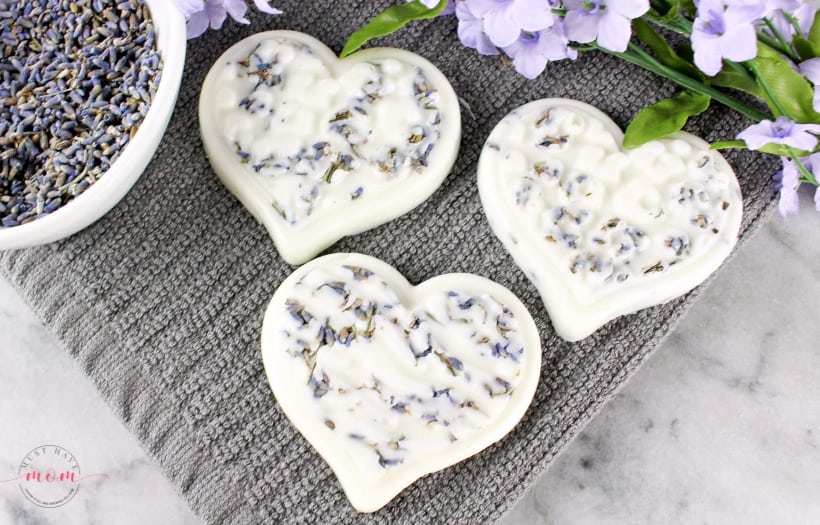
4. ENJOY!! Rub in your hands to use your body heat to naturally melt the lotion bar slightly and moisturize your hands. Store in a pretty glass jar on the counter or in a tin for portability.
That is all there is to it and before long you will be enjoying your own DIY Coconut Oil Lotion Bars. Give them as gifts to teachers, neighbors and friends. They are easy and inexpensive to make and are a meaningful and unique gift that everyone can use! Wrap in clear bags with a pretty ribbon for gift giving!
Pin DIY Coconut Oil Lotion Bars

I can not wait to try this,,ive been wanting to make some for a while now and this is certainly easy enough
Let us know how you like them Vickie!
I’m very excited to try this! What kind of Shea butter did you use? Or would recommend? ????
Thank you!
Hi Tina, this is the Shea butter I use: https://amzn.to/2V8huLQ Have fun making them!!
These are really pretty. The beeswax pellets must keep them from melting. I’d like to try this, I’ve experimented with DIY lotions, etc., this would be perfect for home and for gifts!
I have a very large block of beeswax – could I just grate that for the 1/2 cup rather than buying pellets?
Sure! That would work just fine
I have all the ingredients I made for my son teachers. Thank
Awesome! I bet they’ll love them.
I LOVE these, thanks for sharing them in our Linky Party, I have chosen them as my pick from the projects last week and they will be featured in tomorrows Linky Party!
Yay! Thank you so much!!
These look wonderful! I love that they don’t contain palm oil. I’ve been looking for bar soap without palm oil – not easy to find. Do you happen to know if there is an ingredient I could add to these bars if I make them that would make them act as a soap as well?
Hmm I think that would change the consistency so I’m not sure. Let us know if you experiment and find something that works!
Fragrance lovers pay attention to both scent and service. Users referencing best fragrancenet phone number often discuss how transparency about authenticity and shipping gives peace of mind. When companies clearly explain ingredients, packaging, and return options, it strengthens trust. Fast communication turns first-time shoppers into repeat customers. Great service adds another invisible layer to the perfume experience—it’s what keeps customers coming back long after the first impression fades.
Spielfreunde wissen besonders das große Slot-Angebot sowie den attraktiven Neukundenbonus und die
vielen Einzahlungsmöglichkeiten zu schätzen. Bei Lapalingo handelt
es sich um eine international bekannte Online Spielothek, die nun auch mit deutscher Lizenz ausgestattet ist.
+ 400 % Einzahlungsbonus für neue Spieler + hoher Neukundenbonus für kleinere Einzahlungen Weitere Benefits des Anbieters liegen in der Top-Spielauswahl, die verschiedenste Novoline-Klassiker beinhaltet.
Auf euch wartet ein gutes Spielangebot, ein attraktiver Neukundenbonus und
eine große Auswahl an Zahlungsmöglichkeiten.
Denn durch das neue Gesetz sind nur noch virtuelle Automatenspiele,
welche sonst als Online Spielautomaten bezeichnet werden, erlaubt.
Am härtesten hat es wahrscheinlich die Spielauswahl für legale Online Casinos getroffen. Im Gegensatz zu
früher gilt diese Glücksspiel-Regulierung jetzt in ganz Deutschland für
alle Online Glücksspielanbieter. Denn diesmal schafften es
alle 16 Bundesländer gemeinsam eine Regulierung für Online Glücksspiele auf die Beine zu stellen.
Wenn ihr scharf auf einen dieser dicken Pötte seid, solltet
ihr bei der Wahl eines deutschen Online Casinos darauf achten, dass dort die Spiele dieser Software-Hersteller mit im Portfolio sind.
Ich kann jedem Spielothekenspieler einmal empfehlen, sich
das reichhaltige Angebot der Online Slots anzuschauen. Für jede
der folgenden Spielekategorien haben die deutschen Online Casinos mehrere
Spielvarianten mit unterschiedlichen Spielregeln im Angebot –
Abwechslung ist da garantiert. Deutsche Casinospieler haben den Vorteil,
dass prinzipiell alle Casino Spiele ohne Einschränkung verfügbar sind.
Casinos mit deutscher Lizenz müssen sämtliche Spielergebnisse von Drittanbietern auswerten lassen. Seitdem können Anbieter von virtuellen Glücksspielen eine offizielle Lizenz aus
Deutschland erhalten und legal arbeiten.
References:
https://online-spielhallen.de/n1bet-casino-auszahlung-ihr-umfassender-leitfaden/
This establishment manages to strike a careful balance after mingling the excitement of gambling and the dynamic vibe
particular to Sydney. Exceedingly sophisticated, The Star casino has
been designed to anticipate the desires of every player who sets foot inside.
If you are travelling to and about Sydney and want everything
that a casino has to offer, then be sure to check out the Star.
There’s plenty of casino action available at the Star, as well
as great dining, luxury accommodations, and engaging entertainment.
Sellers can set shipping fees based on item size, weight, and destination. By leveraging these strategies you
not only simplify the process but also create a positive
experience for your customers. Engaging with your buyers through tracking updates and communication builds trust and fosters repeat
business. Remember to provide clear shipping details and use reliable carriers to ensure timely deliveries.
By understanding the various shipping options and effectively managing
costs you can reach a wider audience and boost your sales.
After dispatching an item, you must update tracking information within 3 business days,
keeping the buyer informed about their purchase.
The Star Casino in Sydney is presently the only true casino in the NSW.
The Star Casino Sydney is renowned for its comprehensive entertainment offerings and
luxurious amenities, setting it apart as a premier destination for
leisure and gaming enthusiasts. These the Star Casino news
and promotions are subject to change, and eligibility may depend on the patron’s gaming
activity and membership level within The Star Club.
References:
https://blackcoin.co/playzilla-your-ultimate-pokies-destination-in-2025/
Completing this process upon account creation and deposit ensures swift withdrawals,
avoiding the 3-5 business day processing time. The casino doesn’t charge deposit fees but keep an eye out for potential fees from your payment provider.
These titles break away from the standard pokies and table games offering an experience not unlike popular video games.
At the time of this review, Ozwin Casino had no live dealer games in its catalogue.
Select eZeeWallet as the preferred deposit method4.
Keep the deposit page open until the transfer is confirmed Paste the casino’s Bitcoin address into the “Send to” field8.
From classic three-reel slots to modern video slots
with progressive jackpots, there’s a perfect game waiting for every type of player.
Ozwin employs only competent specialists, which means that any communication with the service will be productive for the player.
Bonus funds can be used for games within the “Pokies and Slots” category.
This is another weekly reward available every Friday and offers 3
rewards for 2 deposits. Get a tempting cashback from 25% to 50% within a weekly Cash Boomerang bonus program.
References:
https://blackcoin.co/bsb007-casino-a-comprehensive-review/
online pokies paypal
References:
https://jips.fkip.unila.ac.id/index.php/jlg/comment/view/21090/0/236609
online poker real money paypal
References:
activeaupair.info