DIY Cocktail Umbrella Wreath Tutorial
Today we have a guest post from Landis, who is the co-owner of The Wreath Depot, a shop that specializes in gorgeous, handcrafted floral wreaths.
Thanks so much to Sarah for inviting me to share this DIY wreath with you guys. I adore mini cocktail umbrellas and had so much fun crafting a wreath from them! It is one of the easiest wreaths to make as you don’t have to have a hot glue gun or special supplies. This DIY Cocktail Umbrella Wreath is bursting with summer color and quickly becomes the center of attention when you have guests over. Follow along below as we learn the steps to craft it.

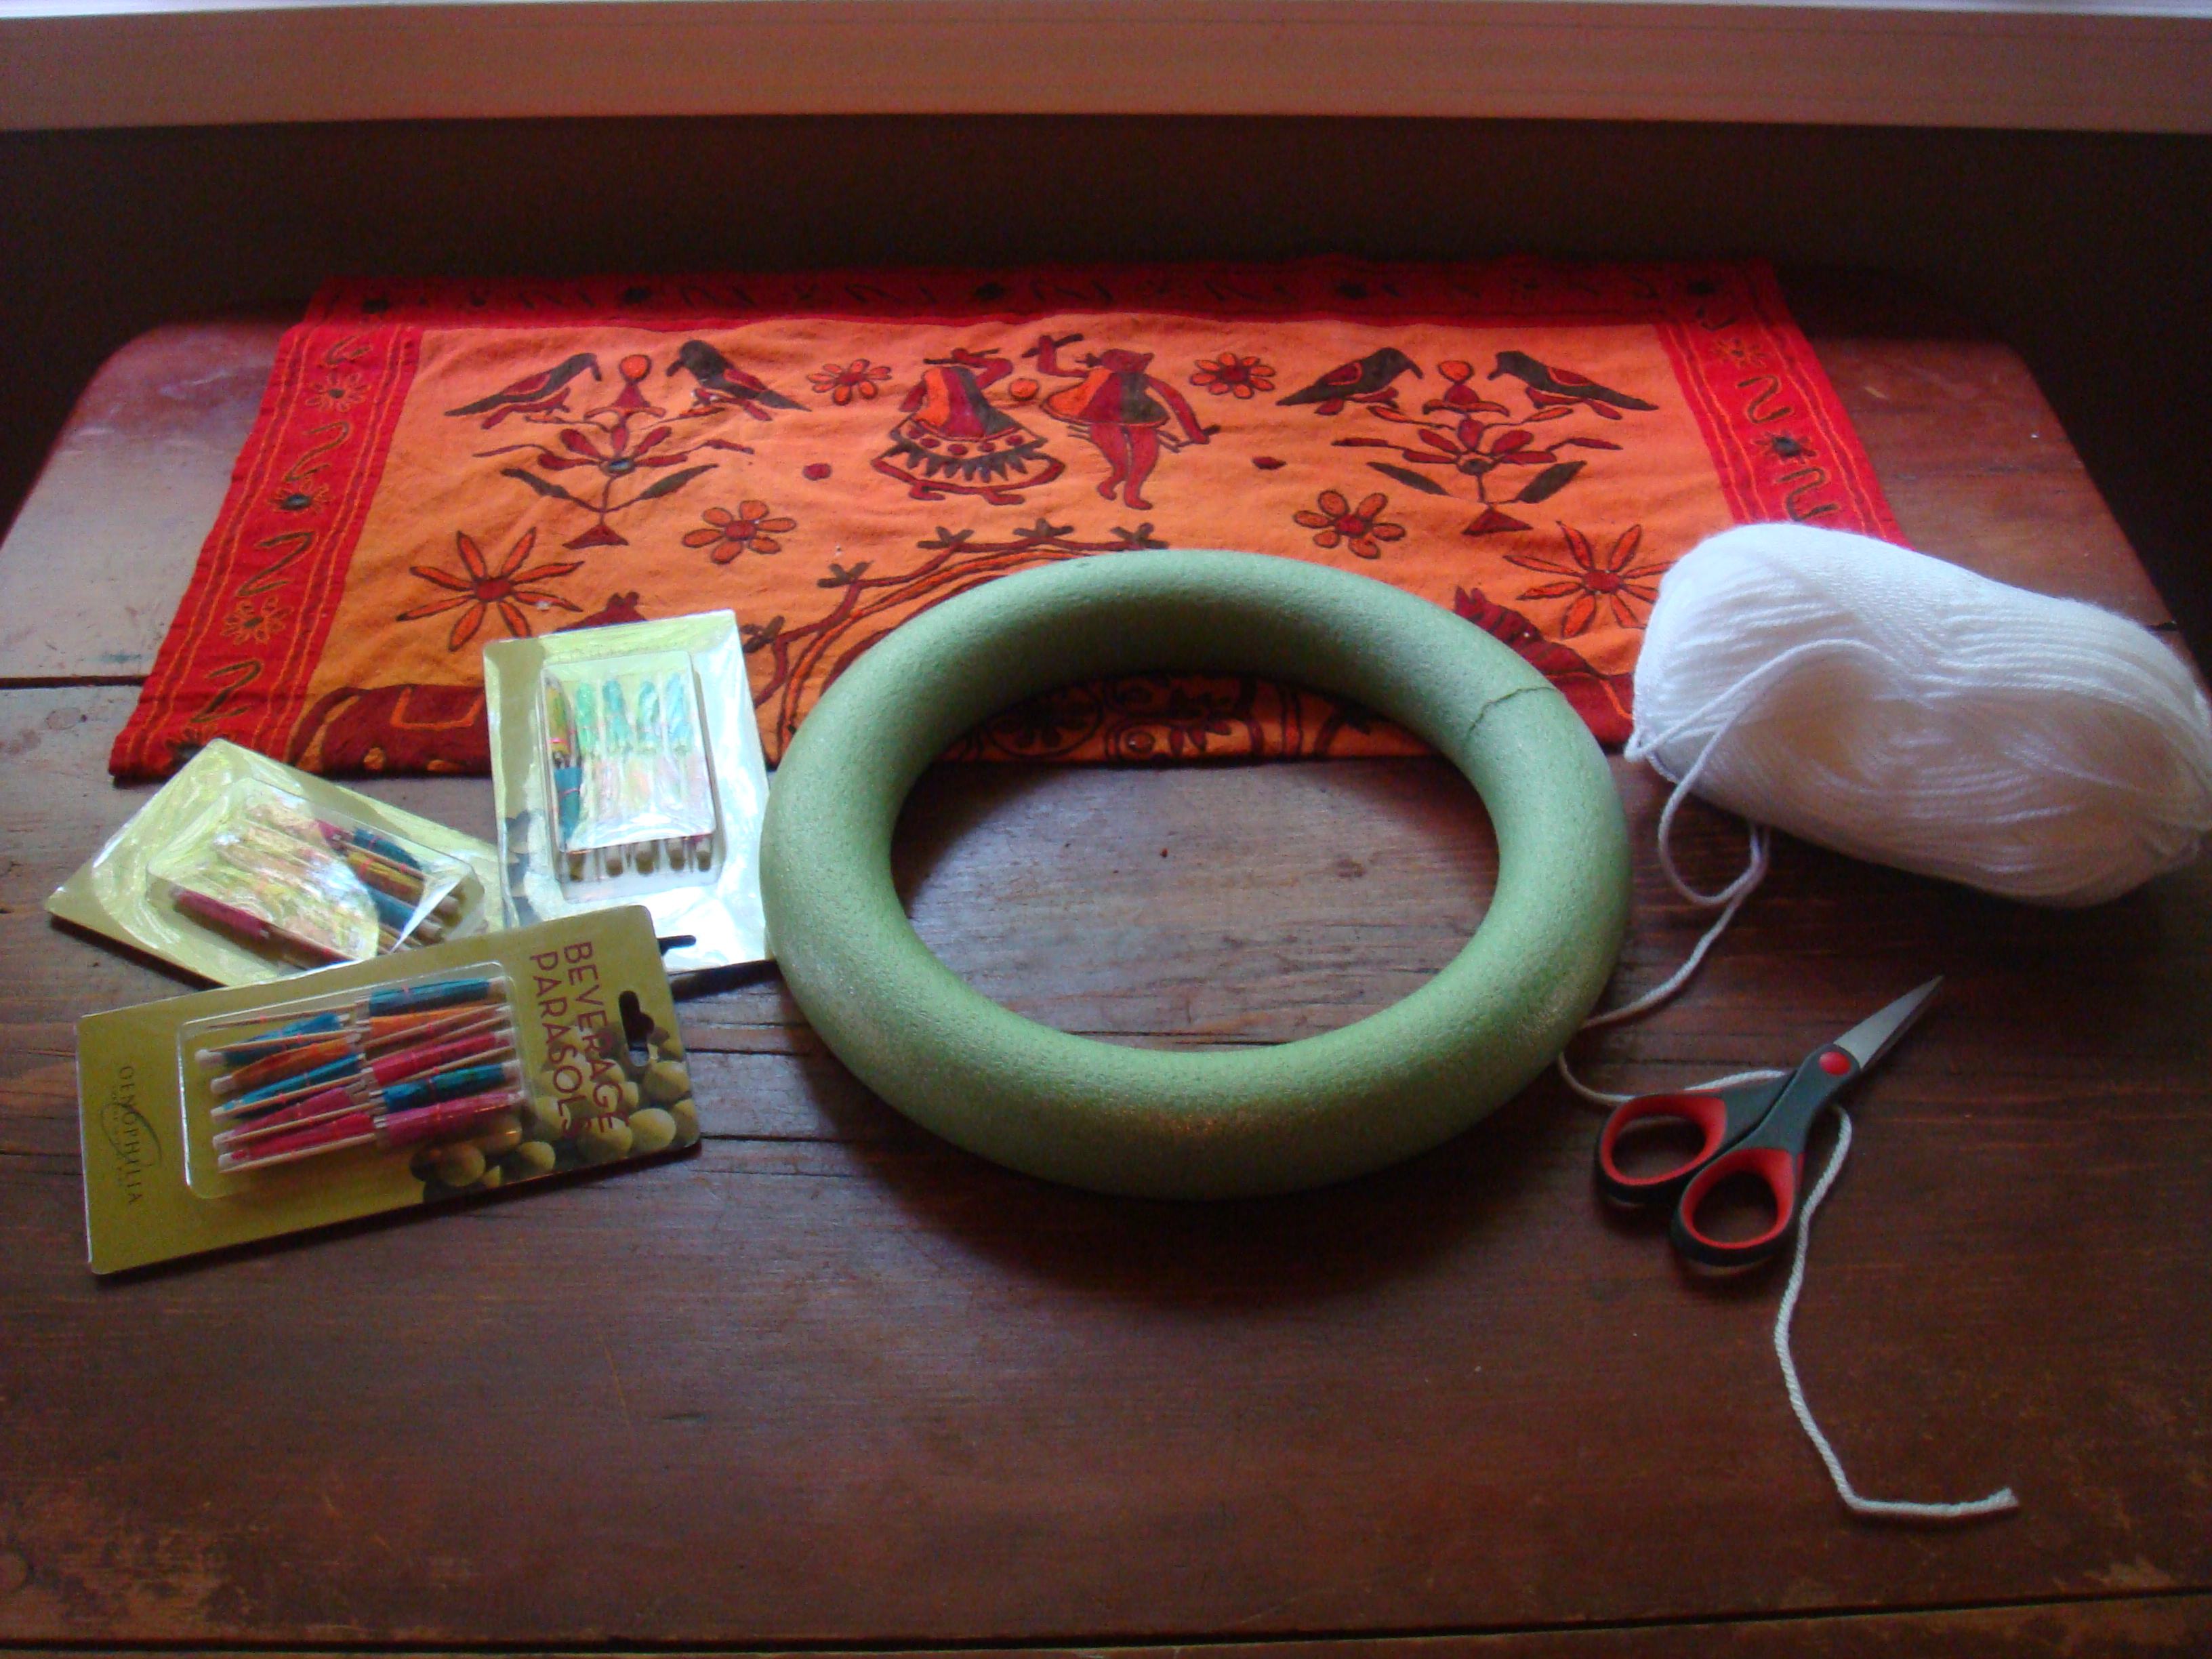
Supplies You Will Need:
1) 10 Inch Foam Wreath Base
2) Cocktail Umbrellas (4 packs of 10)
3) Yarn and scissors (Optional- you can wrap the yarn around the base if you like)
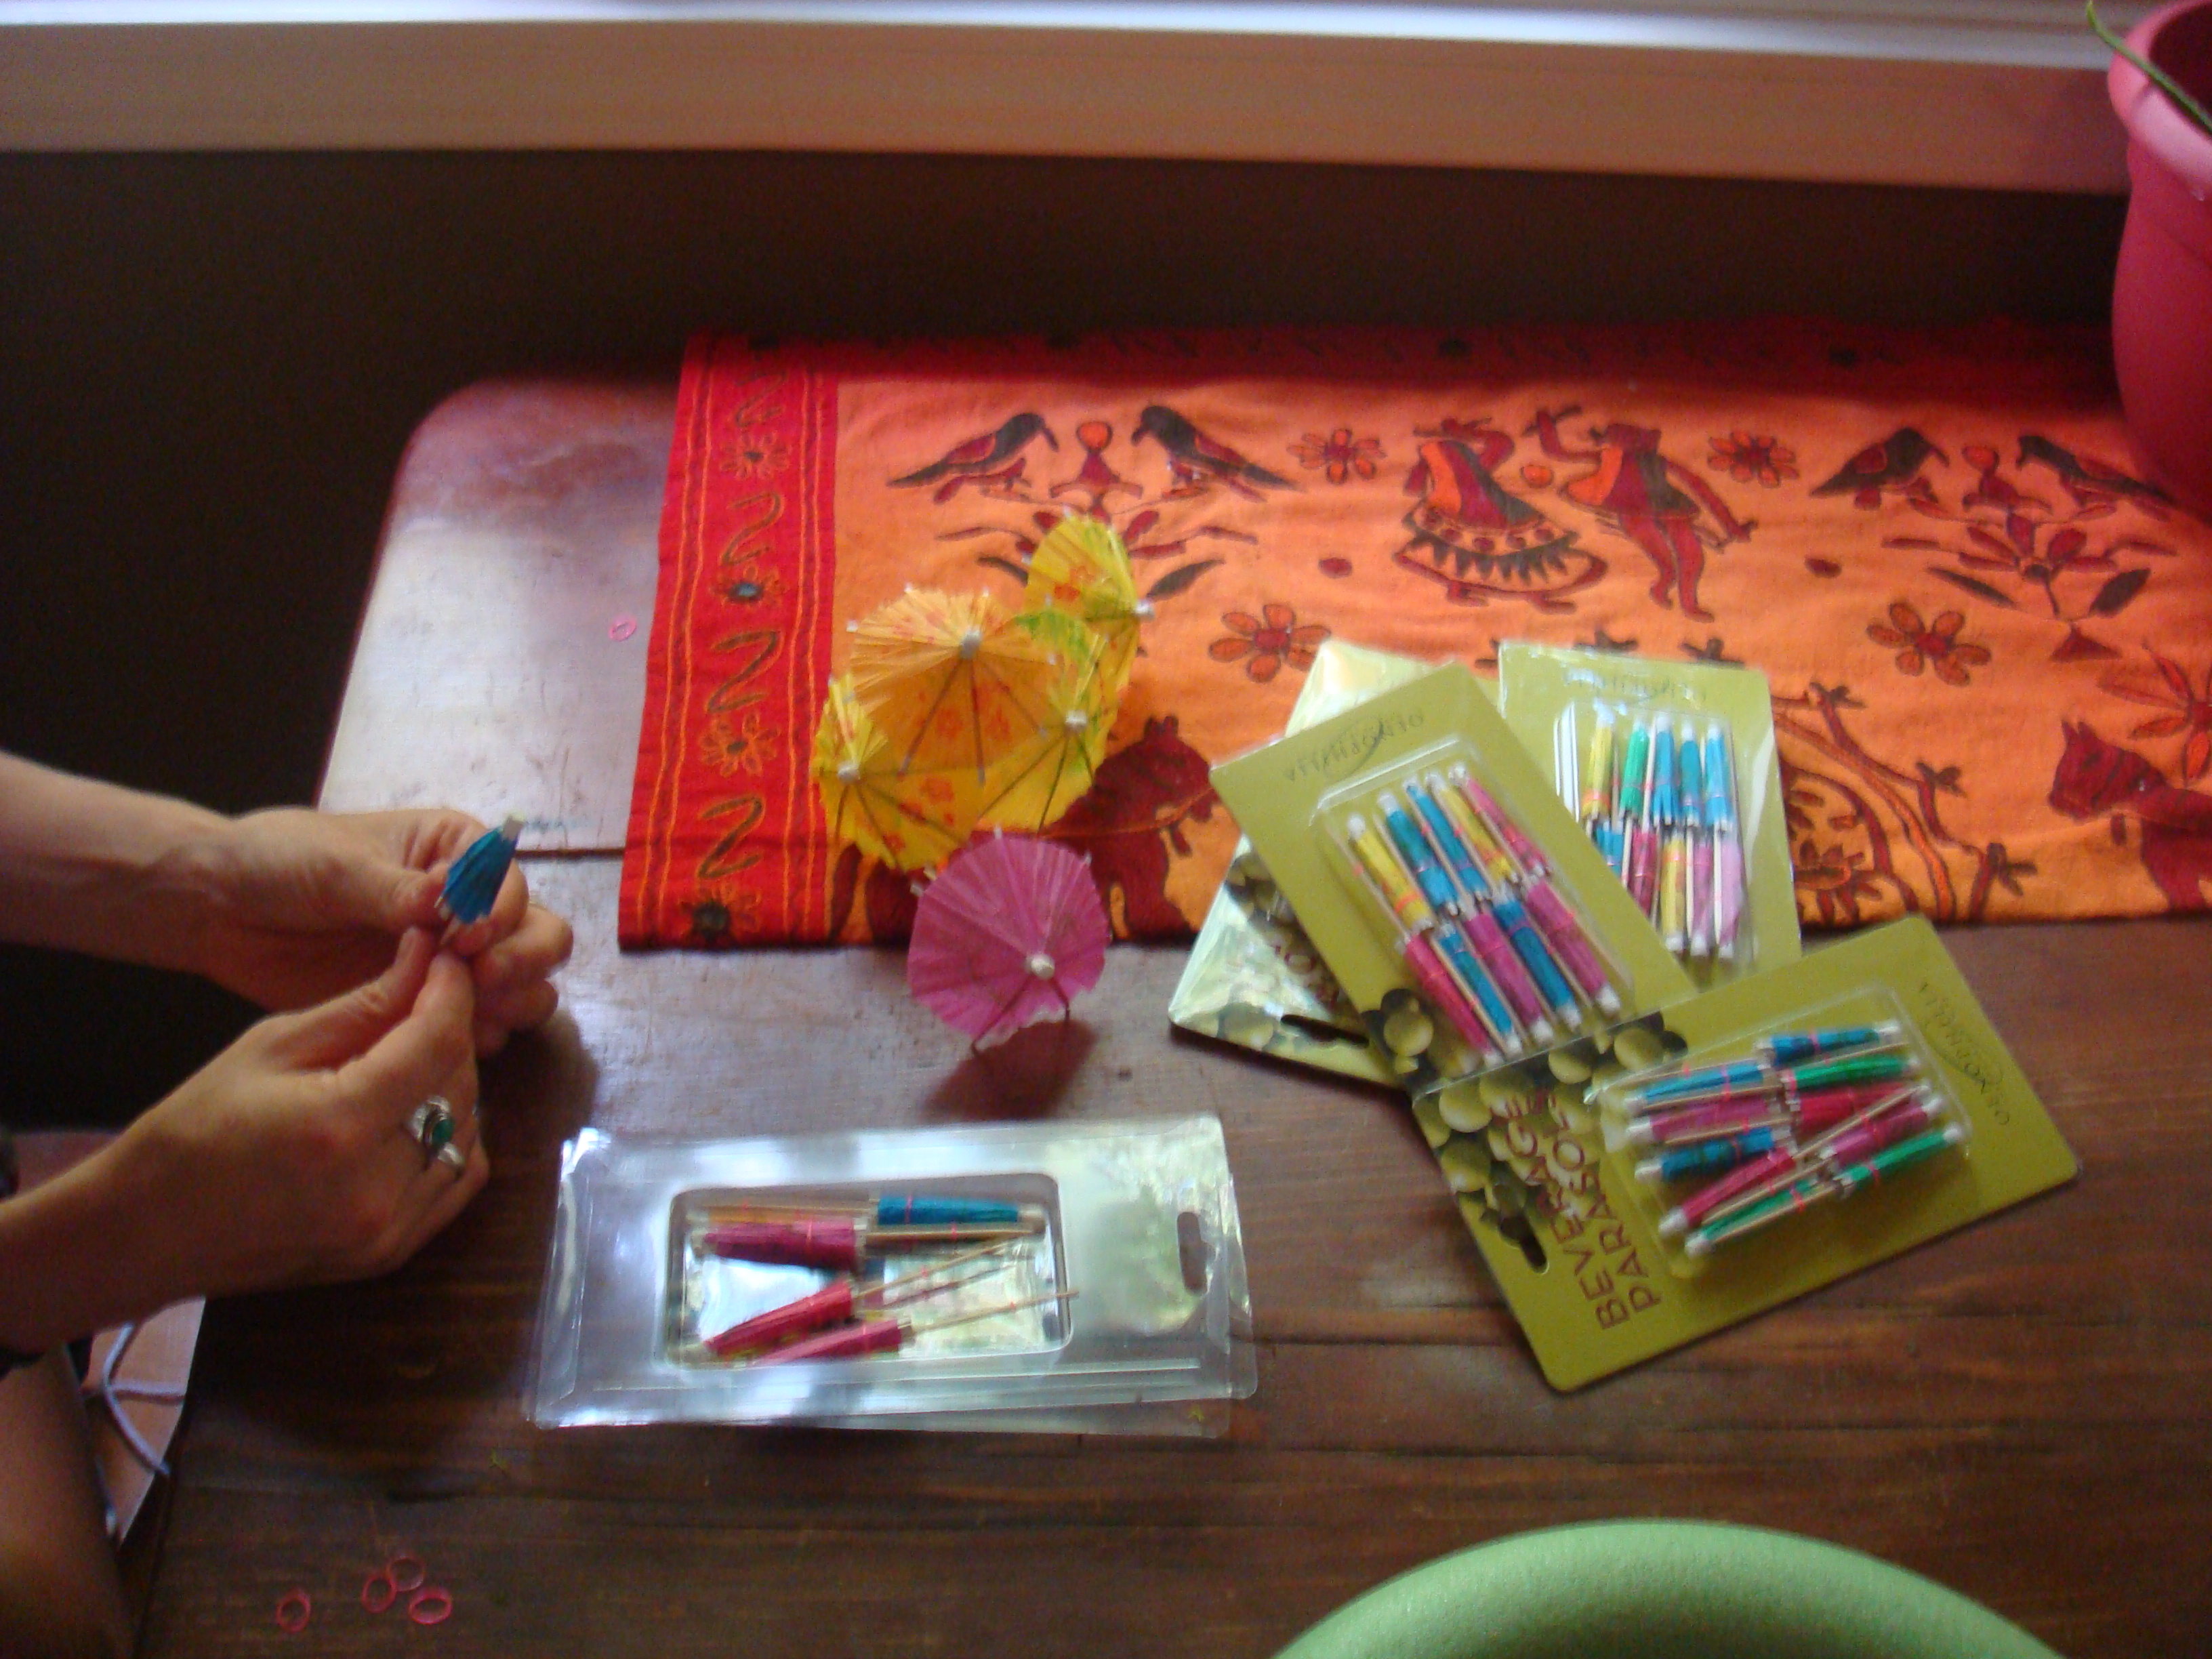
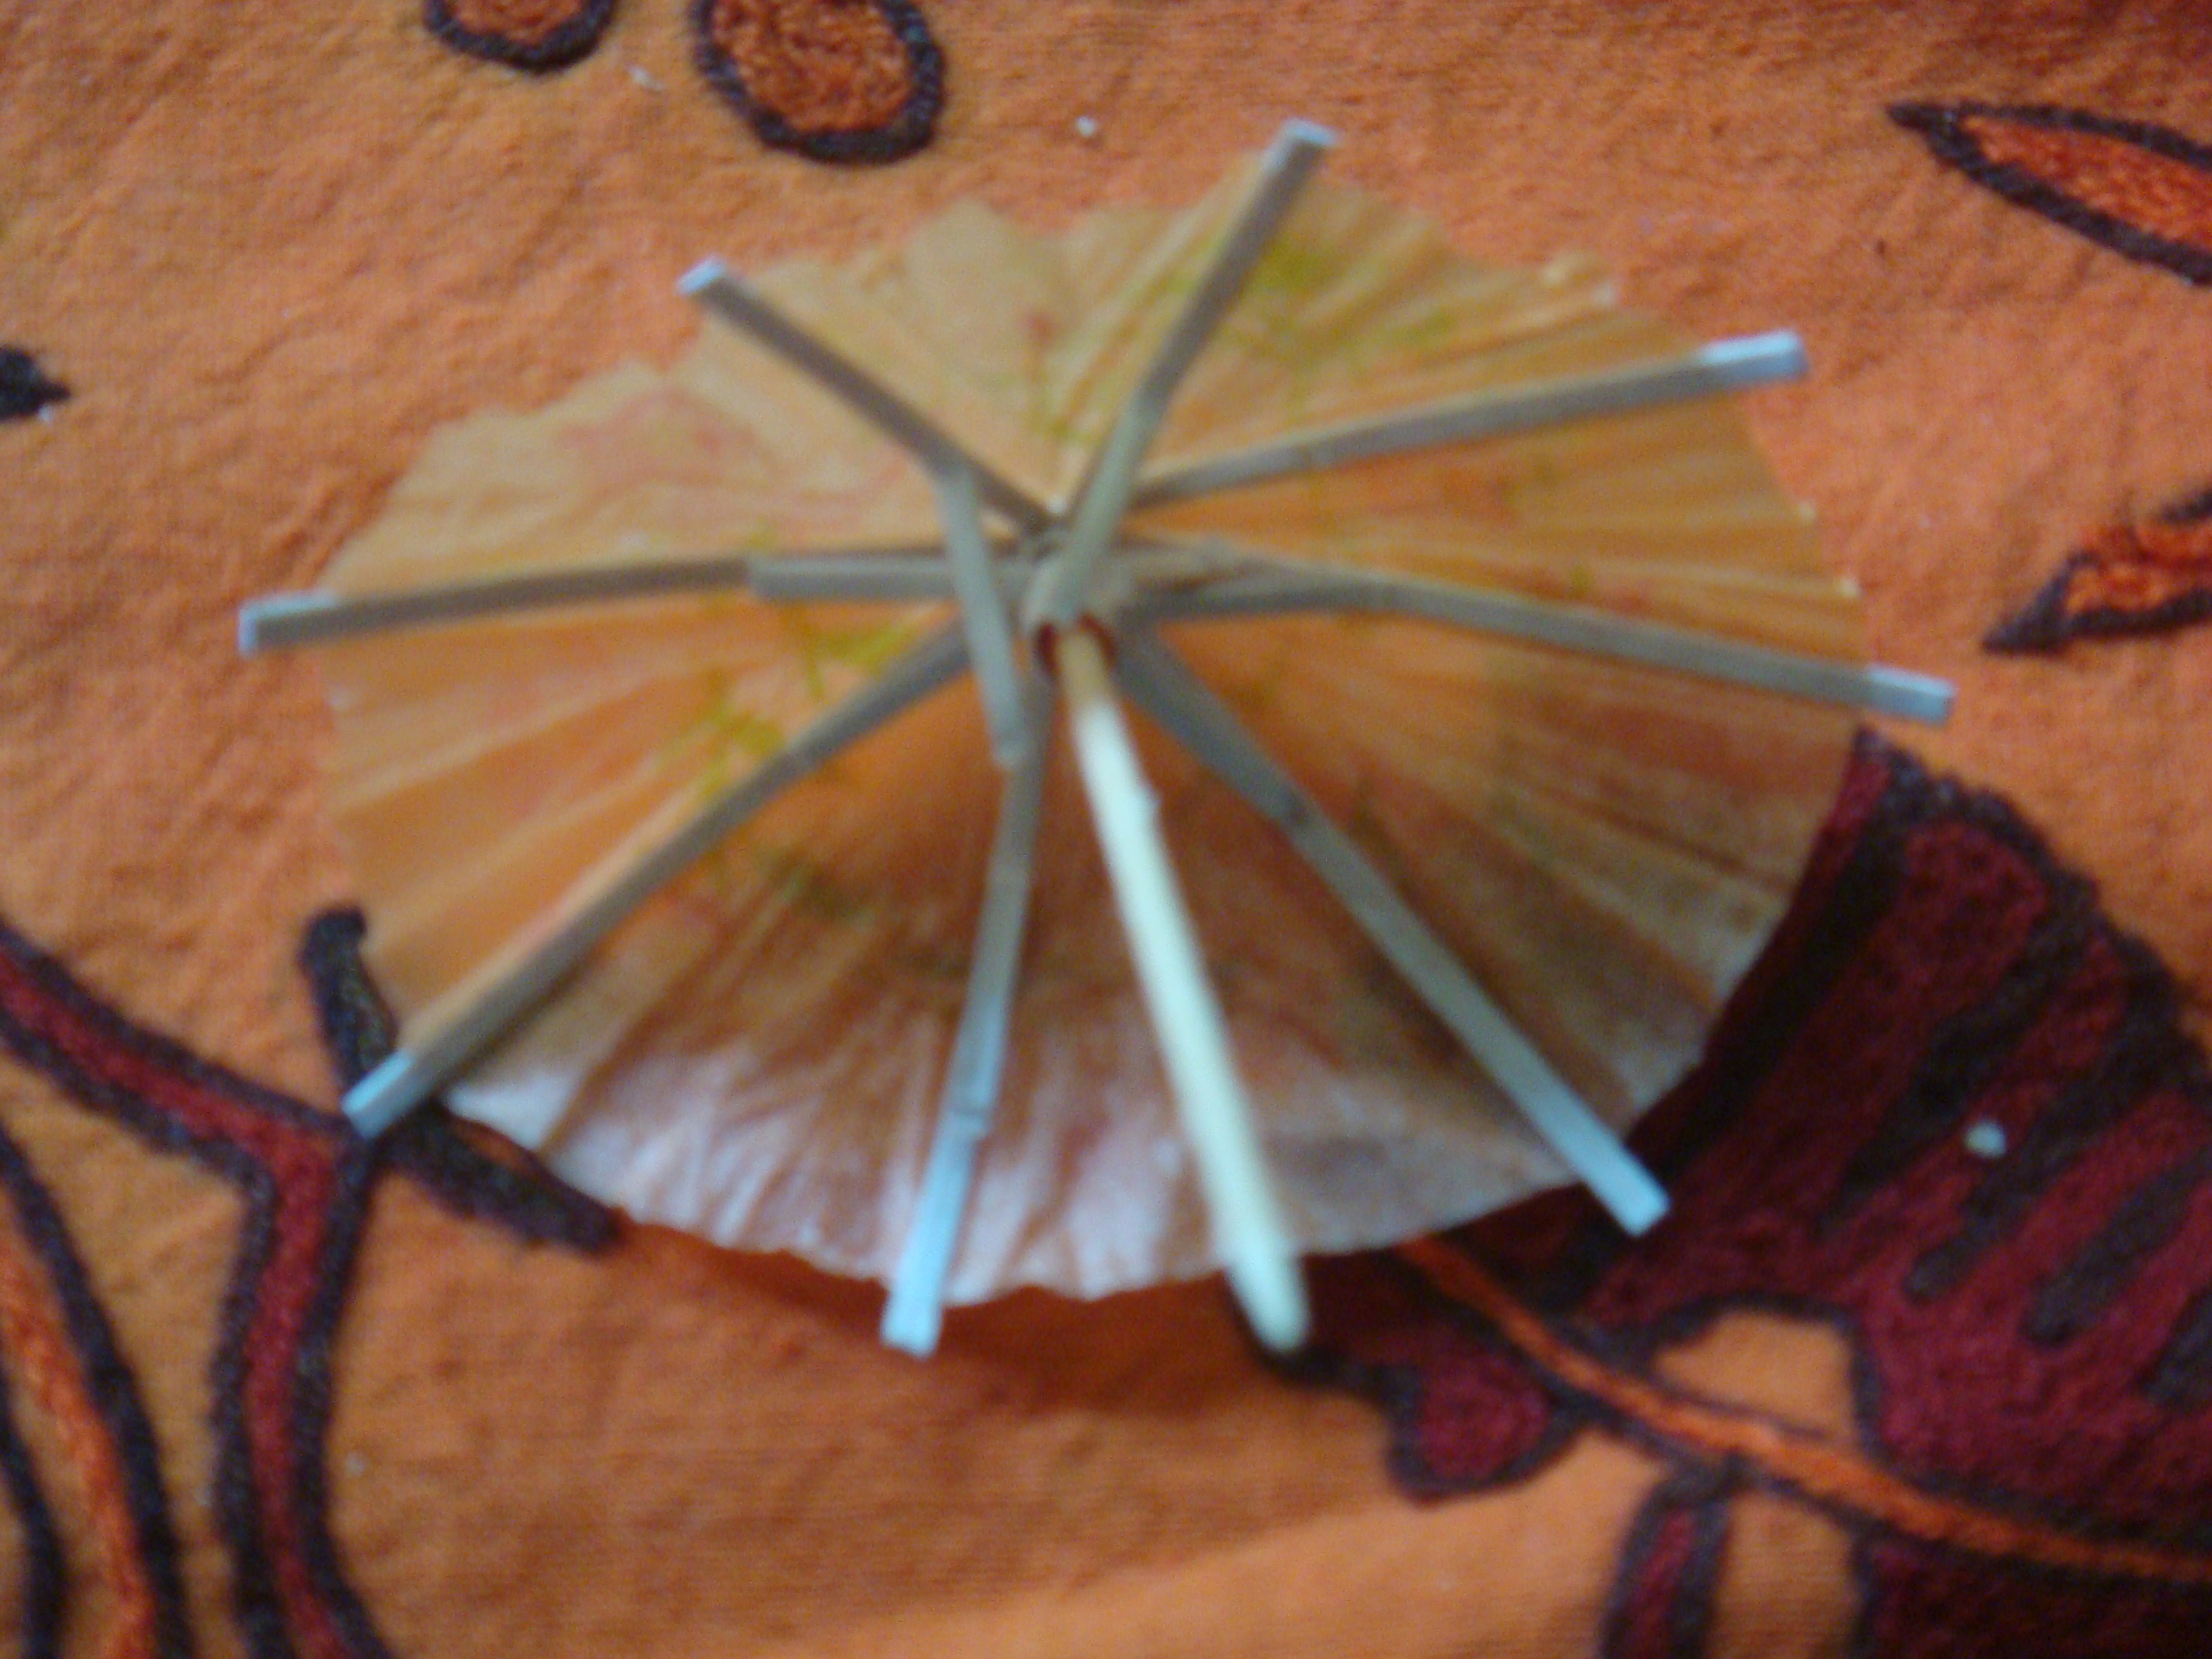
Step 1: Open the cocktail umbrellas. This proved to be a bit trickier than I had expected! First, you have to remove the small rubber band around the outside of the umbrella. Then push the rubber band on the base of the umbrella up to open it.
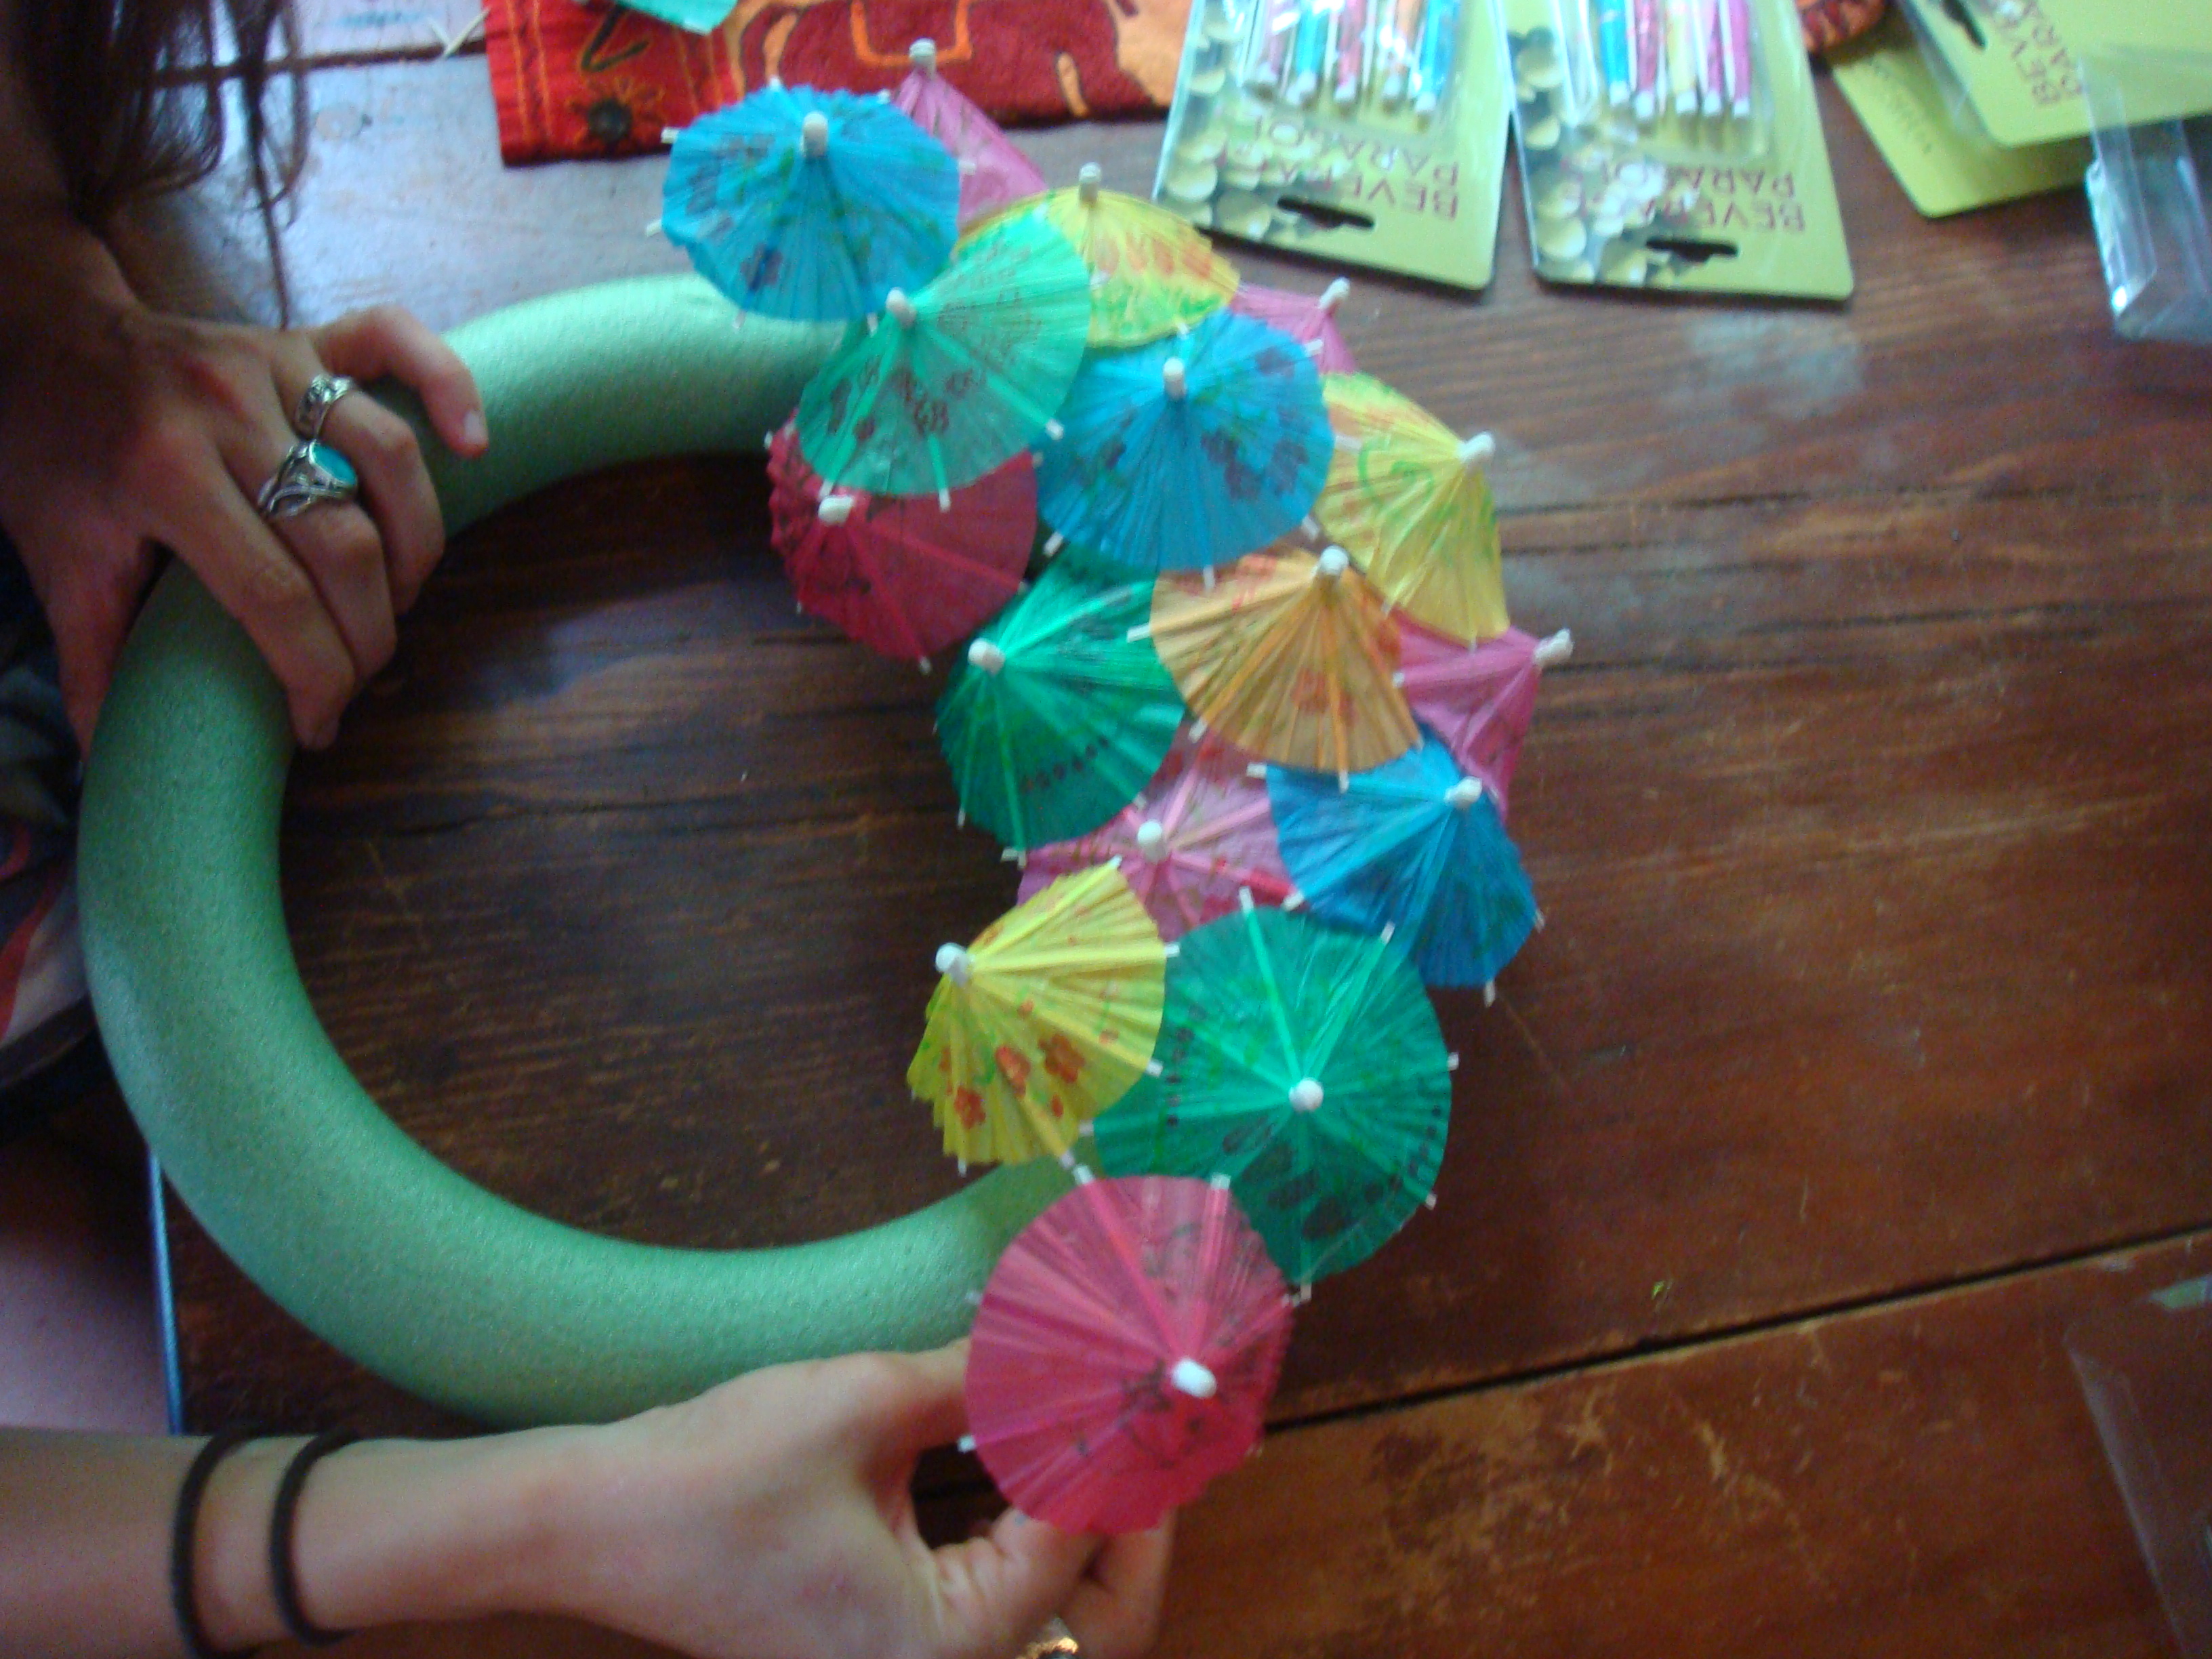
Step 2: Delicately stick the umbrellas in the foam wreath. I chose to alternate the colors randomly to make the design more fun. Make sure the tops of the umbrellas overlap to hide the base of the wreath. It is important to place them at the correct angle to create the pattern.
Tip: Choose the umbrella colors to match your décor. They have all sorts of fun colors and patterns!

Don’t get discouraged if there are a few broken umbrellas in the process 🙂
Work your way around the wreath to create full coverage with the umbrellas.
The last step is to look for any open spots on the wreath that you might have overlooked

And there you have it! A fun display of bright, cheery colors to welcome your guests. Thanks again to Sarah for inviting me to share with you guys. Click here to see our summer wreath collection at The Wreath Depot for more wreath inspiration!


This looks like a neat kid’s activity. You can get large packs of the umbrellas for very cheap.
I made one of these at the beginning of the summer. I used a pool noodle for the base though. It was only $1 instead of $8 or $9.
What a cute craft! I love the bright colors. I enjoy making wreaths, especially for my front door.
wouldn’t that be pretty with some sort of light behind it
I love this idea it’s a great idea that you could add on to too thanks for share
This is super cute and looks fun to make! I would love to try and make one of these, they look so bright and cheery.
What a cute project! I love all the colors.
This Is Soooo Cute! I Will Have To Make This Next Spring/Summer!
I love this idea. It’d be perfect as decoration for a party, or summer time!
Cute! Would be perfect for my daughter’s birthday in April!
“I hope this message finds you well! I’ve been following your progress and I must say, the effort and enthusiasm you put into your projects are remarkable. It’s always a pleasure to see someone so passionate about their work. Keep shining and spreading your positivity!
In den Dama NV Casinos können Spieler legal spielen, da diese eine gültige Lizenz einer Regulierungsbehörde besitzen. So könnt ihr
ohne den Download einer App in einer webbasierten Version spielen. Laut unseren Tests besteht dieser
oftmals aus kombinierten Angeboten aus Freispielen und Bonusguthaben.
Fight Club Casino bietet Spiele von mehreren Anbietern wie iSoftBet, NextGen, Microgaming und NetEnt.
Die Plattform bietet großzügige Promotionen, ein Treueprogramm und alle gängigen Zahlungsmethoden.
Cobra Casino, das 2020 gestartet wurde, bietet eine umfangreiche Spielbibliothek von über
2300 Spielen von 40 bekannten Anbietern. FortuneToWin Casino Ein neues Online-Casino von Dama N.V.,
das Top-Boni und Spiele von 15 Anbietern bietet.
Die Plattform umfasst wöchentliche Reload-Boni, Freispiele, Cashback, Turniere und schnelle Auszahlungen. Die Plattform umfasst wöchentliche Freispiele, Reload-Boni und
alle gängigen Zahlungsmethoden.
Shambala Casino, ein neues Projekt von Dama N.V., bietet vier Willkommensboni von insgesamt 500 Euro und 180 Freispielen oder 5 BTC und 180 Freispielen. Axe Casino, eine neue Seite von Dama
N.V., bietet sechs Einzahlungsboni von insgesamt 5500 Euro und 450 Freispielen. Arlekin Casino, das
im Mai 2021 gestartet wurde, bietet ein Willkommensbonus-Paket von bis zu 5000 Euro und
150 Freispielen.
References:
https://online-spielhallen.de/myempire-casino-auszahlung-im-detail-ihr-ultimativer-guide/
Allerdings könnte die Mindesteinzahlung von mindestens 80 €
pro Woche die Attraktivität des Bonus für Gelegenheitsspieler einschränken. Die Glücksspieler
aus Deutschland erhalten Zugang zu über 300+ neuesten Spielautomaten,
professionellen Bewertungen sowie zuverlässigen und unvoreingenommenen Bewertungen zahlreicher internationaler Casinos.
CasinoSpot.de ist eine Online Casino Website, die
Bewertungen über die Glücksspielindustrie und eine umfangreiche
Sammlung von Glücksspielen und Spielautomaten bietet.
Noch mehr Bargeldboni und Freispiele von Sol Casino erhalten Teilnehmer regelmäßiger Turniere.
Für aktive Spieler hat Sol Casino eine Sonderaktion gestartet,
die Ihnen die Möglichkeit bietet, jede Woche
bis zu 100 Freispiele zu erhalten. Mit über 7.000 Slots, einer Vielzahl von Tischspielen und Live-Casino-Erlebnissen bietet es eine einzigartige Gaming-Umgebung.
Wir werfen auch einen Blick auf spezielle Aktionen wie den Geburtstagsbonus ohne Einzahlung und die regelmäßigen Turniere und Werbeaktionen, bei denen du tolle Preise gewinnen kannst.
In diesem Abschnitt erfährst du alles über
die attraktiven Willkommensboni, No Deposit Boni, und Cashback-Angebote, die das Casino zu bieten hat.
Das Sol Casino bietet eine breite Palette an Boni und Aktionen, die
sowohl neue Spieler als auch Bestandskunden begeistern. Für alle, die auf der Suche nach einem neuen Online-Casino sind, lohnt sich ein Blick auf
unsere anderen Casino-Bewertungen, um das beste Spielerlebnis zu finden.
References:
https://online-spielhallen.de/cobra-casino-login-ihr-tor-zur-digitalen-spielwelt/
An extensive FAQ section covers common topics like PayID payments, registration, withdrawals, and responsible gaming.
Email support provides detailed responses within 24 hours, ideal for complex inquiries
requiring documentation. Response times average under two minutes, with staff trained to handle everything from technical issues to bonus queries.
Touch controls respond instantly, while portrait and landscape modes accommodate different playing preferences.
While there are some areas for improvement, such as high wagering requirements on certain bonuses
and a few minor terms and conditions, the overall experience is positive.
Overall, Leon Casino’s customer support is professional, efficient, and tailored to provide timely solutions for Australian players
at any hour of the day or night. Additionally,
Leon Casino maintains an active presence on social media platforms such as X, Facebook, Instagram, and Telegram, where players can stay updated on news and promotions or reach out for general assistance.
Live chat is the fastest way to get help, connecting you directly with a knowledgeable support agent within minutes, this feature is accessible from the casino’s website and is available to registered users.
Both the app and mobile site support all major functions, including deposits, withdrawals,
and customer support, making it easy to enjoy Leon Casino on the go.
For those who choose not to install the app, Leon Casino’s mobile-optimised
website ensures smooth navigation and gameplay on any smartphone or tablet.
References:
https://blackcoin.co/vip-online-casinos-2023-online-casinos-for-vip-players/
Additionally, you can make payments and authorise changes on the move, all from the convenience of your phone.
Set up Business Banking on your phone through the app for simple, secure authentication. This website is designed for use in the United Kingdom.
The combination of Atif Aslam’s powerful vocals, the collaborative effort
with talented artists, and the visually appealing music video has contributed to the song’s popularity and positive
reception. Explore the polygonal world of Atif Aslam, famous for his musical voice and global appeal.
He has also been in the news for his charity work and surprise
appearance at live events in Dubai and Karachi. This site does not charge for viewing any of our published data,
and we do not accept payments of any kind. Ensure your information is accurate to successfully verify and
access your profile Follow our regular sign-up
process to create a new profile or claim this profile.
Chrome uses cutting-edge safety and security features to help
you manage your safety. Find specific instructions for your device here.
When you set Chrome as your default browser, any link you
click will automatically open in Chrome.
References:
https://blackcoin.co/stay-casino-australia-review-and-bonuses-2025/
Crypto options include Bitcoin, Ethereum, Litecoin, and USDT,
providing a secure and fast way to make transactions.
Cards such as Visa and Mastercard are available for deposits, along with e-wallets like Skrill, Neteller,
and Payz. Registering on King Billy Casino is an effortless three-step process that
gets you ready to dive into the world of gaming in no time.
Mobile access is equally impressive, with a fully responsive site that renders the full 5,000-game library accessible on-the-go without the need
for downloads or installations. Welcome to King Billy Casino, where every spin is a thrilling adventure and every win is a royal treat.
The casino accepts major fiat currencies such as the
US Dollar (USD), Euro (EUR), Canadian Dollar (CAD), and Australian Dollar (AUD), catering
to a broad international audience. This level of encryption is akin to what is used
in financial institutions, offering robust security for online transactions.
King Billy Casino operates under the oversight of reputable gaming authorities, ensuring
its adherence to high standards of fairness,
security, and responsible gaming. Additionally, King Billy Casino
real money bank transfer options are available for those who prefer
traditional banking methods. For those preferring digital wallets, options like Skrill, Neteller, and EcoPayz are available, offering fast and private transactions.
The casino also places a strong emphasis on security, ensuring that
all personal and financial information is protected through
advanced encryption technologies.
References:
https://blackcoin.co/plinkocasino-a-complete-overview/
Whether you prefer classic table games, online slots,
or live dealer experiences, there’s something for everyone.
We highlight the top-rated sites, the most popular games, and the best bonuses available.
Semi professional athlete turned online casino enthusiast, Hannah Cutajar
is no newcomer to the gaming industry.
Join our newsletter and get access to the latest bonuses With two casino floors packed with over
1,500 gaming machines and tables, there’s always something
happening. Check our responsible gambling page for more information about how to manage your bankroll and make sure you stay in control when playing.
This is why I suggest you either time your sessions or take breaks in between games.
Some games can be immersive, and you can easily lose track of time.
References:
https://blackcoin.co/winspirit-casino-login-australia-quick-access-to-premium-gaming/
paypal casino android
References:
https://mcn-kw.com/employer/our-favorite-paypal-casinos-2025-ranking-update
online casino usa paypal
References:
tankra.store
paypal casinos for usa players
References:
https://cello.cnu.ac.kr/ling/bbs/board.php?bo_table=free&wr_id=977248
casino with paypal
References:
https://innovationsgroup.in/employer/2025s-best-paypal-casinos-expert-verified-sites/
online casino roulette paypal
References:
https://starsgrp.net/profile/woodrowantonie
paypal casinos online that accept
References:
http://infuline.co.kr/bbs/board.php?bo_table=free&wr_id=682672