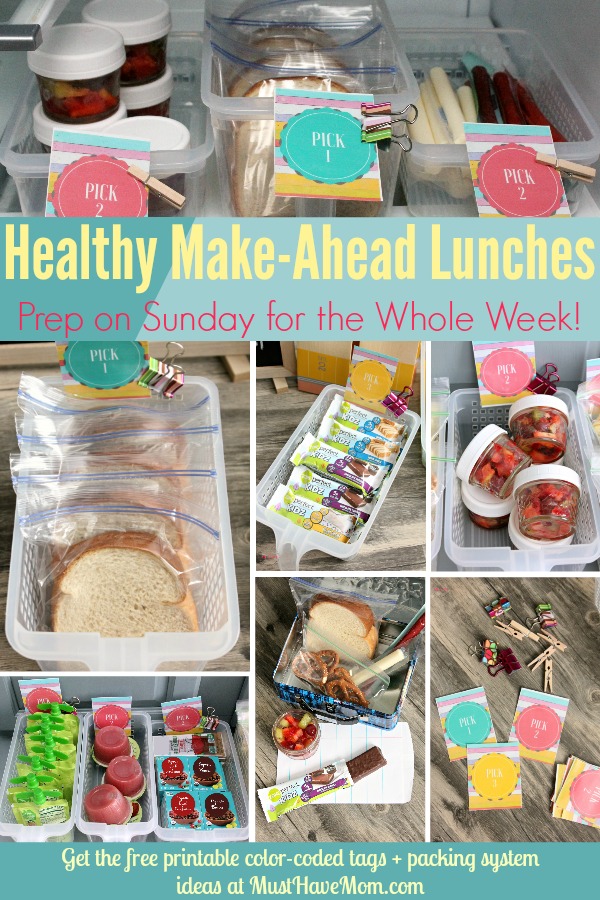
Healthy Make Ahead Lunches for Back To School!
Cold lunches can get boring in a hurry, but not with these healthy make ahead lunches for back to school. I’ll give you my favorite quick and easy tips to pack a healthy lunch every day. The best part? You can prep these on Sunday and your child can pack their own healthy lunch with my guided system!
*This post has been sponsored ZonePerfect. All thoughts and opinions are my own.
I am always struggling to come up with lunch ideas and I get frustrated with my kids lunches coming home only half eaten. When I started to think about it I realized that a lot of times when their lunches came home untouched their response was “I just didn’t feel like eating that”. It wasn’t that they didn’t like the lunch, it was that they weren’t in the mood for what I packed. I know I don’t always feel like eating the same things over and over so I devised a new system that would allow them to pack their lunches everyday, but would guide them so it was a healthy lunch. If I left it up to my 7 year old son he’d pack a cookie and a juice box along with a bag of potato chips and call it good. With my healthy make ahead lunches system, my kids can still pick what they want to eat, but at the end of the process they end up with a healthy, well-rounded lunch.
I hate the morning rush to pack everyone a lunch, feed them breakfast, make sure they are dressed and get them out the door. I came up with a way to prep an entire week of lunches on Sunday so I am only prepping lunches once a week, instead of five times a week. It’s genius and has saved lots of time and frustration in the mornings. Plus the kids eat more of their lunch since they chose what they wanted to eat that day. My healthy make ahead lunches are kid pleasing and come home eaten every day.
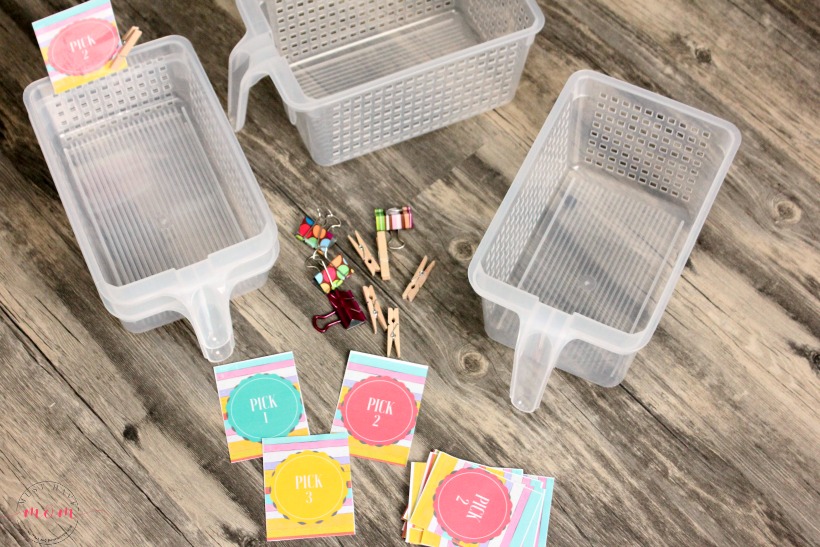
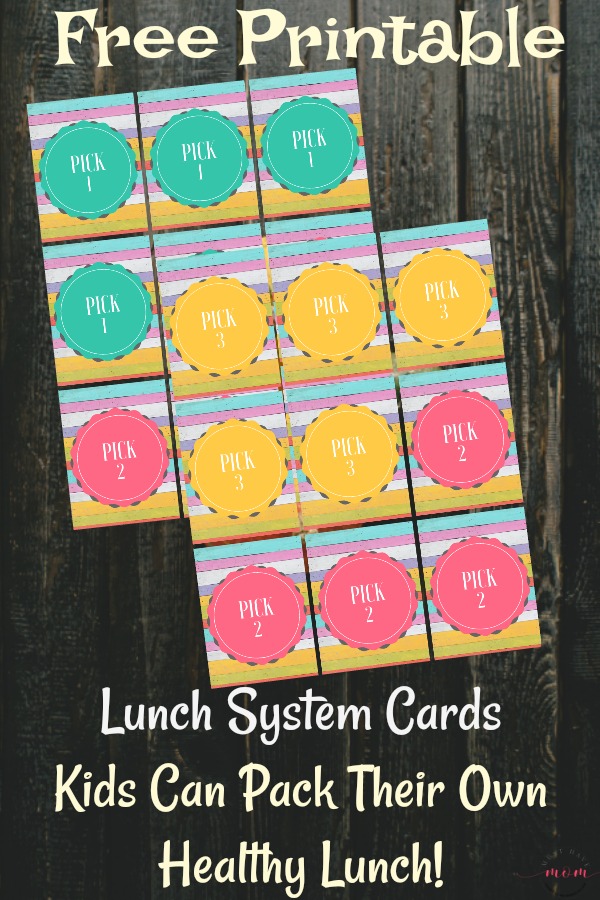
First, you’ll need to get some organizing containers. I picked up some inexpensive pantry baskets to organize our lunch foods in. You’ll also need some clips or mini clothespins and my free printable lunch system cards.
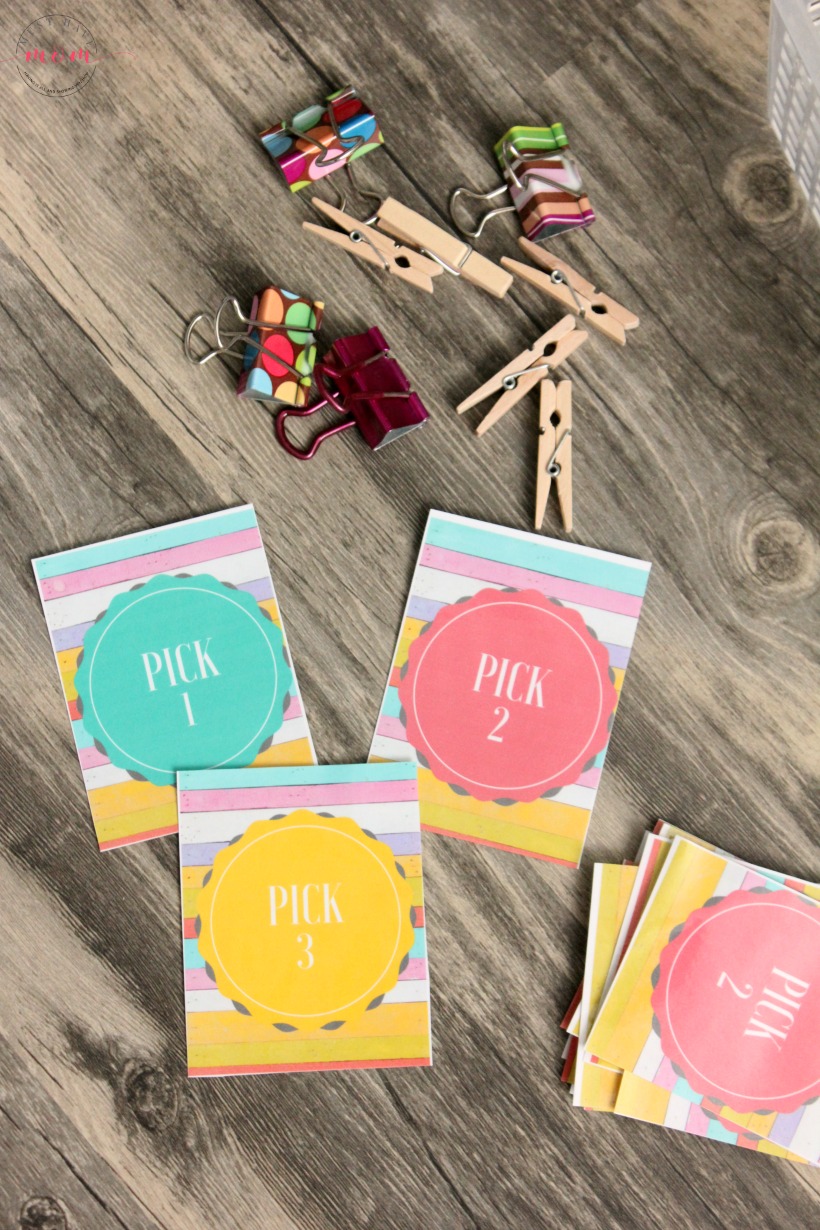
Print out the lunch system cards and then laminate them and cut them apart.
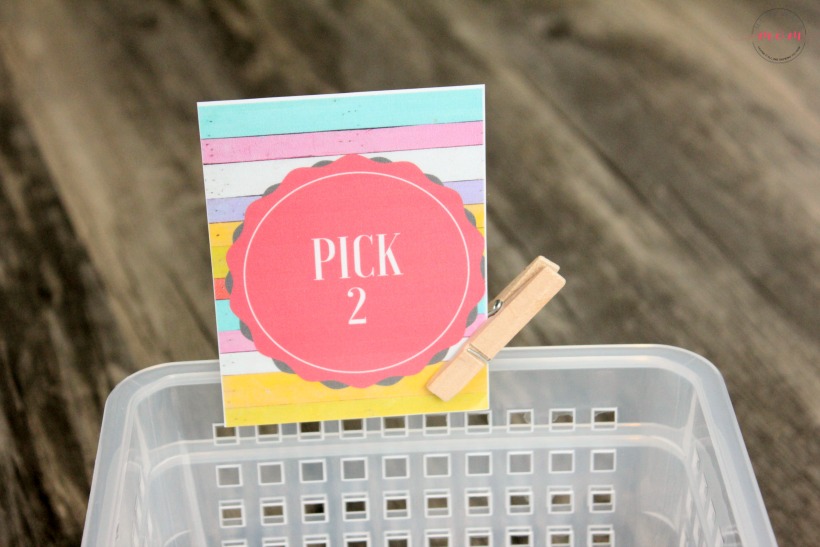
You can use mini clothespins or clips to hold each card on your pantry basket. Now you’ll want to decide how many items of each category you want your child to pack in their lunch. The cards are color coded and allow the child to “Pick 1”, “Pick 2” or “Pick 3” of each item in that color category. For example, I put the pink “Pick 2” tag on carbohydrate snacks like veggie chips and pretzels. They can pick any 2 items from that color category (not any 2 from each basket).
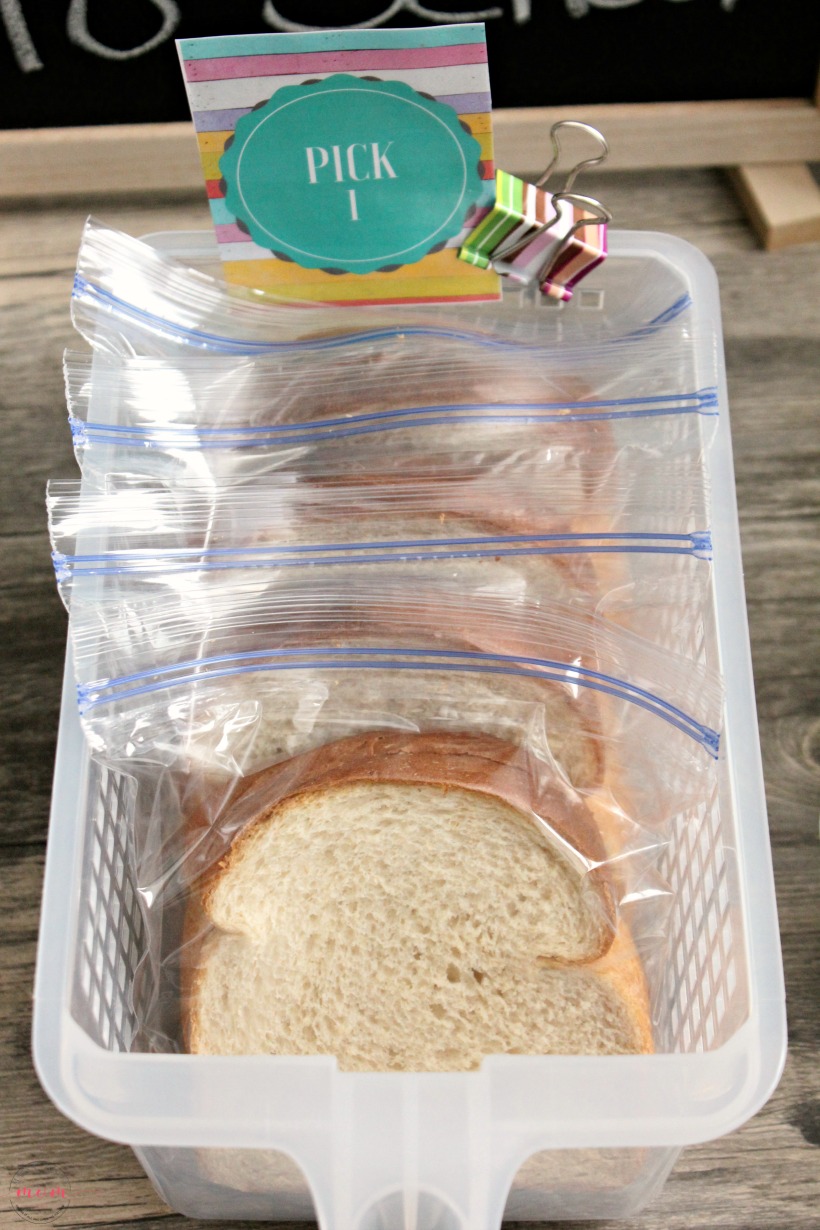
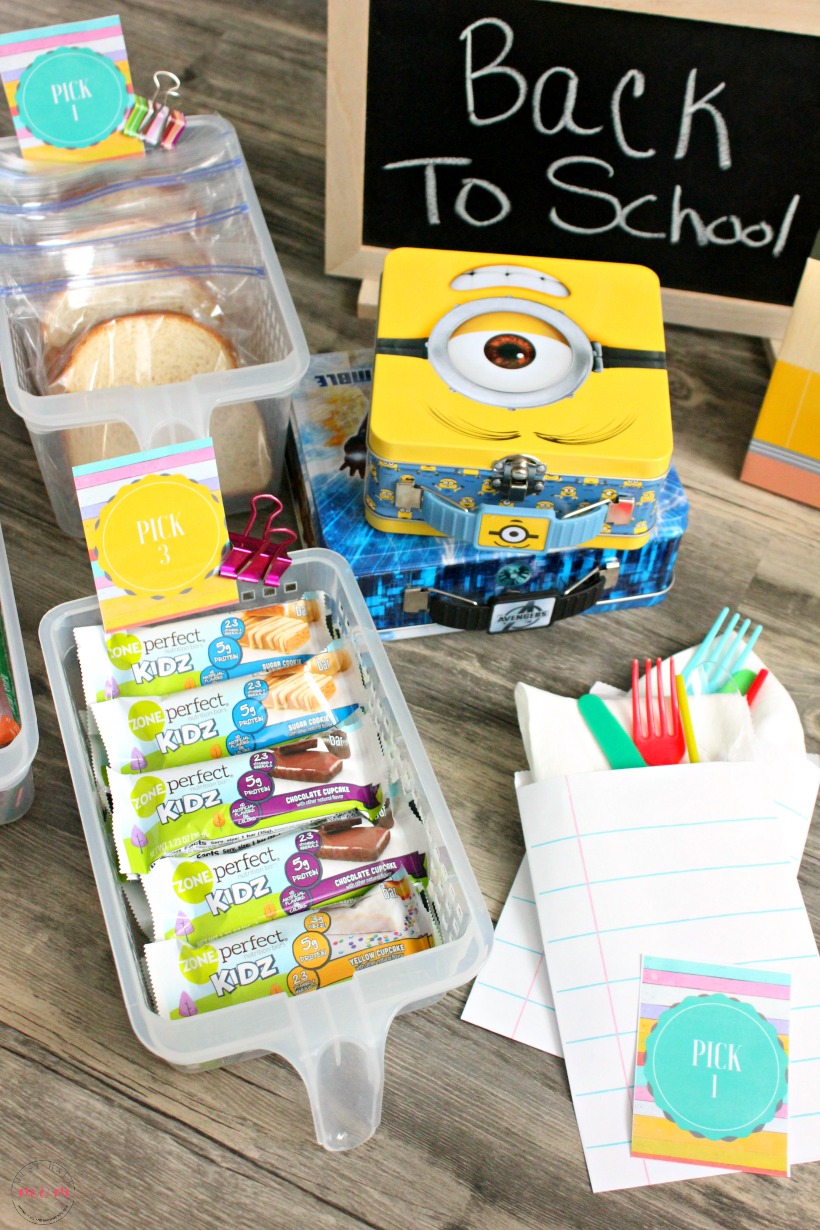
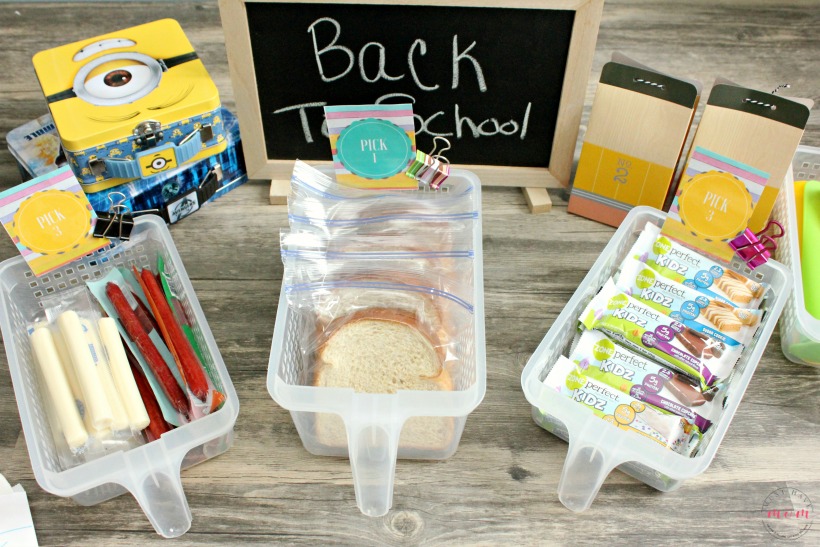
For your “Pick 1” category you should ideally have the main food for their lunch. This can include things like sandwiches, quesadillas, tortilla pinwheels, crackers with meat and cheese, etc. You can prep all of these things on Sunday. My kids are pretty boring and prefer a simple PB&J sandwich. I make a week’s worth of sandwiches on Sunday and freeze them. When they are ready to pack their lunch they grab one from the freezer and by lunch time it is thawed and ready to eat. It’s like making your own homemade uncrustables at a fraction of the cost at the store. I recommend putting peanut butter on each slice of bread first and then putting jelly so that the jelly doesn’t soak through the bread and make it soggy. You can use a sandwich cutout if your kids don’t like crust too.
This also works for meat and cheese sub sandwiches. Just place the meat on each side of the bread and sandwich the cheese between it so it doesn’t get soggy. Then freeze. If your kids like lettuce, mayo and tomatoes on their sandwich then make baggies of those separately and place in the fridge so everything stays fresh for the sandwich once they are ready to eat it.
If your child is a fan of salads then you can make those ahead of time too! Use the directions and recipes in this mason jar salads post to pack a week of salads and keep them fresh for 7 days! My son Carson LOVES salads and often will just order a salad when we go out to eat. Packing him salads for his school lunch is a great way to mix up the routine and give him something he loves.
My kids are generally pretty light eaters so I want to make sure I get plenty of protein choices in front of them. Since my kids also have a sweet tooth I found a genius way to swap out a dessert snack for a protein packed treat that tastes just like dessert, but packs a nutritional punch.
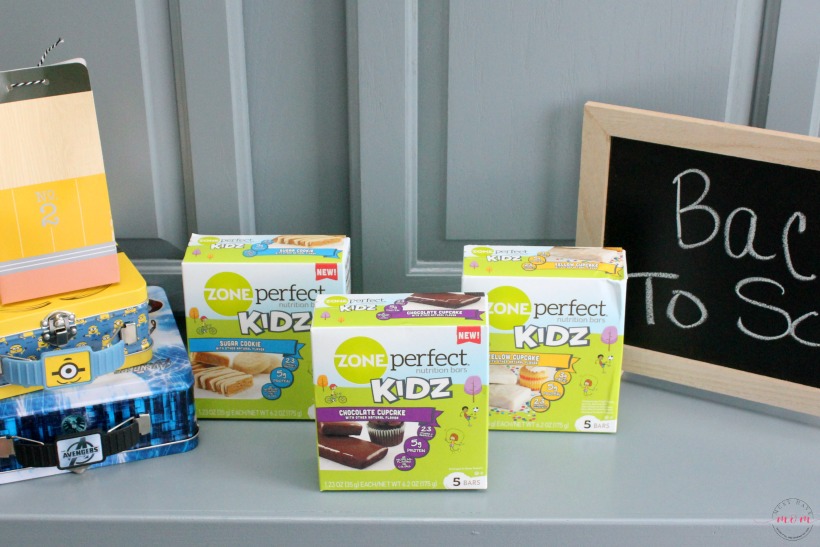
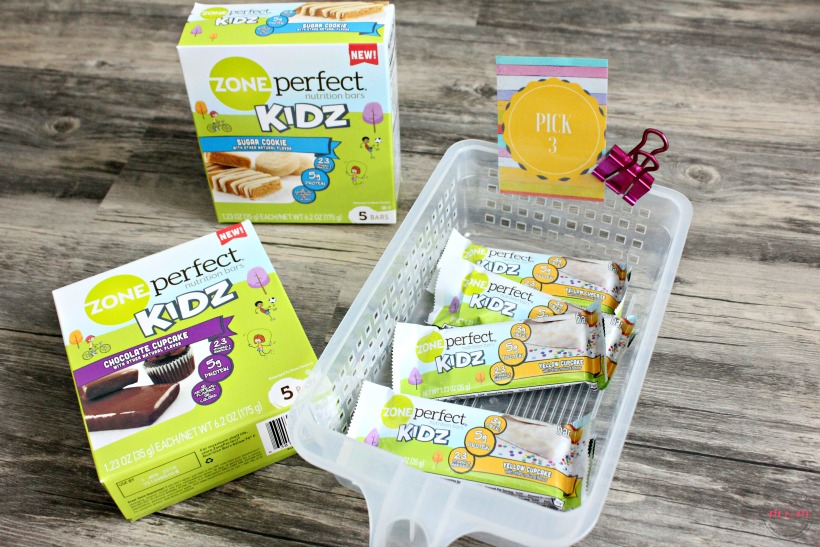
I found these ZonePerfect nutrition bars at Target in yummy flavors like chocolate cupcake, yellow cupcake and sugar cookie. They pack 5 grams of protein, 23 vitamins and minerals and have no artificial flavors or colors. I felt like I hit the jackpot, but the real test would be if my kids thought they tasted like dessert. I grabbed all 3 flavors and brought them home for a taste test. My kids literally devoured their taste test portions and begged for more. I count that as a win!
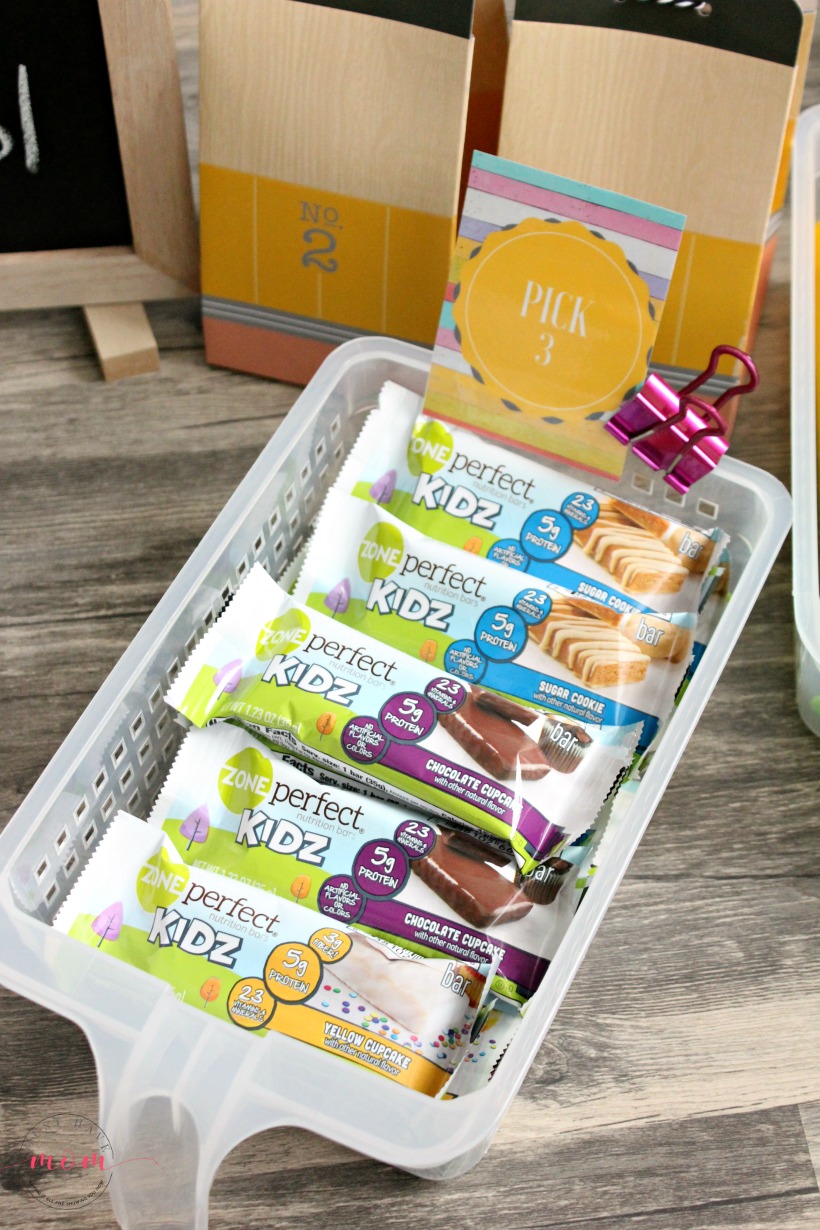
Instead of offering up cookies or cake treats for their lunches, I offer the ZonePerfect Kidz nutritional bars and my kids are equally satisfied by these treats. Plus, they are getting a protein packed treat that will help fill them up and fuel their school day. I admit that I have also stolen these bars when I need a quick, easy snack and they really do taste like their treat counterparts. It’s quite amazing how much chocolate cupcake tastes exactly like a chocolate cupcake.
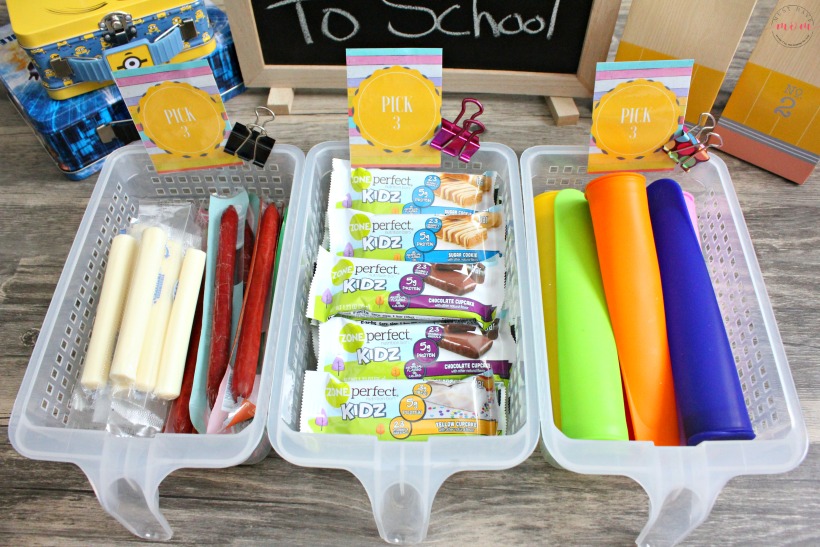
Protein is my “Pick 3” category and I offer up homemade yogurt tubes which I make ahead and freeze. They are thawed by lunch time. I also include the ZonePerfect Kidz nutritional bars, beef sticks, cheese sticks, hummus, peanut butter, nuts, trail mix, and hard boiled eggs. I rotate which options are available each week and I portion/prep them every Sunday.
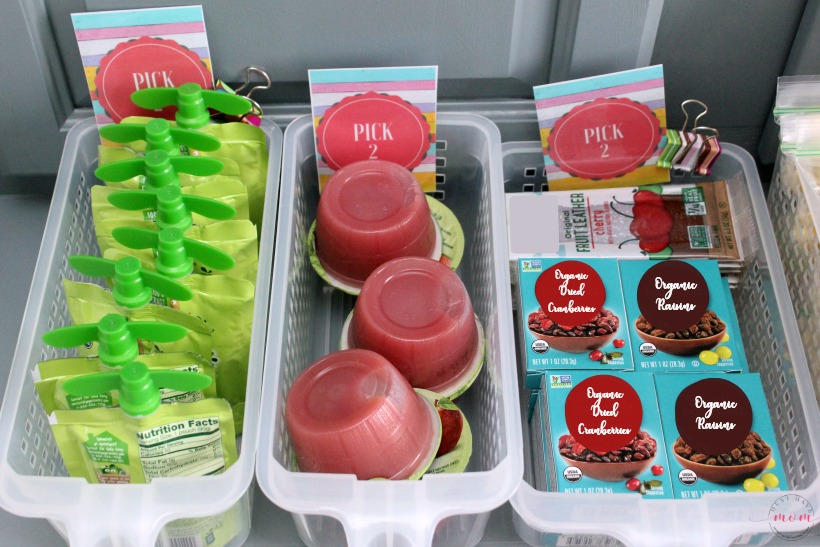
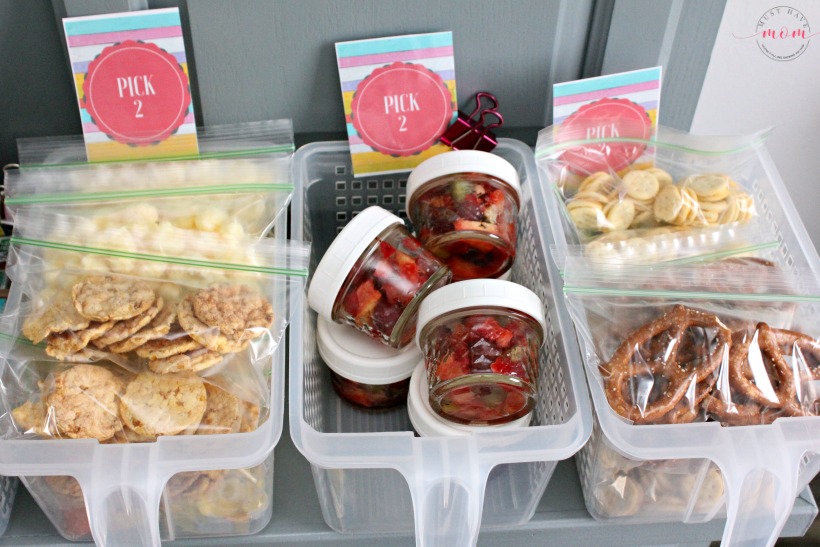
For my “Pick 2” category I offer up fruits and vegetables. I rotate foods such as applesauce, dried cranberries, raisins, fruit cups, cherry tomatoes, carrots and homemade ranch dressing, celery, homemade fruit leather, dried fruit, easy peel tangerines, etc.
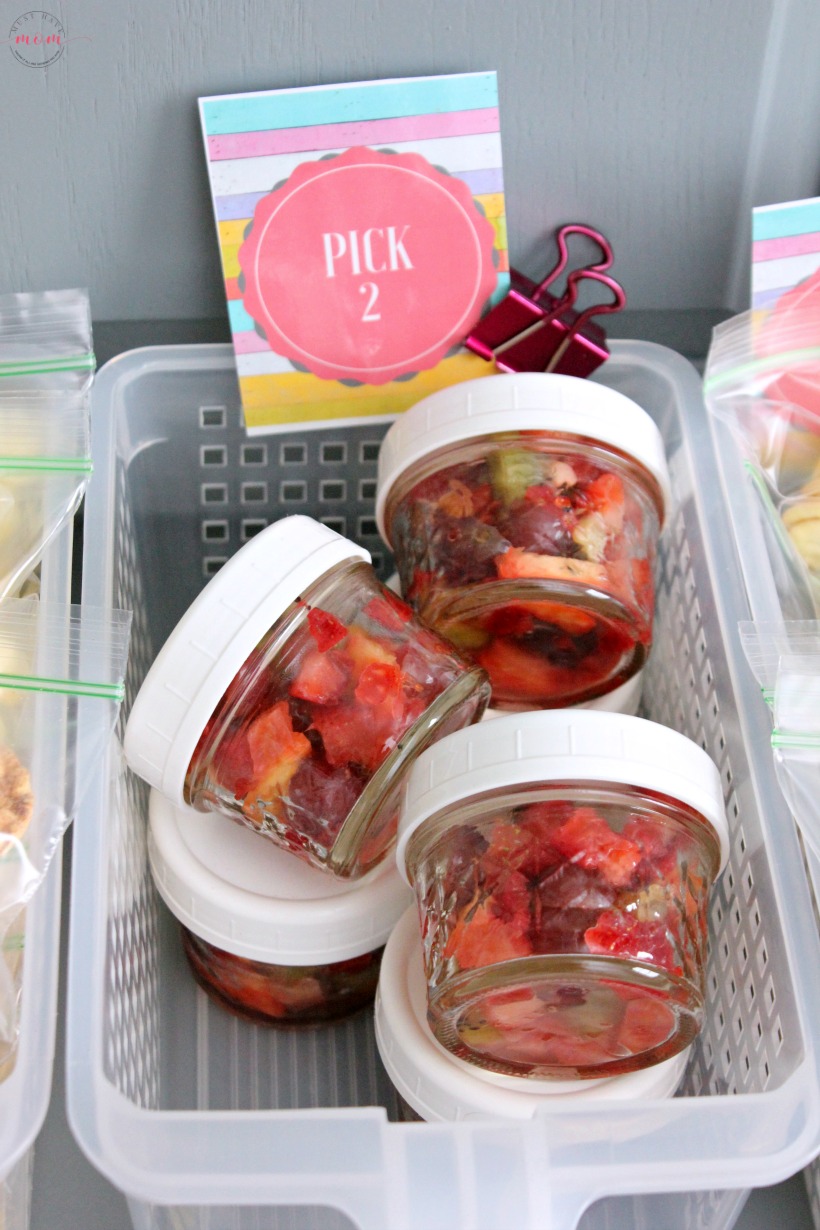
I find the easiest way to prep my fruit for the week, and ensure that it doesn’t go bad by the end of the week, is to clean and dice it and put it in small glass mason jars with lids. I have been doing this for years and the fruit will last an entire week (or more) in the fridge this way. If I leave my strawberries in my fridge without doing anything with them, they are bad by the end of the week. By washing it and cutting it up and putting it in the glass jars it stays fresh for SO much longer. The trick here is the glass jars. They somehow help keep fruit fresh for way longer than any other method I’ve tried. No need for vinegar washing or fancy prepping. Just clean and cut up as normal and put in the jars. Trust me, it will last all week! Fruits that work well for this method (that I’ve personally used and had stay fresh for a week+) are: strawberries, pineapple, kiwi, grapes, halos, blueberries, and blackberries.
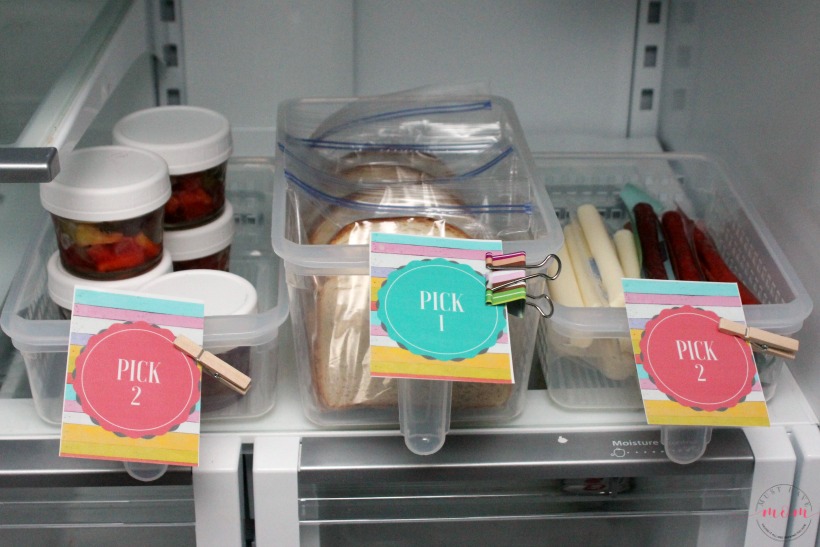
Place the refrigerated foods on a shelf in your fridge and attach the card you want for the number of items they can pick from each color category (remember they wouldn’t be picking two fruit jars from this picture, but would be taking two pinks total – ex: a fruit cup and a cheese stick, along with 1 sandwich).
You can either place the snacks that don’t require refrigeration (carbs and snacks) in your pantry or you can put them out on the sideboard in the morning for the kids to pick from. Of course, the easier option is in the pantry, but if you are low on space then placing them out in the morning works too!
My carbohydrates are also a “Pick 2” category and I include the following foods in rotation: veggie chips, rice cakes, pretzels, peanut butter crackers, cheese cracker sandwiches, puff corn, homemade cheese crackers, wheat crackers, corn nuts, popcorn, and snack mix.
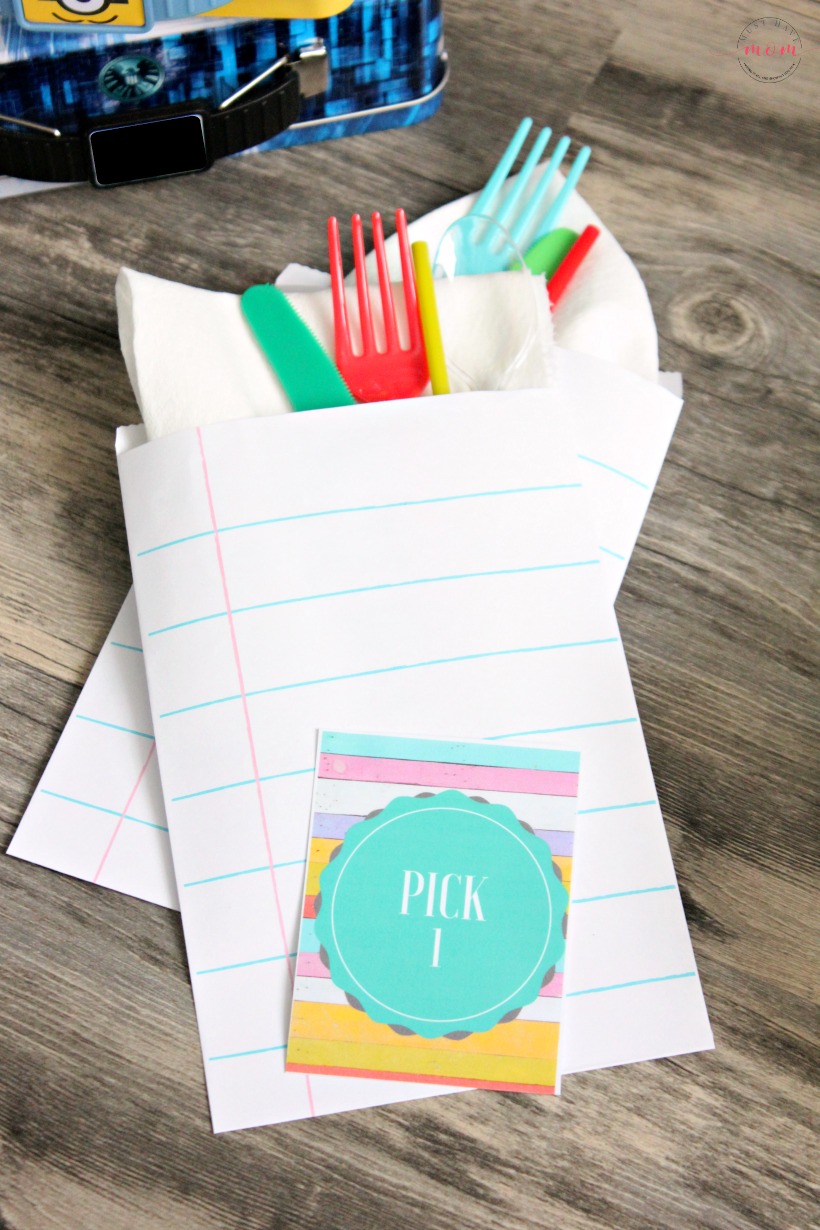
I also make little packets with a napkin and disposable silverware that they can grab and toss in their lunch pail. This ensures that everything they need for their lunch is packed and they aren’t left without a fork for their salad or a spoon for their fruit cup.
Don’t forget to include drinks as well. I keep juice boxes, milk and water in the door of the fridge and they can pick one of those as well.
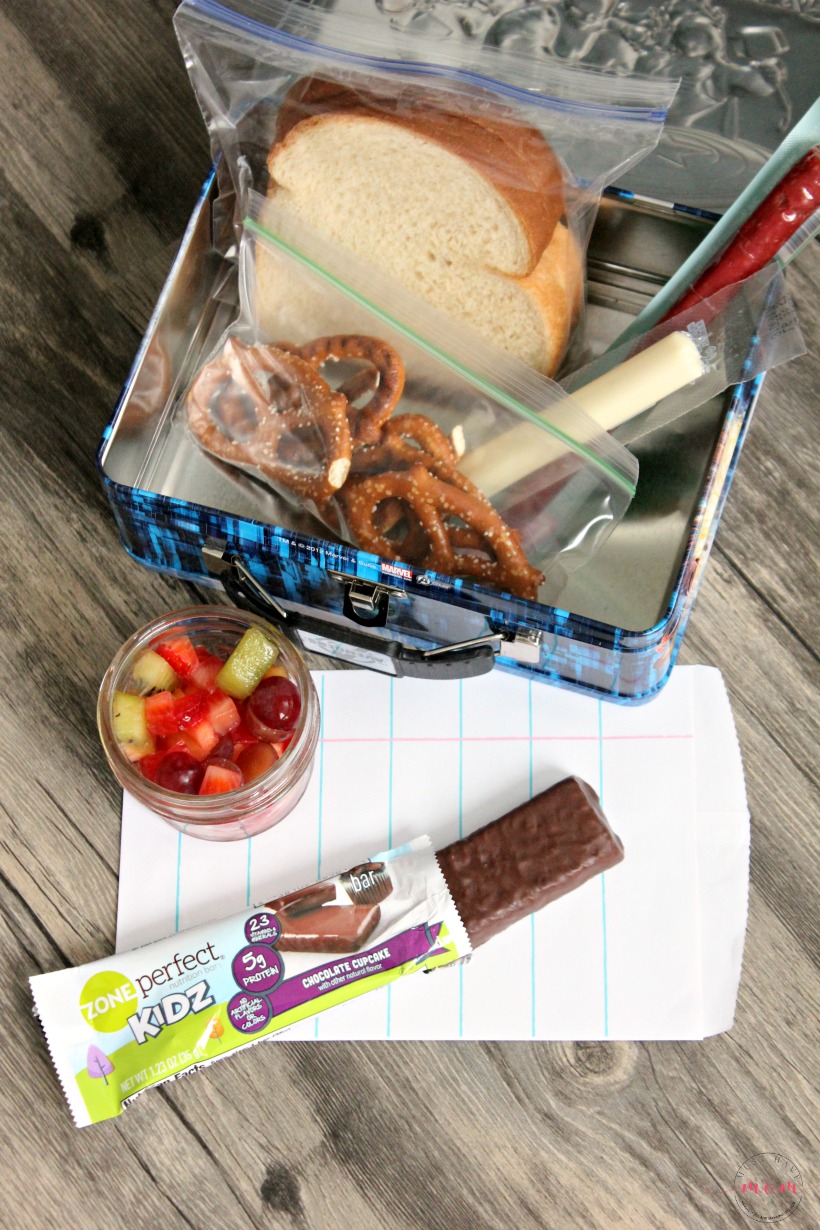
Here is an example of one of the healthy make ahead lunches that my child packed himself. By picking the proper amount of items from each labeled category he was able to pack a well-rounded lunch that has every food group covered. Plus, he packed what HE wanted to eat that day so he actually ate it! Mom for the win!

Want to try my treat-swap trick with your kids? Here is a coupon for ZonePerfect Kidz nutritional bars so you can try them AND save money! Win!
Print the Make Ahead Lunches Cards:
Print the lunch system cards and laminate them, then cut them out.
Pin the Healthy Make Ahead Lunches:


I love this! I’m bookmarking this. It’s going to save me so much time this year. I love you so much right now.
OH I am totally doing this! School is about to start here so this is coming at the right time! I can’t wait to do this!
This is such a clever way to prepare lunches and give your kids some choices! I should have used a system like this!
I love this idea! It gives the kids a sense of independence. It gives you peace of mind they are eating healthy. Brilliant!
Exactly! They love getting to pick what they are in the mood for too!
This idea is just genius! LOVE this idea! Absolutely using this for when my kids go back to school!
I’m glad you found it helpful!
Where did you get the lass jars? Love this idea!
They are actually just little jelly jars you’d use for canning. Like these (amazon affiliate link) http://amzn.to/2wdl4u8
Where did you purchase the plastic lids?
Amazon! Here is the link for the package that has both wide mouth and regular mouth sizes: https://amzn.to/2MGKidq
This is a fantastic idea for lunches. I will have to try this for when school gets back in. It will make things so much easier.
This is a great idea that we will also be implementing in our home. It makes lunch prep mega easy for my 3 kids.
Yes, I am all for EASY mornings and prepping ahead. Let me know how it works!
I am loving this! I am going to print out your cards to give this a try!
Thanks! Let me know how it works for you
I LOVE this! School lunches are always a struggle for me. Your ideas will make it a whole lot easier. Fantastic!
This has seriously got to be the BEST idea for kids lunch ever. You have won the internet with this one! Shoot, I was lucky to get a peanut butter and jelly sandwich (and I had to make it myself!)
Haha perhaps this was inspired by my own childhood lunches…a bag of goldfish and a twix bar! haha
I’m seriously impressed that you can get it all done Sunday. I need to try that freezing PB & J trick with the double peanut butter. Well, sunflower butter since the kids’ school is nut-free.
It is such a huge help to get it all done on Sunday! Makes the rest of the week go more smoothly!
I loved how those bacon were divided into small containers, it’s a go to lunch in the fridge. Perfect for on the go office workers too!
I totally LOVE this system and will see if I can tailor this for my teenagers. Thanks for sharing your system on Merry Monday.
Thank you! Yes, teenagers eat so much it would be great to use to get them to eat all the food groups 🙂
yes totally aggreged and also love this for the teens
I love this idea, but I’m slightly confused.
Here is what I understand:
Pick 1: Main
Pick 2: Carb
Pick 3: Protein
Pick 2: FRuit/Veggie
That totals 8 items, but I only see 6 items in your example photo. Can you clarify for me? Thank you so much!!
Sure Tiffany! This system is meant to be flexible to your own way of eating/likes etc. So you can use the Pick 1 for your main item (like the sandwich or salad), Carbs can be a Pick 2 category if you want (give them options in that category) and pick 3 could be your fruit/veg category (give options in that category). If you want to add in other food groups you can add them in and choose which number they can pick from. It’s meant to be a flexible system for the foods you have on hand that week and will change each week with your options you present your kids with. Maybe the following week carbs will be a pick 3 and fruit/veg will be a pick 2 because you are low on fruit/veg but have lots of carbs on hand. I hope that makes sense! The example lunch has 6 items based on the choices I had available for my child that week. It varies week to week 🙂
Thank you! Love the idea. I already bought some tubs. Now, I’m just trying to organize my thinking.
How did you make the little packages that hold the utensils and napkin.
Thank you for this post! I have an extreme picky eater and I bought the bars you suggested. They were a hit!
This is such a wonderful idea. By doing this it would save so much time in the morning.
Great ideas. Our 12-year-old granddaughter now will pack her own lunch in the evening for the following day but with guidance from Mom. Once she decided what she wishes to enjoy the next day, she will leave it out next to her bag for Mom to OK. Mom may veto a choice and then guide her to a more healthy one. Even a 12-year-old still need help as they often only see the yum stuff iso of the healthy stuff.
Thank you for sharing your links with us at #273 SSPS Linky. See you again next week.
After medical school, my next step is culinary school. Hoping cooking won’t be as challenging as medicine; even with help from nursing essay writing pros, medical studies were tough for me. I excited for a flavorful career change!
I love the idea of incorporating make-ahead lunches into our back-to-school routine. Whether it’s preparing batches of homemade soups, salads, sandwiches, or grain bowls on the weekends, having pre-made meals ready to grab and go ensures that we have healthy options readily available when hunger strikes.
Additionally, involving kids in the meal planning and preparation process can be a fun and educational activity. Encouraging them to choose their favorite fruits and veggies, assemble their own wraps or sandwiches, or pack their lunch boxes helps instill healthy eating habits from a young age and empowers them to make nutritious choices.
In today’s fast-paced world, where convenience often trumps nutrition, taking the time to prioritize healthy make-ahead lunches is a valuable investment in our overall well-being. By fueling our bodies with wholesome foods, we not only support dunkin donuts superbowl ben affleck orange tracksuit physical health but also promote mental clarity, focus, and academic success.
Here’s to a successful and nourishing school year ahead filled with delicious, nutritious make-ahead lunches that keep us energized and ready to tackle whatever challenges come our way
Interesting topic for a blog. I have been searching the Internet for fun and came upon your website. Fabulous post. Thanks a ton for sharing your knowledge! It is someone write my assignment to see that some people still put in an effort into managing their websites. I’ll be sure to check back again real soon.
Looking for discounts on academic assistance? Check out the 123HelpMe promo code review on https://nocramming.com/123helpme-promo-code . This review offers insights into how you can save money on their services. With their promo codes, accessing quality essays and research papers becomes more affordable than ever. Don’t miss out on the chance to unlock great discounts and enhance your academic journey.
We needed reliable, small containers for our deli items, and the 8 oz Tamper-Evident Containers with Flat Lid were perfect. I discovered them through an online search and purchased them from McDonald Paper: https://mcdonaldpaper.com/dart-ch8def-8-oz-clear-tamper-evident-containers-with-flat-lid-200-cs/ . These containers keep our products secure and fresh, with an easy-to-use flat lid.
I mean, this is the most brilliant concept for a kid’s lunch ever. This one has won you the internet! My luck ran out when I made my own peanut butter and basketball stars jelly sandwich, but at least I got one!
I would want to thank you for your efforts in reading this.
This information is quite impressive, and I enjoy reading it. I discovered the importance of sharing it with my friends.
This topic is always interesting to me and hard to find information about. Thanks for sharing it with us. I’ll definitely give it a full rating after reading more killer frost jacket about the idea in this article. You did a great job!
If you live in Kenya and want to discover the world of gambling and sports betting, you need to choose a reliable bookmaker and online casino. I was looking for a place where I could both play games and bet on sports. And I managed to find this https://1win.info.ke/ site. It is really very convenient and it has a good reputation among players from Kenya.
Amazing…
Need a lifeline for your management coursework? My Assignment Help offers top-notch academic writing support to keep you afloat. Our native PhD writers deliver plagiarism-free work that hits the mark, whether you need assignment help Liverpool or anywhere else. From quick 24-hour homework help to comprehensive PhD thesis assistance, we’ve got you covered. With round-the-clock live support and the best prices in the industry, affordable assignment help is just a click away. Our 100% satisfaction guarantee and full refund policy mean you can breathe easy knowing your grades are in good hands. Don’t let assignments drag you down – get university homework help that propels you to the top of the class.
Visit:
https://globalassignmentexpert.com/uk/liverpool-assignment-help
Such a very useful article. Very interesting to read this article.I would like to thank you for the efforts you had made for writing this awesome article
mens gothic pants
People nowadays are more interested in the latest fashion brands and following celebrities style on that so don’t forget to check it this Leave The World Behind 2023 Julia Roberts Blue Sweater.
I was taking a gander at some of your posts on this site and I consider this site is truly informational! Keep setting up. 야구 스포츠중계
Extremely intriguing online journal. A lot of web journals I see nowadays don’t generally give anything that I’m keen on, however I’m most definitely inspired by this one. Recently felt that I would post and let you know.
내 웹 사이트에서 비슷한 텍스트를 볼 수 있습니다. 바카라사이트
If you’re in the food service industry or just own a Hoshizaki ice machine, I’d highly recommend checking out https://hoshizaki.manymanuals.com/ for all your manual needs. We use a Hoshizaki ice maker at our restaurant, and recently, it started having some issues. I couldn’t find the original manual, but this site had exactly what I needed. I was able to download the manual quickly, and it had all the information I needed to troubleshoot and fix the machine. The site is really user-friendly, with a search function that makes it easy to find the exact model you’re looking for. One thing I found particularly useful was the detailed maintenance schedule in the manual—it’s helped us keep the machine running smoothly and avoid costly repairs. Another tip: the manual also includes instructions on how to properly clean and sanitize the machine, which is crucial for health and safety compliance. If you’re responsible for maintaining a Hoshizaki ice machine, this site is a must-have resource that will save you time and money.
유쾌한 게시물,이 매혹적인 작업을 계속 인식하십시오. 이 주제가이 사이트에서 마찬가지로 확보되고 있다는 것을 진심으로 알고 있으므로 이에 대해 이야기 할 시간을 마련 해주셔서 감사합니다! opga
Very Nice Blog Thanks for sharing This Useful information. antminer s21
안녕하세요. GOOGLE을 사용하여 블로그를 찾았습니다. 이것은 아주 잘 쓰여진 기사입니다. 나는 그것을 북마크하고 당신의 유용한 정보를 더 읽기 위해 돌아올 것입니다. 게시물 주셔서 감사합니다. 꼭 돌아 올게요. 오피뷰
많은 사람들에게 이것은 중요하므로 내 프로필을 확인하십시오. 메이저카지노사이트
유쾌한 게시물,이 매혹적인 작업을 계속 인식하십시오. 이 주제가이 사이트에서 마찬가지로 확보되고 있다는 것을 진심으로 알고 있으므로 이에 대해 이야기 할 시간을 마련 해주셔서 감사합니다! 오피쓰
흠 !! 이 블로그는 정말 멋져요. 정말 운이 좋아 여기에 도달해서 멋진 정보를 얻었습니다. 다파벳
안녕하세요 좋은 정보를 공유하고 싶습니다. 좋은 정보를 얻으십시오. 좋은 정보를 얻을 것입니다. 코로나 때문에 모두 힘들 겠지만 최선을 다해주세요. 코로나가 곧 사라지 길 바랍니다. 누구나 힘들 겠지만 더 견디고 좋은 결과를 얻을 수 있기를 바랍니다. 감사합니다 바카라추천
나는 그들이 매우 도움이 될 것이라고 확신하기 때문에 사람들을 귀하의 사이트로 다시 보내기 위해 귀하의 사이트를 내 소셜 미디어 계정에 추가하고 공유했습니다. 오피사이트
긍정적 인 사이트,이 게시물에 대한 정보를 어디서 얻었습니까? 나는 그것을 발견하게되어 기쁘다. 당신이 어떤 추가 포스트를 포함하는지 곧 확인하기 위해 곧 다시 확인할 것이다. 바카라
You have performed a great job on this article. It’s very precise and highly qualitative. You have even managed to make it readable and easy to read. You have some real writing talent. Thank you so much EPL중계
” ‘훌륭한 유용한 리소스를 무료로 제공하는 가격을 알 수있는 웹 사이트를 보는 것이 좋습니다. 귀하의 게시물을 읽는 것이 정말 마음에 들었습니다. 감사합니다! 훌륭한 읽기, 긍정적 인 사이트,이 게시물에 대한 정보를 어디서 얻었습니까? 지금 귀하의 웹 사이트에서 몇 가지 기사를 읽었으며 귀하의 스타일이 정말 마음에 듭니다. 백만명에게 감사하고 효과적인 작업을 계속하십시오. 링크모음 사이트 링크맵
이 기사는 기사 역사상 최고 중 하나입니다. 나는 골동품 ‘Article’수집가이고 때때로 그것들을 흥미롭게 읽습니다. 스포츠중계
Intriguing post. I Have Been pondering about this issue, so much obliged for posting. Really cool post.It “s truly extremely pleasant and Useful post.Thanks
” ‘훌륭한 유용한 리소스를 무료로 제공하는 가격을 알 수있는 웹 사이트를 보는 것이 좋습니다. 귀하의 게시물을 읽는 것이 정말 마음에 들었습니다. 감사합니다! 훌륭한 읽기, 긍정적 인 사이트,이 게시물에 대한 정보를 어디서 얻었습니까? 지금 귀하의 웹 사이트에서 몇 가지 기사를 읽었으며 귀하의 스타일이 정말 마음에 듭니다. 백만명에게 감사하고 효과적인 작업을 계속하십시오. 바카라
” ‘훌륭한 유용한 리소스를 무료로 제공하는 가격을 알 수있는 웹 사이트를 보는 것이 좋습니다. 귀하의 게시물을 읽는 것이 정말 마음에 들었습니다. 감사합니다! 훌륭한 읽기, 긍정적 인 사이트,이 게시물에 대한 정보를 어디서 얻었습니까? 지금 귀하의 웹 사이트에서 몇 가지 기사를 읽었으며 귀하의 스타일이 정말 마음에 듭니다. 백만명에게 감사하고 효과적인 작업을 계속하십시오. 먹튀검증
완전히 흥미로운 블로그 게시입니다. 저는 종종 Diwali Bumper Lottery에 대한 내 프로젝트의 도움을 위해 귀하의 게시물을 방문하고 귀하의 슈퍼 쓰기 기능은 진정으로 당황스러워했습니다.이 게시에 대해 많이 감사합니다. 올인구조대
You guardians do an astounding web diary, and have some unfathomable substance. Continue doing extraordinary.
나는 이것이 유익한 게시물이라고 생각하며 매우 유용하고 지식이 풍부합니다. 따라서이 기사를 작성하는 데 많은 노력을 기울여 주셔서 감사합니다. 먹튀검증
You folks have created an amazing blog with some fantastic content. Keep up the great work!
I genuinely believed you would probably have something useful to say. All I hear is a bunch of whining about something that you can fix if you were not too busy looking for attention. After all, I know it was my choice to read..
Love this post on healthy make ahead lunches for back to school such a great way to stay organized and nourish throughout the day! On the other fashion note, Mark Wahlberg Green Jacket is a fantastic pick for this season.
It is quite beneficial, although think about the facts when it reaches this target soi cầu 247
Such a very useful article. Very interesting to read this article. mens gothic trench coat I would like to thank you for the efforts you had made for writing this awesome article.
Blogging is an amazing way to reach a wide audience and share your knowledge. It’s an outlet where you can express your thoughts and ideas freely. Regular blog posts keep your readers engaged and help you refine your writing. Over time, your blog becomes a platform where people can learn and feel inspired. Keep writing, and enjoy the process.
This post is exactly what I needed today! Your words are so motivational and filled with a refreshing dose of positivity. It’s amazing how you consistently bring such uplifting energy to your content. You have a knack for turning even the simplest topics into something empowering. Thank you for being a beacon of light and inspiration!
Incredible post!” I love how you’ve broken down complex ideas into easy-to-understand points. This really makes the topic less overwhelming. I’ve been searching for clear explanations like this, and your approach is spot-on. It’s also relaxing to read something that doesn’t feel too technical or dry. Keep up the great work; you’ve definitely earned a new follower.
Your blog layout is absolutely gorgeous! How long have you been in the blogging game? You make it look effortless. The design is sleek, and your content is truly captivating. Check out more insights like these here. 강남 출장마사지
I love significantly your own post! I look at all post is great. I discovered your personal content using bing search. Discover my webpage is a great one as you.I work to create several content this post. Once more you can thank you and keep it create! Enjoy! bandar slot
I really loved reading your blog. It was very well authored and easy to undertand. Unlike additional blogs I have read which are really not tht good. I also found your posts very interesting. In fact after reading. I had to go show it to my friend and he ejoyed it as well!
Thanks for taking the time to discuss that, I feel strongly about this and so really like getting to know more on this kind of field. Do you mind updating your blog post with additional insight? It should be really useful for all of us.
I am happy to find your distinguished way of writing the post. Now you make it easy for me to understand and implement the concept. Thank you for the post. slot thailand
I truly enjoyed reading your post! It’s impressive how much effort you put into gathering the information for this article. I’ve gone through a few more of your articles, and your writing style really stands out. You have a fantastic blog, and I look forward to more of your insightful topics. Keep up the great work! The effort you invest in your content is evident, and I’ll be sure to keep checking back for more valuable posts. Thanks for sharing such useful information, it’s much appreciated!
WOW!!! Just found your blog. THIS IS AMAZING!!!!
Your post is very helpful to get some effective tips to reduce weight properly. You have shared various nice photos of the same. I would like to thank you for sharing these tips. Surely I will try this at home. Keep updating more simple tips like this.
A lot of people having an incorrect image about the cash advance loans or sometimes refer it as bad credit payday loans.
“Great lunch ideas for back to school—so easy and delicious! Perfect for meal prepping! ???? #BackToSchool #MealPrep”
I think this is a really good article. You make this information interesting and engaging.
Expert Assignment Help Jordan delivers plagiarism-free, accurate assignments that help students tackle challenging academic topics effortlessly.
Marketing Assignment Help ensures academic success with customized, plagiarism-free solutions that tackle complex marketing topics effectively.
One present why galore businesses opt for postcards is because they are overmuch cheaper to be prefab and this can forbear a lot of expenses on the lengthened run. anonymous crypto casinos
I found so many interesting stuff in your blog especially its discussion. Really its great article. Keep it up. anonymous crypto casinos
A fantastic example of how technology can revolutionize education and make learning accessible to all. yeti878
The lessons are detailed and well-researched, providing depth while remaining approachable for a wide audience. Pikbet88
I think this post is beneficial and full of useful information. So, I’d like to thank you for all the hard work you put into writing this article fnaf
A very awesome blog post. We are really grateful for your blog post. You will find a lot of approaches after visiting your post. I was exactly searching for. Thanks for such post and please keep it up. Great work ddos attack
Just pure classic stuff from you here. I have never seen such a brilliantly written article in a long time. I am thankful to you that you produced this!
Tamang pagpili para sa bawat pangangailangan..Drop Ball
This article is packed with practical tips for making back-to-school lunches stress-free while keeping them healthy and kid-approved. I love the idea of using a label system to guide kids in packing their own lunches—it’s such a smart way to teach independence while ensuring balanced meals. Prepping everything on Sunday is another game-changer for busy mornings.
The detailed suggestions for organizing and storing food, like using glass jars to keep fruit fresh, are incredibly helpful. Plus, incorporating protein-packed snacks like the ZonePerfect bars is a clever way to satisfy sweet cravings while boosting nutrition.
For those juggling school and extracurricular activities, systems like this save so much time. If you’re overwhelmed balancing parenting and school schedules, tools like a https://edubirdie.com/law-essay-writing-service law essay writing service can help free up your time for family priorities!
I really appreciate to read this blog it is very helpful and inspiring content good work keep it up
This blog was extremely helpful. I really appreciate your kindness in sharing this with me and everyone else!
Love these healthy lunch ideas—such a great way to kick off the school year! Nurses could also explore business ideas for nurses by creating meal planning or nutrition coaching services, helping families make healthy choices for school lunches while supporting overall wellness.
If you’re into games that bring the thrill of jackpots, check out SG8 Casino and experience your own FB777 moment.
Wondering what that means? Dive into our article to find out!
Excellent .. Amazing .. I’ll bookmark your blog and take the feeds also…I’m happy to find so many useful info here in the post, we need work out more techniques in this regard, thanks for sharing.
At JUNKWISELY Junk Removal, we are committed to responsible and eco-friendly junk removal practices. We understand the importance of minimizing our environmental footprint while efficiently clearing your space of unwanted items. Our dedicated team employs eco-conscious methods, including recycling, donation, and proper disposal techniques, to ensure that as much of your junk as possible is diverted from landfills. By choosing JUNKWISELY Junk Removal, you can trust that your clutter is being handled with care and consideration for the planet, leaving you with a cleaner conscience and a cleaner environment.
Discover The Bark Media, your premier Top Streaming Site for unforgettable events and quality entertainment. From live music to unique performances, we specialize in creating memorable experiences that bring joy and excitement.
Thanks for the blog post buddy! Keep them coming… I also wanna talk about the best Contact Center Workforce Management Software.
subscribe to: post a comment (atom)” intitle:fake bachelor degree
At JUNKWISELY Junk Removal, we are committed to responsible and eco-friendly junk removal practices. We understand the importance of minimizing our environmental footprint while efficiently clearing your space of unwanted items. Our dedicated team employs eco-conscious methods, including recycling, donation, and proper disposal techniques, to ensure that as much of your junk as possible is diverted from landfills. By choosing JUNKWISELY Junk Removal, you can trust that your clutter is being handled with care and consideration for the planet, leaving you with a cleaner conscience and a cleaner environment.
Thankyou for sharing the data which is beneficial for me and others likewise to see. business class flights
You have done a great job on this article. It’s very readable and highly intelligent. You have even managed to make it understandable and easy to read. You have some real writing talent. Thank you.
That appears to be excellent however i am still not too sure that I like it. At any rate will look far more into it and decide personally!
Get an inside look at construction projects through powerful construction photography, emphasizing tools, teamwork, and the beauty of architectural development. Capture the essence of building projects with Architectural Photography that tells the story of every stage, from groundbreaking to final touches.
The eBook bundle of Football Coaching Books represents 16 different eBooks that offer 5,000+ pages of information on Offense, Defense and Program Organization.
There’s something uniquely transformative about women supporting women. It goes beyond friendship and camaraderie, creating a bond that fosters growth, strength, and empowerment. This dynamic, often described as “ Women With Women ,” celebrates the collective power of women to uplift each other.
Ensuring a safe and secure betting experience is crucial. That’s why I always choose verified platforms from 토토사이트 추천
Enhance your setup with premium enterprise IT accessories for seamless operations.
You guardians do an astounding web diary, and have some unfathomable substance. Continue doing extraordinary. what is winstrol
Choose Microsoft Teams-certified video devices for better integration. https://sourceit.com.sg/
Thanks for the tips guys. They were all great. I have been having issues with being fat both mentally and physically. Thanks to you guys i have been showing improvements. Do post more.
이렇게 하면 선택한 기기 화면에 맞는 HTML5 사이트로 이동됩니다.
Get Lenovo ThinkPad T14 laptops with hardware-based security for regulated industries.
Sohbet denilince akla ilk gelen nedir? Kimine göre bir fincan kahvenin yanında dostlarla atılan tatlı bir kahkaha, kimine göre gece yarısı yastığa fısıldanan sırlar, kimine göre de bilinmez diyarlara uzanan hayali diyaloglar… Ancak, gerçek bir sohbet mekânı, sadece fiziksel bir alan değil, aynı zamanda ruhların buluştuğu, kelimelerin dans ettiği, zamanın ötesine geçen bir hayal diyarıdır.
Hayal sohbet mekânları, insanın en saf duygularına hitap eder. Burası, gerçek dünyanın sınırlarının ötesinde, sözlerin sihirli bir dokunuşla anlam kazandığı yerdir. İster bir romandaki iki sevgilinin tutkulu diyalogları olsun, ister bir masal kahramanının bilge sözleri, sohbetin olduğu her yer, aslında bir hayal alemidir. Çünkü gerçek sohbet, insanın içindeki duyguları harekete geçirir ve onu bambaşka diyarlara götürür.
Tarih boyunca insanlar, sohbetin gücünü keşfetmiş ve bu gücü kullanarak büyük eserler ortaya koymuştur. Mevlana’nın “Söz söylemek için önce dinlemek gerekir” sözü, sohbetin ne kadar derin bir sanat olduğunu gösterir. Gerçek bir sohbet mekânı, sadece konuşulan değil, aynı zamanda hissedilen bir yerdir.
Günümüzde teknoloji, sohbetin doğasını değiştirdi. Artık insanlar, fiziksel olarak yan yana gelmeden de derin bağlar kurabiliyor. Chat odaları, sosyal medya platformları ve sanal sohbet grupları, modern insanın yeni hayal mekânları haline geldi. Bu dijital alemin en büyük gücü, sınırları ortadan kaldırması ve insanları dünyanın öbür ucundaki biriyle bile bir anda buluşturabilmesidir.
Ancak, gerçek bir sohbetin özü değişmedi. İster yüz yüze, ister ekran karşısında olsun, samimi bir diyalog kurmak için kalpten kalbe bir köprü gerekir. Sanal sohbet mekânları, bu köprülerin en güzel örneklerinden biridir. Kimi zaman bir yabancıyla paylaşılan bir anı, kimi zaman uzun zamandır görüşülmeyen bir dostla atılan bir mesaj, insana kendini iyi hissettirir.
Marketing Assignment Help is the best writing service for every student. Our writers help students solve educational problems. Our experts provide 24/7 help for students.
Thank you for sharing such a thoughtful and informative blog post. The G DiLine Network
very quote was awesome and thanks for sharing the content.
Love this system! Such a smart way to keep lunches healthy, organized, and kid-approved. Definitely trying the mason jar fruit trick too!
Very interesting blog. Alot of blogs I see these days don’t really provide anything that I’m interested in, but I’m most definately interested in this one. Just thought that I would post and let you know.
The information you have posted is very useful. The sites you have referred was good. Thanks for sharing…
Beautifully written and well-researched. I love your fresh perspective on this subject. It really got me thinking! Can’t wait to read more. Brown Leather Jacket
I’m completely glad to visit your blog. At this point, Payroll Outsourcing I have found what I genuinely care about. I truly look at your blog ordinary and try to obtain something from your blog.
This post was a breath of fresh air. So much positivity and good energy. You really uplift your readers. The world needs more voices like yours. Keep spreading this joy and wisdom. Thank you for writing this! Snake Skin Jacket
Trying to prep wholesome lunches for back-to-school season with my twins, I realized batch cooking needed streamlined snack delivery too. I turned to Jack in the Box’s community insights at https://jack-in-the-box.pissedconsumer.com/review.html, where parents traded stories of on-the-go meal hacks using breakfast burritos and hash brown muffins. Inspired, I crafted a weekly rotation plan pairing DIY wraps with mini burrito fixes—saving me mornings and keeping picky eaters fueled through recess without cutting into afternoon homework time.
Planning healthy make-ahead lunches is a smart way to fuel kids for a successful school day. Nutrient-packed meals like quinoa salads, veggie wraps, and lean protein bento boxes can support energy, focus, and overall wellness. While managing diet is essential for growing children, it’s also important for adults using weight-loss medications. If you’re using treatments like **semaglutide**, be aware that semaglutide hair loss can occur in some cases due to rapid weight changes—making a balanced diet even more critical.
모바일 인터넷이 발달하면 할 수록 온라인 카지노는 더욱 성장할 것이라 예상합니다.
oni chichi siempre es bueno apredner y leer cosas nuevas
Laro ng bayan, swerte ng sambayanan!!roulette game
สัมผัสประสบการณ์เล่นเกมไม่เหมือนใคร.ทดลองเล่นสล็อต
reverse rape hentai tyh e best place
this site jimihen
really good, its amazing
Great Article! Thank you for sharing this is very informative post, and looking forward to the latest one.
Step up to the challenge, embrace the excitement, and prove yourself as the ultimate champion in the arena of true gamers.crazy 777
Buy kids dress for boys Online in India at Ministitch. Shop from latest collection of girl’s and boy’s clothes at the best prices.kids dress for boys
Preparing healthy make-ahead lunches for back-to-school can save time and keep kids energized throughout the day. Just like ensuring nutritious meals, keeping your home safe from pests is part of maintaining a healthy environment. For families in Abu Dhabi, pest control services Abu Dhabi
can help create a clean, safe space so you can focus on health and wellness without worries.
Assignment Guidance delivers reliable My Assignment Help services, offering expert academic support, well-researched content, and tailored solutions to help students achieve higher grades and meet deadlines with confidence.
My Assignment Help
Boost your grades with Economics Assignment Help from Assignment Mentor. Get expert assistance, accurate analysis, and timely solutions tailored to your coursework needs—ensuring academic success and stress-free learning today.Economics Assignment Help
Assignment Guidance delivers reliable My Assignment Help services, offering expert academic support, well-researched content, and tailored solutions to help students achieve higher grades and meet deadlines with confidence.
My Assignment Help
Thanks again for sharing a wonderful article here we are provide Luminous T-Shirt Printing: Shine Bright with Custom Designs in Singapore. T-shirt printing
I have been searching to find a comfort or effective procedure to complete this process and I think this is the most suitable way to do it effectively. بازی انفجار
This is such a practical and inspiring approach to school lunches!
The idea of prepping a week’s worth of healthy meals in advance not only saves time but also empowers kids to make their own nutritious choices.
The color-coded system and printable lunch cards are brilliant tools for encouraging independence and ensuring balanced meals.
Thank you for sharing this innovative method — it’s a game-changer for busy families!
Does anyone still doubt natural herbs? I’ve seen the great importance of natural supplements and the wonderful work they have done in people’s lives. I wonder why people still spend their money on surgery, injections and drugs each time they are sick. Natural herbs can cure all kinds of diseases and viruses contact Dr Ofenmu for more information visit https://drofenmuherbalcenter.simdif.com/
drofenmu@gmail.com
Βριλλιαντ ινφορματιον ηερε! Ηοπεφθλλυ υοθ ςοντ στοπ τηε φλος οφ σθψη μαγιψαλ ματεριαλ!
checkout the best b9 game download
Fusionex Hub is a dynamic, content-first platform and vibrant online community created for individuals passionate about technology. Whether you’re a beginner exploring the digital world or a professional https://www.light-houze.com/post/a-heart-that-gives-dato-seri-ivan-teh-s-initiative-brings-hope-to-b40-families-of-children-with-ca
What a great post! Thank you for sharing.
I love how your blog sparks so many great discussions. From the flood of comments, I can tell it’s a place where many people enjoy spending their time.
checkout the best game.
I found so many interesting stuff in your blog especially its discussion. Really its great article. Keep it up. pbn Sidebar
checkout the best 2025 games.
Use our free Mortgage Overpayment Calculator to find out how extra payments could help you pay off your mortgage faster and cut down on total interest costs. See the impact of monthly, annual, or one-time overpayments and plan your finances smarter.
Download Bet939 Apk is about getting the Bet939 app on your Android phone. This app lets you play games and enjoy online betting from your mobile. It is easy to use and works smoothly on most Android devices.Download Bet939 Apk
This is a great high resolution screen which you have shared for the users. Making a website is not an easy task but managing a good website is really a hard work. As far as this website is concerned, I am very happy. qiuzziz.finance
Yacine TV is a free streaming application that allows users to watch live sports, news, movies, and entertainment channels directly from their mobile devices. It has become especially popular in Arabic-speaking countries because of its focus on football coverage and access to regional channels
Bet939 Pakistan is a leading online gaming platform designed for players across Pakistan who want fun, excitement, and rewards all in one place. Whether you are a beginner or an experienced gamer, Bet939 Bet939 Pakistan
The Albert Heijn Bonuskaart is one of the most popular shopping cards in the Netherlands. It helps bonuskaart
The world of online gaming has expanded rapidly, providing players with exciting opportunities for CK33 game
checkout the best 2025 games.
777CB Game: Exciting Online Slot Adventure
The 777CB game is an online slot game that has captured the attention of gaming enthusiasts. Its main 777cb game
Download the latest Bet939 APK and enjoy nonstop gaming, fast withdrawals, and exciting rewards every day!
Yacine TV is a free streaming app that provides users with access to live television channels, sports matches, and entertainment programs. It has become widely known for its simplicity and for offering quick, no-cost access to popular sports events and TV shows on mobile devices.
have you played the best 2025 game.
checkout the best 2025 game.
checkout the best 2025 game.
“HE777 offers a smooth and user-friendly platform with quick access and easy navigation. The registration process was simple, and the interface feels modern and reliable. Still exploring all features, but so far the experience is positive, and the system seems stable and responsive. Worth trying for new users.”
X111 Game
If you want, I can also create a combined mega-article with P999 Game, V555 Game, X888 Game, and
Turn your everyday outfit into a show-stopping look with this exceptional Miles Morales Jacket, created for those who love fashion with character. Its sleek silhouette, modern craftsmanship, and superhero-inspired touches make it a must-have for trendsetters and fans alike. Wear it proudly and let your style swing to a whole new level.
checkout the best 2025 game.
ZC777 Game
666p Game
Royal X Casino
Royal X Casino is a popular online gaming platform that provides a wide variety of games for players. It is
Kk33 Game is a mobile gaming platform that mixes casino‑style games with real‑money earning Kk33 Game
checkout the best 2025 game.
X777 Game is an engaging mobile platform that offers both fun and the chance to earn real rewards. Its fast gameplay, daily bonuses, and variety of games attract thousands of users. But like any real-money app, it must be used responsibly. While it can be enjoyable and potentially rewarding, users should always remain aware of the financial risks involved
Avatar World APK brings a fun mix of creativity and exploration, letting players design unique characters and interact with lively environments. It’s a great pick for anyone who enjoys playful, customizable gameplay.
checkout the best 2025 game.
qk777 game
gamers. For anyone looking for a reliable, engaging, and adaptable online gaming platform, lotgame.net is a compelling option that meets diverse gaming needs.
Really useful post — I love how you break down simple, doable lunch-prepping steps that make mornings much less chaotic. The idea of prepping lunches on Sunday and letting kids help pick their meals later is a big time-saver and keeps lunches balanced. Also, I recently came across 11 exch — seems like a handy little resource for organizing online links and ideas while I browse helpful blogs like this.
I simply must tell you that you have written an excellent and unique article that I really enjoyed reading. I’m fascinated by how well you laid out your material and presented your views. Thank you. seo backlink
Real Racing 3, or RR3, has redefined mobile racing games by delivering an experience that rivals console-quality racing. Developed by Firemonkeys and published by Electronic Arts, RR3 combines stunning graphics, realistic driving physics, and a huge variety of cars and tracks to create a mobile game that feels truly immersive. Since its launch, RR3 has become a favorite for both casual players and racing enthusiasts around the world.
Magis TV APK offers a convenient way to stream movies, TV shows, and live channels on mobile devices. Its extensive content library, user-friendly interface, and flexible streaming options make it popular among mobile viewers. However, users should be mindful of security and legal considerations to ensure a safe entertainment experience. For those seeking mobile entertainment on the go, Magis TV APK represents a versatile and engaging option.
X111 is a refreshing digital platform built around speed, simplicity, and easy usability. It focuses on delivering a smooth experience while avoiding the heavy features that slow down many modern apps. With its growing popularity and user-friendly approach, X111 is becoming a preferred choice for people who want a fast, stable, and reliable platform for everyday use.
I love this — make-ahead lunches at the start of school are a lifesaver for busy mornings. These ideas look healthy, simple, and perfect for kids (or adults) who want good food without morning stress. Prep ahead, grab, and go — so much better than rushing for something last minute. Also — came across fairdeal 7 recently and thought their message about sensible choices kinda matches this post’s vibe.
checkout the best 2025 game.
This is a really helpful post — I love how you share easy and healthy make-ahead lunch ideas that are perfect for busy school mornings. It takes a lot of stress out of planning and still keeps things nutritious. I’m bookmarking this so I can try some recipes myself. Also, I happened to see my99exch while surfing — maybe someone here finds it useful too.
While “Lightroom Pro APK” searches are common, using modified or cracked apps is unsafe, illegal, and risky for your personal data. Lightroom Mobile already provides excellent free tools, and upgrading to the official premium version ensures you get full features, cloud security, and ongoing updates.
Loklok APK is a popular entertainment app known for its vast content collection and user-friendly interface. However, downloading APKs from unofficial sources carries risks related to security, privacy, and legality. Users should understand these concerns and consider safer, legal alternatives for streaming entertainment.
The mobile gaming industry has grown tremendously, offering players a wide variety of engaging Wintupees Game
In summary, Wintupees Game i 666P Game
s an engaging and well-rounded mobile game that combines smooth
Clash Royale, created by Supercell, is one of the most popular real-time strategy games in the world. It combines card-based battles, tower defense, and online PvP, making it a highly competitive and addictive mobile game.
Lulubox is a third-party Android application known for offering tools that modify, customize, or enhance mobile games and apps. Many people search for it because it claims to provide extra features such as skins, plugins, faster performance, and game-related tweaks—all without rooting the device.
In today’s digital world, online Quran classes for kids have become one of the most convenient and effective ways to help young learners connect with the Holy Quran. Whether parents are busy, live far from a mosque, or simply want a safer and more flexible learning environment, online Quran academies provide a modern solution that suits every family’s schedule.
checkout the best 2025 game.
I love how stable the gameplay is in 3 Patti Best. No lag, no glitches, and the cards deal smoothly even during busy hours. That stability makes the experience enjoyable.
Get access to unlock a wide range of free style gaming experiences, new features, updated services, and smooth gameplay with the help of https://apkbuilt.net/s85-game/
Woah! I’m really enjoying the template/theme of this blog.
It’s simple, yet effective. A lot of times it’s
difficult to get that “perfect balance” between user friendliness
and visual appearance. I must say you’ve done a awesome job with this.
Also, the blog loads super fast for me on Safari. Outstanding Blog!
Very energetic blog, I loved that bit. Will there be a
part 2?
Helpful overview
What’s up, after reading this remarkable piece of writing i am too glad to
share my knowledge here with mates.
I need to to thank you for this great read!! I definitely enjoyed every bit of it.
I have got you saved as a favorite to look at new stuff you
post…
Good web site you’ve got here.. It’s hard to find quality writing like yours nowadays.
I honestly appreciate people like you! Take care!!
Laser 247 is a trusted and licensed real-time online casino gaming and sports betting platform with secure services.
Fairplay is a trusted and licensed real-time online casino platform, offering secure gameplay and a smooth user experience.
Fairdeal offers real-time online casino gaming and is known as a licensed, trusted, and secure platform.
The 999R Game is a top choice for players who enjoy simple, smooth, and entertaining online gameplay. Its 999R Game
I like the helpful information you provide in your articles.
I will bookmark your weblog and check again here frequently.
I am quite sure I will learn many new stuff right here!
Good luck for the next!
Incredible points. Sound arguments. Keep up the good
work.
features, Kk33 online delivers an immersive experience suitable for both casual and competitive gamers.Kk33 online
In the world of online gaming, P999 com has emerged as a top platform for players seeking qualityP999 com
The 3RR Game is a modern mobile gaming platform that combines entertainment and rewards. With its variety of games and simple design, it continues to attract mobile gamers. Responsible play ensures a safe and enjoyable experience.
92 pkr game download
The world of mobile gaming has grown exponentially in recent years, offering players instant access to interactive and entertaining experiences. Among the platforms gaining popularity is the 92 PKR game download,
Mobile gaming has become one of the most popular sources of entertainment, and Bet629 Game is rapidlyBet629 Game
Reddy Anna Book feels well-organized and user-friendly. From the beginning, the platform was easy to understand. Navigation feels natural, and information is clearly presented. I didn’t experience delays or technical problems, which is always reassuring. The support team has been responsive whenever I needed clarification. Their replies were clear and respectful. It feels like the platform is maintained properly. While outcomes depend on individual choices, the system itself has been reliable and smooth for me so far.
BK66 Game is a mobile gaming and real‑money earning platform that has grown in popularity among smartphone users, especially in Pakistan and neighboring regions. It combines a variety of casual, casino‑style, and card games with prediction rounds, mini‑games, and challenge modes — all in one app. Players can play for fun and also potentially earn real cash rewards through gameplay, bonuses, and referral systems.
Wenn Sie in einem Kryptocasino spielen, ergeben sich für Sie
verschiedene Chancen und Risiken. Dabei übertreffen sich die Casinoanbieter
immer wieder mit Bonusguthaben, Freispielen und Cashback.
Beste Bitcoin Casinos belohnen Großspieler oft mit
individuell zugeschnittenen Bonus Angeboten, die weit über das hinausgehen, was klassische
Plattformen bieten. Es ist jedoch ratsam, nur bei seriösen Bitcoin Casinos Österreich zu spielen, die transparente Bedingungen und hohe Sicherheitsstandards bieten.
Das Spielangebot umfasst eine Vielzahl an Spielautomaten, Tischspielen, Live-Casino-Tischen sowie ein umfangreiches Angebot an E-Sports- und klassischen Sportwetten. Auch für regelmäßige Spieler
gibt es ein Level-System mit Boni, Cashback und Freispielen, das für zusätzliche Motivation sorgt.
Besonders hervorzuheben ist die Auswahl an hauseigenen Stake-Originalspielen, die
exklusiv auf der Plattform verfügbar sind und durch ihre einfache Bedienung und
faire Gewinnchancen überzeugen. Stelle immer sicher, dass du alle gesetzlichen Anforderungen erfüllst, bevor du in einem Casino deiner Wahl zu spielen beginnst.
Solange du auf ein lizenziertes Casino mit transparenter Technik setzt,
kannst du auch in Deutschland sicher mit BTC spielen. Auch wenn ein Krypto Casino
ohne KYC mehr Freiheit und Anonymität bietet, solltest du immer bewusst spielen. Du kannst einzahlen, spielen und sogar Auszahlungen mobil anfordern – genauso wie am
PC. Moderne Krypto-Casinos machen es dir leicht, ohne Anmeldung und ohne Bürokratie direkt zu spielen – schnell, sicher und anonym.
Je nach Plattform kannst du mit Ethereum, USDT, Litecoin, Dogecoin, TRON, BNB oder sogar MATIC und anderen Altcoins spielen.
References:
https://online-spielhallen.de/druckgluck-casino-bonus-code-dein-weg-zu-tollen-pramien/
The Tim Hortons menu blends classic coffeehouse drinks with baked goods and food items that satisfy breakfast, lunch, or snack cravings. From its signature Iced Capp® and brewed coffee to timbits and savory sandwiches, there’s a variety of options to enjoy any time of the day.
Download the Best Alight Motion Templates for 2026! Free XML presets, smooth transitions, and ready-to-use effects for pro-level video editing.
Greetings! I’ve been reading your site for a long time now and
finally got the courage to go ahead and give you a shout out from
Lubbock Tx! Just wanted to tell you keep up the excellent job!
The 92 Glory Game is an online game that is easy to play and fun for everyone. It is popular because it offers 92 Glory Game
Unser Ziel ist es, Gewinne zügig und sicher an die Spieler zu übermitteln. Manche bevorzugen klassische Fruit Slots,
andere eher moderne Video-Slots mit Bonusfunktionen oder jackpotschwere Tischspiele.
Dann laden Sie Ihr Casino-Konto auf – und schon können Sie Ihre erste Wolfy Casino und
Login-Erfahrung mit Willkommensbonus genießen. Um
alles reibungslos zu gestalten, haben wir den Registrierungsprozess vereinfacht.
Zusätzlich zu diesem Standardbonus bieten wir gelegentlich Sonderaktionen wie ein Wolfy Casino und Kein Einzahlungsbonus an. Auch auf
Wolfy Casino und Kein Einzahlungsbonus setzen wir, um ein Stück Extra-Vergnügen zu ermöglichen.
Der ausgewählte Slot „Tower of Fortuna“ bietet spannende Spielmechaniken wie steigende Multiplikatoren und Bonus-Runden,
die für zusätzliche Gewinnchancen sorgen. Freispiele ohne Einzahlung sind umsatzfrei, sodass Gewinne direkt
ausgezahlt werden können, was besonders vorteilhaft ist.
Wir können definitiv empfehlen, das Wolfy Casino auszuprobieren und sich den ein oder anderen Bonus dort zu sichern. Dort können die User
selber entscheiden, wie viel Risiko sie eingehen und wann sie sich ihren Gewinn sichern. Es bietet tolle Boni und neben den mehr als 6.000 anderen Spielen die derzeit besonders beliebten „Crash-Games“ wie JetX, die zu den Mini-Spielen gezählt
werden.
References:
https://online-spielhallen.de/irwin-casino-bewertung-ihr-umfassender-leitfaden/
Z777 is a versatile and engaging gaming platform offering a mix of casual games and reward-based features. Its mobile-friendly design, intuitive interface, and diverse game selection make it appealing to a wide audience. While it provides entertainment and incentives, players should remain mindful of platform rules and approach the experience responsibly.
k99 Game
Game is an online gaming experience created for players who value simplicity, comfort, and smooth
I’m truly enjoying the design and layout of your website.
It’s a very easy on the eyes which makes it much more
enjoyable for me to come here and visit more often. Did you hire out a developer to create your theme?
Fantastic work!
ZH88 Game is a casual mobile gaming platform that focuses on quick entertainment, easy gameplay, and reward-based engagement. With its variety of mini-games, daily bonuses, and user-friendly design, it appeals to users looking for light gaming experiences on the go. As with any third-party gaming app, players should remain cautious, download responsibly, and play within healthy limits.
I am extremely impressed with your writing talents and also with the layout on your
blog. Is that this a paid subject matter or did you modify it your
self? Either way stay up the excellent high quality writing, it is
uncommon to see a great weblog like this one today..
Ethereum shows signs of recovery following the fall close to the $2,600 level this week. The price bounced almost 10% and generated hope for buyers. The chart even shows small positive movements on a day-to-day basis. However, the bigger picture of the trend still appears to be weak. New data is now revealing the presence of a major problem building at the background level. Long-term holders have suddenly been more than 300% selling in a single day.
Hello and welcome to Lahore Call Girls!!!There are numerous types of women in the world, and believe me, they are remarkably similar to men. As diverse as men’s desires and dreams are, they seek to enjoy their lives through a variety of techniques. This is why they continue to use a variety of substances, including cigarettes, whiskey, and other substances, in an effort to improve their quality of life. Did you know that the majority of women also use these substances in order to improve their quality of life? When searching for Lahore Call Girls, make sure to select the highest quality.
Karachi, the city where we are based, serves as administrative center. The town-wide community universally praises Call Girl. One of the best ways to treat yourself is to use Karachi Escorts Services, which is where affluent people in the city go to have a first-class, luxurious experience. They are very common here in this city. There are a lot of options for finding a call girl in Karachi, but we’re the only ones to offer a completely relaxed service to our valued customers. You won’t need to worry about finding a call girl company while you’re here.
What you call our Independent Call Girls is between you and them. Client privacy is our main point as well as client satisfaction and high quality service. We treat every client, especially because we understand that clients have different personalities and then their tastes are different in women. Escorts in Islamabad know exactly how to deal with a gentleman.
KK33 Game is an online gaming platform and mobile app that has rapidly gained popularity in Pakistan as an earning‑oriented gaming experience. It combines the fun of casino‑style and skill‑based games with opportunities to win real cash rewards, making it appealing to players looking for both entertainment and side earnings
fairplay game
The tot55 game is exciting and enjoyable, offering players a mix of strategy and fun. Its user-friendly interface and engaging gameplay make it appealing for both beginners and experienced players.
The tot55 game is exciting and enjoyable, offering players a mix of strategy and fun. Its user-friendly interface and engaging gameplay make it appealing for both beginners and experienced players.
laser247 contact
Our casinos fully comply with international regulations, providing a safe and legal gaming experience.
Here you have more details on the top-ranked real money casinos on our list,
making it easy for you to compare and find the one that catches your interest.
Looking for the best real money casinos in Australia? The
main pro is that you are offered a great selection of games that you can play from your very own home.
Cryptocurrency is widely used in modern real money
casinos for its speed, privacy, and low transaction costs.
Payment options can define your experience at a real
money casino. Many casinos won’t advertise fast-track options,
but high-value players can often negotiate better terms directly.
From instant crypto withdrawals to huge slot selections and VIP-level limits—these real money casinos check every box.
We’ve tested 100+ nice real money casinos to create this list with the best of the best ones, and Bovada is definitely our top choice.
Welcome package includes up to 4 deposit bonuses and free spins.
Live casinos offer live blackjack, live roulette, and live baccarat.
Casinos online also offer specialty games, which is a catch-all term for
Keno, Bingo, and lottery games (scratch cards). Most sites in the online gambling industry simply call these a list
of casino reviews. Read trusted and honest online casino reviews before signing up and depositing at an online casino.
With an extensive selection of real money games, cutting-edge technology,
and seamless payment solutions, this platform caters to players of all
levels. King Johnnie Casino Australia stands as a
top-tier platform for online casino enthusiasts and sports bettors seeking a secure, rewarding,
and high-quality gaming experience. Explore the best online gaming experience
today and discover why players across Australia choose King Johnnie Casino as their
ultimate betting destination. With a vast selection of
high-quality casino games, live dealer options, and competitive sports betting odds, we bring world-class entertainment straight to your fingertips.
King Johnnie Casino has launched an official mobile app to make
gaming more convenient for Australian players.
A strong reputation and positive feedback from other players can provide valuable insights
into the casino’s reliability and overall quality.By keeping these factors in mind, Australian players can confidently navigate
the world of online gambling and choose a trustworthy platform like King Johnnie Casino, which ticks all the right boxes.
King Johnnie Casino holds a Curacao eGaming license and maintains an above-average safety rating, with relatively few player complaints and a reputation for fair play.
For those who prefer speaking directly, the phone support line allows for immediate and personalised assistance.
Email support is available for more detailed or non-urgent inquiries, with responses typically provided within a few
hours. For Android users, the app requires at least version 6.0 and 1
GB of memory, while iOS users can download directly from the App Store.
References:
https://blackcoin.co/kangaroo88-casino-a-decade-of-winning-experience/
Check out the complete Whataburger menu to explore all your favorite burgers, sides, and breakfast options.
Translate a sign in a photo or text on a menu without having to
retype the words yourself. With Chrome, you can quickly access
your files right from the search bar and work on them while offline, too.
Sign in with your Google Account to access Google Drive.
You’ll need to enter the administrator account password.
To install Chrome, use the same software that installs programs on your computer.
Simply download the app and follow the on-screen instructions.
If you haven’t already, register for Business Internet Banking using the link below to get your online account up and running.
Get convenient digital tools, greater control over your business transactions, speedy self-service processes and more in two simple steps.
Scan your cheques using the app to access your money
faster and save time and effort. These charts use data given to
the Payment Systems Regulator by major banking groups in the UK in 2023.
Need to complete some banking with HSBC? Opening times & information for your local banks around
the UK Explore our industry insights and banking
capabilities in a simpler way Find out more about online security Activate this
service online or in branch Billericay belongs to the HSBC
banking brand.
References:
https://blackcoin.co/real-money-online-slots-in-australia-2025/
Looking for a casino? https://elon-casino-top.com: slots, live casino, bonus offers, and tournaments. We cover the rules, wagering requirements, withdrawals, and account security. Please review the terms and conditions before playing.
We announce these limited-time offers through email and on-site notifications.
This approach allows us to provide more substantial welcome
bonuses and ongoing promotions. Our promotions include
Monday free spins, tournaments, and cashback offers with clear wagering requirements.
From here, you can view your balance, access games, and manage
your profile settings. We require all players to complete our Know Your Customer (KYC) process before making withdrawals.
Our streamlined process takes just minutes, and you can begin playing immediately after your first
deposit.
The wagering requirements sit at a reasonable 40x for bonus funds and 40x for free spin winnings, calculated only on the bonus amount
rather than deposit plus bonus. Free spins activate automatically, with
40 spins released after each of the first five deposits.
Deposit two unlocks a 50% bonus up to $1000, while deposits three through five each carry 50% matches worth up to $500, bringing the
total potential bonus value to $3500. The interface
responds instantly to touch controls, with games loading in under three seconds even on 4G connections across the NBN network.
References:
https://blackcoin.co/are-bitcoin-casinos-better-than-normal-casinos/
It is not my first time to pay a visit this site, i am visiting this website
dailly and take nice information from here everyday.
Download the official app here: CZ777 App
98pkr game is exciting and entertaining, offering smooth gameplay and thrilling features that keep players engaged.
KK33 Game lets players enjoy skill-based games, win real money, claim regular rewards, and withdraw earnings safely through secure payment methods.
CHECKOUT THE BEST 2025 GAME.
us poker sites that accept paypal
References:
kabayan.kr
us poker sites that accept paypal
References:
https://jobhaiti.net/employer/top-8-ethiopia-betting-sites-2025-bet-online-with-ehiopian-birr/
Y999 Game download lets users enjoy a smooth and simple gaming experience on Android devices. The app is easy to install, lightweight, and works well on most smartphones. For the official version, visit Y999 game download and install it safely.
online roulette paypal
References:
https://muwafag.com/compani/paypal-casinos-2025-best-casino-sites-that-accept-paypal/
paypal online casinos
References:
https://backtowork.gr/employer/best-online-casinos-in-australia-top-casino-sites-for-2025/
Buy Premium Quality Research Chemicals Online
High-Quality Research Chemicals
Buy Premium Quality Research Chemicals Online
Shop High Premium Quality Research Chemicals Online
Herbal Incense & Legal Buds
Shop Europe Strongest Legal Highs
fitness gym equipment
shop research chemicals
shop fitness equipment
research chemicals for sale
Home Gym Fitness
australian online casinos that accept paypal
References:
https://jobsathealthcare.com/employer/top-10-list-of-casino-sites-our-expert-picks-for-2025/
casinos online paypal
References:
https://rentry.co/68989-best-australian-betting-sites–apps-updated-december-2025
Buy Premium Quality Research Chemicals Online
High-Quality Research Chemicals
Buy Premium Quality Research Chemicals Online
Shop High Premium Quality Research Chemicals Online
Herbal Incense & Legal Buds
Shop Europe Strongest Legal Highs
fitness gym equipment
shop research chemicals
shop fitness equipment
research chemicals for sale
Home Gym Fitness
Enjoy Best Casino Games with https://apkjanders.com/wc777-game/ . For Earning Real Cash.
Games also nurture creativity and imagination. Many modern video games, including role-playing and sandbox games, allow players to design characters, create worlds, and influence storylines.Visit https://y999game.app/ for an exciting online gaming experience.
Follow my blog – Thanks for addressing this! Not many people talk about it.
Visit Noob Win Game Download APK for an exciting online gaming experience.
Games spark creativity and fuel imagination like nothing else. Modern titles, especially role-playing and sandbox adventures, let players craft unique characters, build entire worlds, and shape their own stories https://apksbot.com/777tez-game/ turning every play session into a boundless creative journey.
Buy Premium Quality Research Chemicals Online
High-Quality Research Chemicals
Buy Premium Quality Research Chemicals Online
Shop High Premium Quality Research Chemicals Online
Herbal Incense & Legal Buds
Shop Europe Strongest Legal Highs
fitness gym equipment
shop research chemicals
shop fitness equipment
research chemicals for sale
Home Gym Fitness
checkout the best trending 2026 games.
Buy Premium Quality Research Chemicals Online
High-Quality Research Chemicals
Buy Premium Quality Research Chemicals Online
Shop High Premium Quality Research Chemicals Online
Herbal Incense & Legal Buds
Shop Europe Strongest Legal Highs
fitness gym equipment
shop research chemicals
shop fitness equipment
research chemicals for sale
Home Gym Fitness
Weight Bench For Sale
Dumbbells For Sale
Buy Premium Quality Research Chemicals Online
High-Quality Research Chemicals
Buy Premium Quality Research Chemicals Online
Shop High Premium Quality Research Chemicals Online
Herbal Incense & Legal Buds
Shop Europe Strongest Legal Highs
fitness gym equipment
shop research chemicals
shop fitness equipment
research chemicals for sale
Home Gym Fitness
Buy Premium Quality Research Chemicals Online
High-Quality Research Chemicals
Buy Premium Quality Research Chemicals Online
Shop High Premium Quality Research Chemicals Online
Herbal Incense & Legal Buds
Shop Europe Strongest Legal Highs
fitness gym equipment
shop research chemicals
shop fitness equipment
research chemicals for sale
Home Gym Fitness
checkout the best agem 92 glory game apk
Buy Premium Quality Research Chemicals Online
High-Quality Research Chemicals
Buy Premium Quality Research Chemicals Online
Shop High Premium Quality Research Chemicals Online
Herbal Incense & Legal Buds
Shop Europe Strongest Legal Highs
fitness gym equipment
shop research chemicals
shop fitness equipment
research chemicals for sale
Home Gym Fitness
Thanks for these ideas — healthy make-ahead lunches are such a lifesaver once school starts! I love how many of these options balance nutritious ingredients with simplicity, so kids actually look forward to eating them and parents don’t spend forever prepping. For anyone here looking for tools and ideas to stay organized, inspired, and creative in meal planning and daily routines, check out lotus365 blue. Appreciate the helpful suggestions!
Follow my blog – Wow, this was incredibly detailed.
Cardiac surgery is one of the most complex and precise areas of medicine, requiring the collaboration of highly skilled professionals. Among them, the perfusionist plays a critical role in ensuring patient safety and read full guide
checkout the new trending 2026 game.
what a great blog.thanks for sharing.checkout the new trending 2026 game.
Good pleasure and entertainment – [url=https://is.gd/32lCDu]waiting for you right now…;)[/url]
This is such a helpful guide for busy mornings. The make-ahead lunch ideas are practical, healthy, and perfect for back-to-school routines. I really like how the recipes focus on balance and easy prep, which makes sticking to healthy eating much more realistic for both kids and adults.
Such a helpful guide for busy mornings. The make-ahead lunch ideas are practical, healthy, and easy to prep, making balanced eating much more realistic for both kids and adults. A great resource for back-to-school routines also worth checking out: https://a55app.com.pk/sk999-game/
Nice post, thanks for sharing. I found this ct777 game helpful as well.
Love these healthy make-ahead lunch ideas—perfect for busy back-to-school mornings and keeping meals nutritious. For more helpful online resources, you can also check out https://a55app.com.pk/sk999-game/
.
Click Here – Your breakdown made everything crystal clear.
This is such a smart and realistic approach to school lunches, especially letting kids choose while still keeping things balanced. The make-ahead system sounds like a huge time-saver for busy mornings, and it makes sense that kids eat more when they feel involved. Clear systems like this really reduce daily stress, whether it’s meal planning or using a straightforward starting point like a **Daman Game login** to avoid confusion and keep things running smoothly.
Apktool is an open-source tool designed for decompiling, analyzing, and rebuilding Android APK files. It allows users to explore app resources, edit XML and configuration files, work with smali code, and recompile the app into a functioning APK. Apktool is widely used for app debugging, reverse engineering, UI customization, security analysis, and understanding the inner workings of Android applications—without needing the original source code.https://apktool.com.pk/
Our Lahore escorts website is the only one that lets you choose from local Lahore escorts for full services and Russian escorts from other countries.
You can get high-class, private call girl services in Islamabad from Safe Islamabad Call Girls. 24/7, you can book certified call girls online. Trusted, secure, and enjoyable activities.
Lahore Call Girls With Free Room Service will come to your home in 20 minutes. You can book college girls, models, actresses, Russian call girls, and Bhabhi call girls in Lahore 24 hours a day, 7 days a week.
Want to find call girls in Karachi? You’ve come to the right place! We take care of all of your personal needs in one place. Our site makes it easy to find call girls in Karachi who meet your wants and make you happy.
Need a secure escort service in Islamabad? Call us at +923709920008 to get the best Islamabad escort service with our beautiful and skilled girls.
This is such a smart approach! Letting kids choose while still guiding them toward balanced options feels like a real win for parents.
Love the make-ahead and labeling system—practical, time-saving, and empowering for kids to pack lunches they’ll actually eat.
time-saving, and empowering for kids to pack lunches they’ll actually eat. love this system very much
This is such a smart and realistic approach to kids’ lunches. Giving them choice while keeping things balanced really solves the daily struggle, especially with busy mornings. I like systems that save time and reduce stress, similar to Tiranga Prediction Game, where simple structure makes everyday decisions easier.
인천출장마사지 – 인천 전역에 24시간 여성 전문
마사지사가 찾아가는 출장 안마 서비스!
아로마, 스포츠, 커플 마사지로 피로와
스트레스를 합리적 가격에 풀어보세요
For older users looking to unwind in their free time, Nekopoi is a popular online platform that offers easy access to animated content with a simple and user-friendly layout. It’s designed for smooth browsing across devices without complicated setup. You can explore more about the platform here: Nekopoi
Games also have strong social benefits. Many games are designed to be played with others, promoting communication, cooperation, and friendly competition.
These make-ahead lunch ideas are really practical, especially for busy school mornings. I like how the recipes are both healthy and easy to prepare in advance. It makes staying on track with good eating habits much simpler. Thanks for sharing these great meal prep ideas!
Nice article with practical insights. Login access becomes simpler when the correct link is known. The skyexchange login page is useful for users. Appreciate the informative post.
Games have been an essential part of human life for centuries, offering enjoyment, challenges, and opportunities for learning.
Olympic football live scores, men’s and women’s tournament at the Games
Bet939 Apk provides quick entry to popular online games
Terabox is a cloud storage service that allows users to store, manage, and access files online. It is widely known for offering a large amount of free storage space, making it attractive to users who want to back up photos, videos, documents, and other digital files without investing in physical storage devices.