DIY Appliqued Birthday Shirt Tutorial! Inexpensive and Easy!
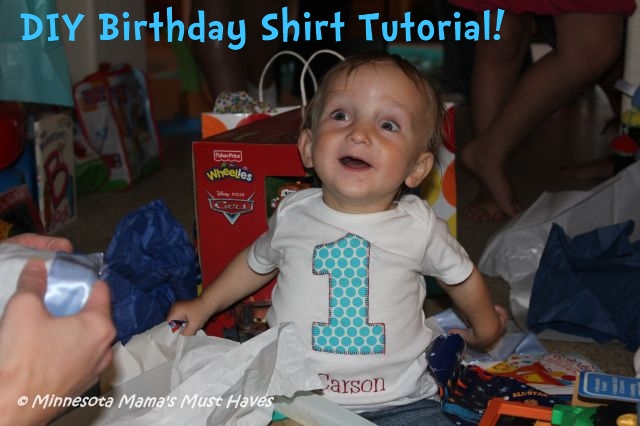
We had an amazing Dr. Seuss themed Birthday party for Carson’s 1st Birthday. I made him an appliqued Birthday shirt and I made shirts for his brother and sister in the red and turquoise party colors. They were really easy and turned out really cute. Follow my Birthday shirt tutorial below to see how you can make matching shirts for any occasion!
Here is what you will need to make your own appliqued Birthday shirt:
Supplies:
You’ll need a piece of fabric in your choice color/pattern. I got 1/2 a yard of turquoise polka dot fabric to make the three shirts. This was more than enough but I wanted plenty in case I got the bug to make anything else.
Plain t-shirt(s)
Thread in a contrasting color
Scissors
Heat ‘n Bond (purple package)
Number or letter printout/tracing
Pencil
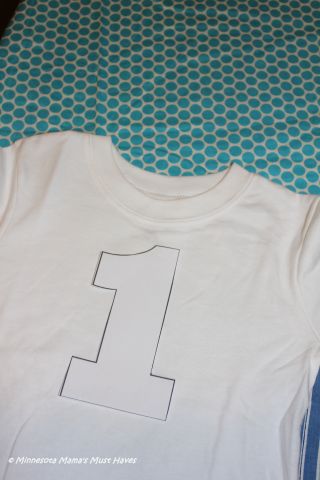

I printed out the number 1 and the letters “A” and “D” (my kids first initials and my son’s 1st Birthday) because I’m not good at freehand drawing them. You can google free bubble letters to get free templates to print. Once you’ve printed or drawn your letter/number that you wish to make your shirt with then you will need to cut it out.
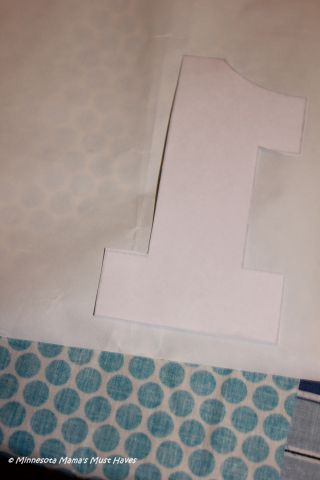
Next, trace it UPSIDE DOWN on the Heat ‘n Bond paper (be sure to get the purple package).

Once you’ve traced your letters/numbers then cut them out of the Heat ‘n Bond paper. Put them on the wrong side of your fabric with the smooth paper side facing UP. Then iron them onto the fabric.

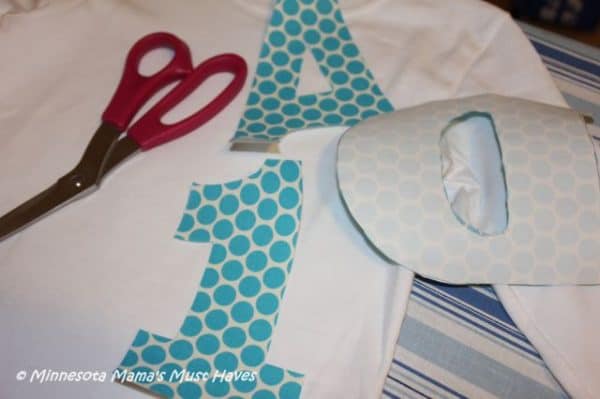
Once you’ve done this you can cut them out of the fabric, leaving the paper ON.

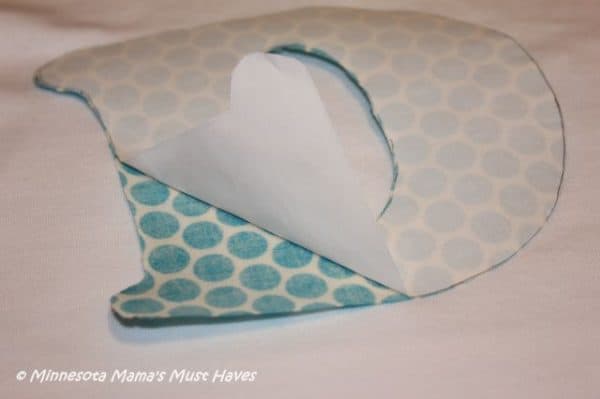
After you’ve cut them out you can peel off the paper backing.

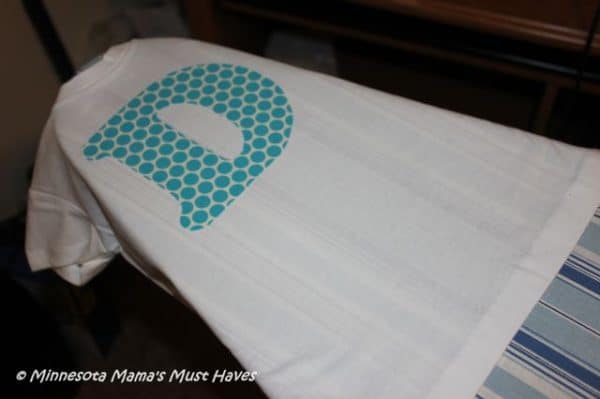
Position them where you desire them to be placed on your shirt. Be sure they line up properly and then iron them on.

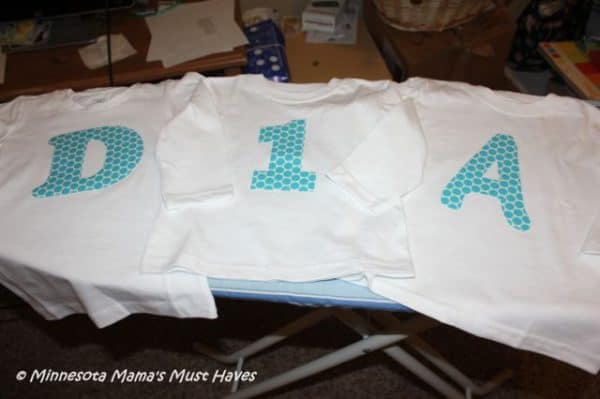
I did this with all three shirts. I have a “D” for my daughter Danika, a “1” for Carson because it was his 1st Birthday, and an “A” for my son Aiden.

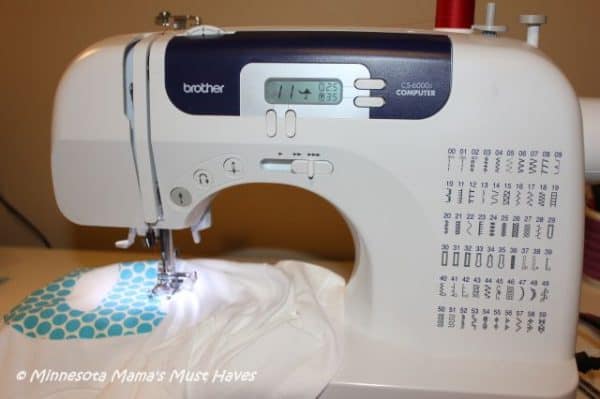
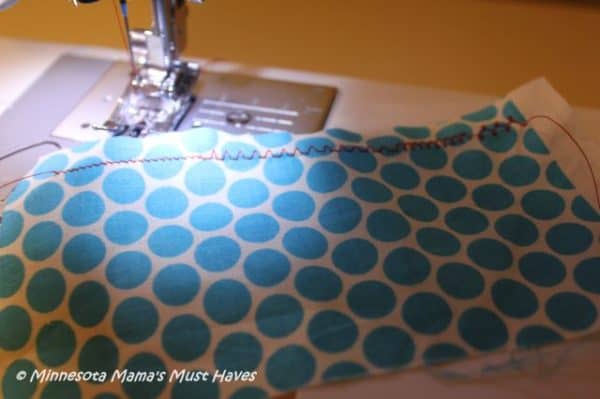
Now you are ready to do your stitching. Grab a scrap piece of fabric and test out your thread color and stitches that you desire to use. I tried a handful of decorative stitches on my Brother sewing machine and then settled on a blanket stitch. The red color popped nicely off the fabric and coordinated with the Birthday party colors.

Next you will stitch around the letter/number with the decorative stitch you chose. Be sure not to sew through both layers of the shirt!

Once you’ve stitched all the way around the letter/number you are done! See that wasn’t so hard was it? 🙂

Your finished product! If you’d like to go one step further you can have their name embroidered below it. I did this in the first picture on this post. My friend has an embroidery machine and was able to put Carson’s name on his shirts. They turned out darling! These are really inexpensive to make and much cheaper than buying them from someone.

If you liked this post consider pinning it so you can easily find it later 🙂
*This site is copyright protected. Photos may not be used without express written consent. Thank you.

Now you just need to teach me how to sew so I can make one too!
I love these, I have always wanted to try doing this but been too afraid to try – always seemed so hard. I am pulling out the sewing machine this weekend, maybe I will give something simple a try! Thanks for sharing.
Carson is adorable!!! Thank you for the tutorial and photos; I love this idea. Yay!
Such a cute photo! I was with you until you broke out the sewing machine. I’ve tried it several times (sewing) and it turns out hilarious as opposed to successful! But the shirts are really cute!
This is so cute, I want to make one for my grandsons birthday!
Such a cute idea! Even my limited sewing skills could handle this. And the blanket stitch was the best look, I agree!
what a great an in expensive way/idea to mark the occassion!
where did you find heat n bond that big? i checked hobby lobby and they just had a small roll 7/8″. thanks!
This looks like it would be very easy…if I knew how to sew and had a machine 🙂
i love this idea. Id love to try this one day soon. this is a great idea for the party coming up too
I tried this for my daughter’s second birthday and modified it! I recently sold my sewing machine because it was a glorified dust collector. So instead, I bought some gold glitter ribbon and hot glued it around the edge of the fabric. Other than that, I followed your instructions on using the iron-on with the fabric, and it worked like a dream! Thanks for this idea. Wish I could include a photo here of the finished product!
That is perfect! I’m so glad you found this useful!! Happy Birthday to your daughter!!
A birthday is a special occasion that marks the anniversary of a person’s birth, celebrated with joy and excitement by friends and family. It’s a time to reflect on the past year and look forward to new experiences and opportunities. The day is often filled with laughter, cake, gifts, and warm wishes. Birthdays can also be a reminder of growth and progress, motivating one to set new goals for the year ahead. Some might even find interesting ways to celebrate by exploring opportunities online, and you might stumble upon exciting offers or platforms, such as www mygreenbucks .net, which could be a great option for those interested in trying something new. While birthdays are personal, they also carry a sense of potential and the promise of something new.
You offer reflection rather than conclusion. zeusbola
The tone you’ve used is friendly yet professional. zeusbola
Your calm style makes the message more convincing.
You offer a refreshing take on the subject. zeusbola link alternatif
Your arguments feel both rational and fair. zeusbola
You add depth without being overwhelming. zeusbola
You help the reader process ideas step by step. zeusbola
There’s a quiet strength in how you presented your ideas. zeusbola
The article reflects care and attention in every part. zeusbola
You have a consistent tone that supports your message. login zeusbola
You allow the content to speak for itself effectively. zeusbola
You’ve created a sense of order in a complex topic. zeustoto
The structure supports your message effectively. zeusbola
You bring logic and structure to the topic. zeusbola
You’ve made your case without overwhelming the reader.
A shirt can often become more than just clothing; it holds the possibility of expressing identity, mood, or even a message that resonates with others. There is always a chance that a simple design might turn into a statement piece, catching attention in unexpected ways. Among many options, the snuffed on sight shirt could potentially reflect a bold attitude, leaving room for interpretation depending on how it’s worn. It may carry a sense of uniqueness that allows someone to stand out, and at the same time, it offers the possibility of being seen as a symbol of personal style.
Short but very informative, thank you.
Great job! This content is both useful and enjoyable.