RV Remodel Ideas: Bohemian Farmhouse Style!
I love nothing more than a beautiful RV Makeover. We did an RV remodel on our 32′ bumper tow travel trailer a year ago and you all just loved it. So when I saw this beautiful bohemian farmhouse style RV remodel idea from Bridget, I just knew I had to share it with you all. The finished project is so beautiful and looks like something you would see on HGTV. Enjoy looking at this makeover and get inspired for your next project.
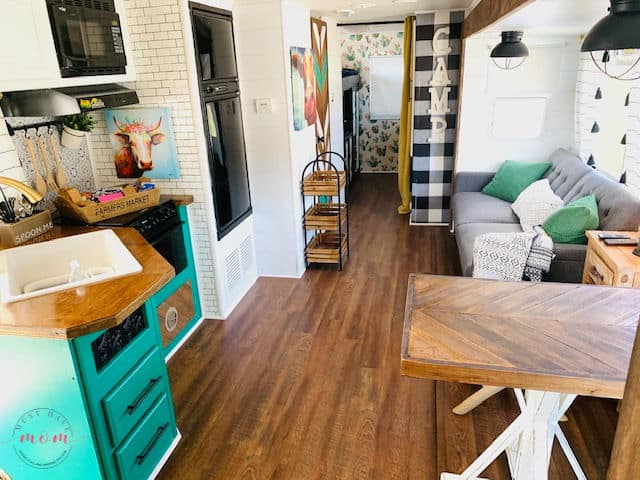
RV Remodel Ideas – Bohemian Farmhouse Decor
One of the most impressive things about this makeover is that Bridget and her husband had never owned a camper before and had never tackled a makeover. This is their first try at it and they really hit it out of the park. While Bridget says her husband would have been happy with the dark and dreariness of the camper when they bought it, she knew that she wanted a place that still felt like home. And with a family of 8, Bridget knew it had to be big enough to hold them all.
Here is her story (and her RV makeover!):
After years of pestering my husband for a camper… AND one he would let me “Redo”… my dream came true November of 2018. I will never forget the look in my husband’s eyes when I mentioned all I wanted to do to it… to a guy.. the dark dreariness of Campers today… would do! I wanted a place that felt like home… a place I craved to vacationing in with our large family! When we purchased the camper, I had the big dream of redoing several and putting them in our favorite places to vacation (on permanent spots). We would always have a spot to vacation without the hassle and big expense it takes to find a place to fit our family of 8. I wanted to then rent these renovated campers out for others to have the same wonderful vacation experience! Now that the renovation is 95% done, we have started small with renting it out for others to enjoy too. They book their campground… then book our unit and just sit back and enjoy!
*SCROLL DOWN TO SEE THE LIST OF SUPPLIES USED IN THIS MAKEOVER AND THE BEFORE AND AFTER PHOTOS*
RV Makeover Reveal
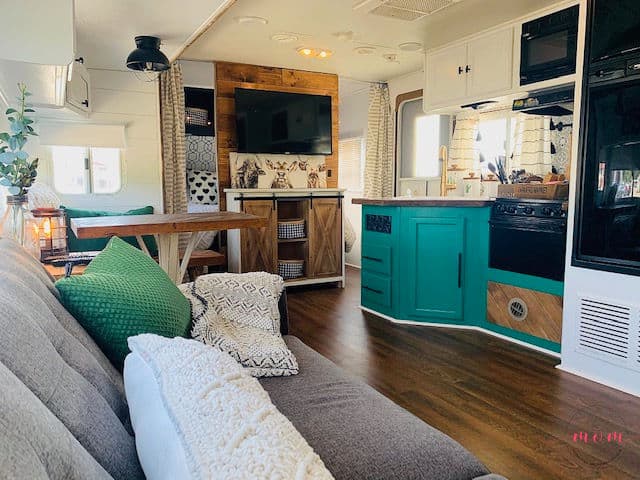
Bridget says she chose not to do all white like you typically see simply because she wanted it to be “fun and comfy”. I know I think she achieved this goal easily. Not only does it look inviting and comfortable, but it is also a fun space with great pops of color. It feels so much more open and doesn’t look at all cramped. The combination of earthy materials (wood, gold, metal, fabrics) with pops of color really works to create a bohemian charm.
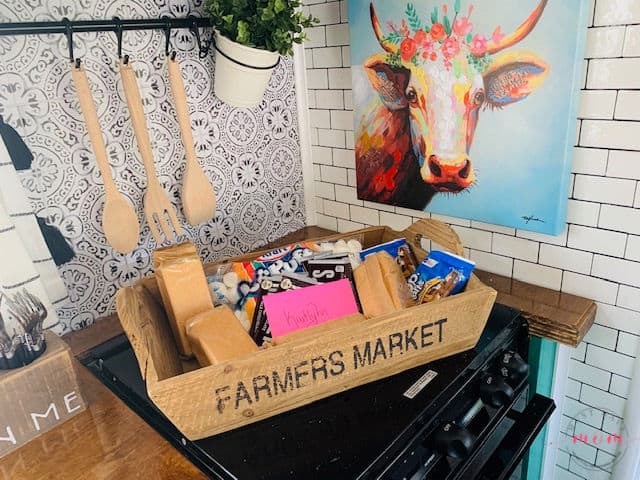
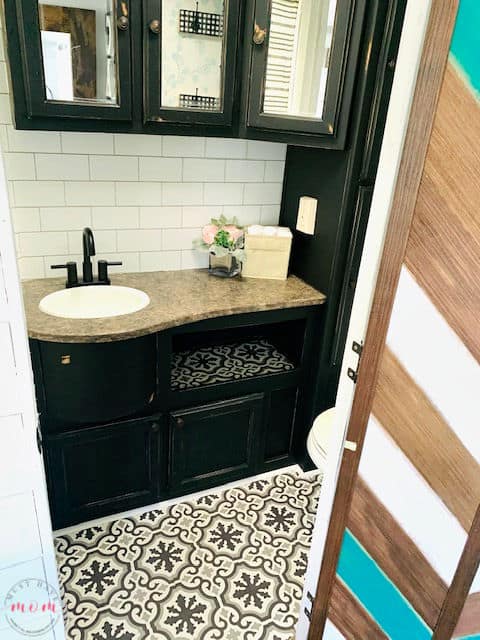
Make sure you check out that beautiful backslash in the kitchen and the floor in the bathroom! These choices may seem bold but mixed with the subtle use of color, all the wood, and the white walls, they add the perfect amount of texture for this bohemian RV makeover.
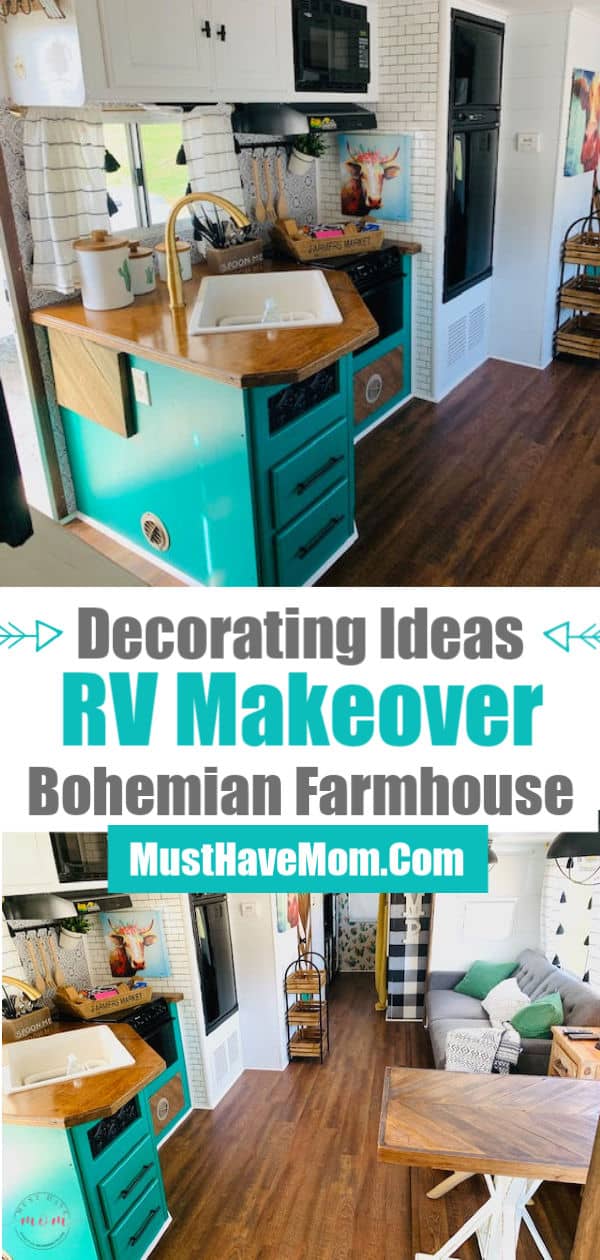
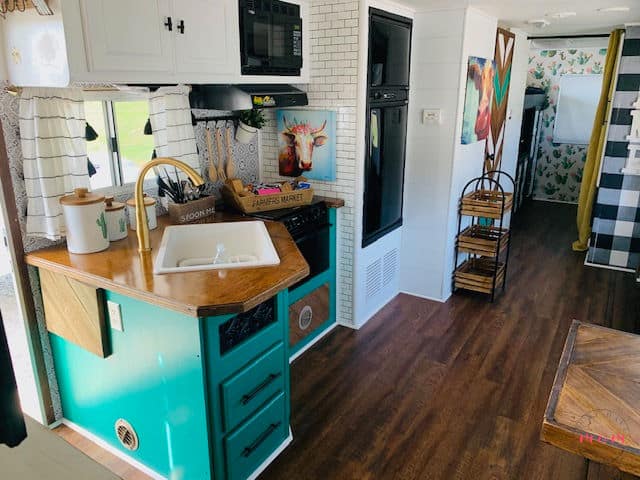
RV Kitchen Makeover
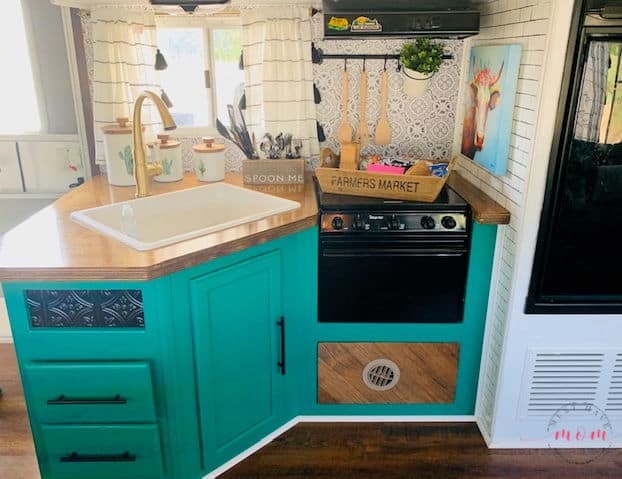
Bridget admits that the hardest part of the renovation was choosing her colors! She debated going safe and using all white. But she loves the look of a black bottom cabinet and a white top cabinet. But she admits she was drawn over and over to a green color. Finding the right green, that was another story.
They settled on a Valspar Chalk Paint Color in Peridot Broche that she loved so much she asked Lowes Hardware to turn into a Latex paint. Not sure how to paint cabinets in a camper? Check out my RV remodel for instructions on how I did it.
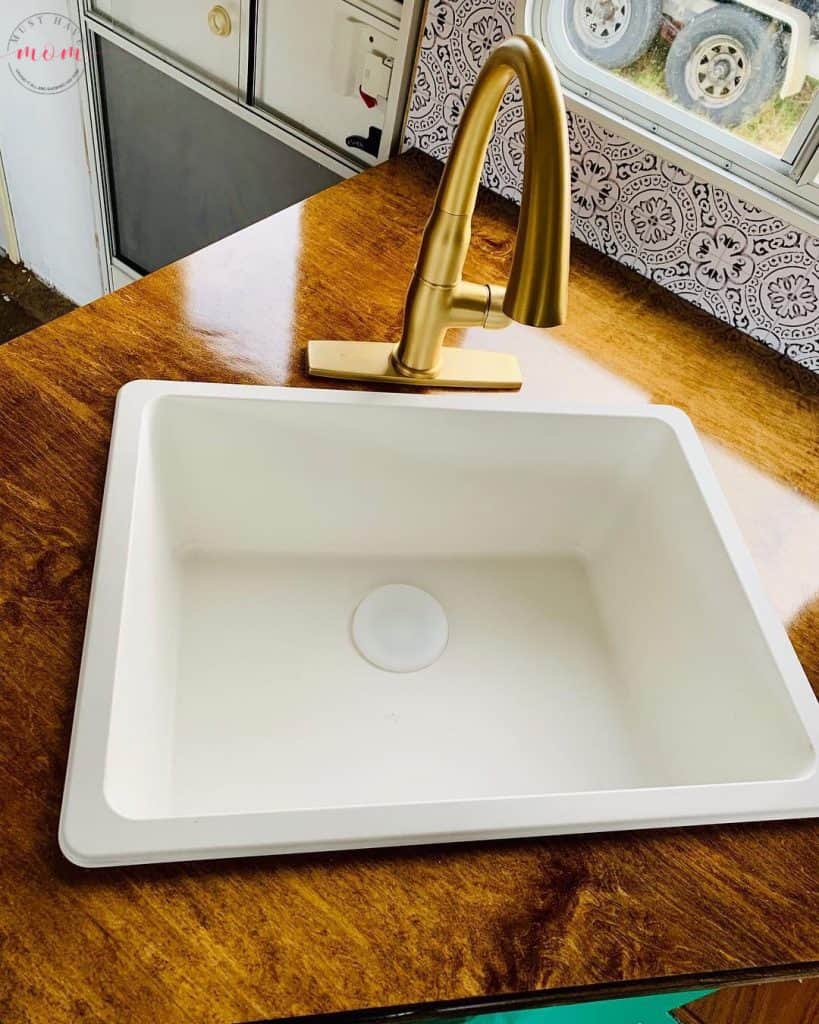
And that amazing kitchen faucet was found on Amazon. And the backsplash is actually a decal from Etsy! What a brilliant idea.
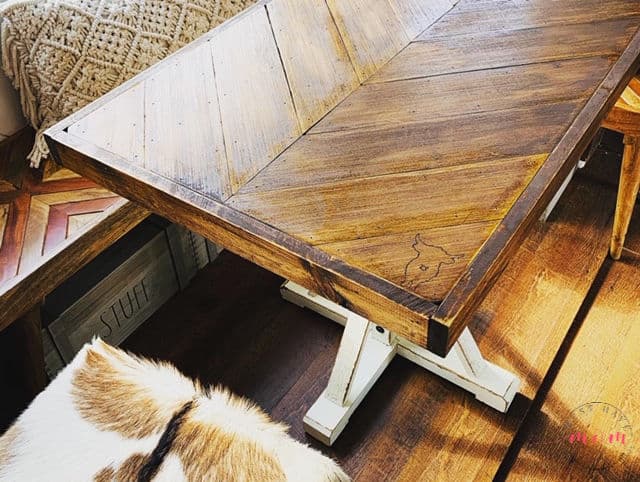
They struggled to find a table that would work for them and in the end hired someone to create a table using a herringbone pattern and burn the bull from their logo in it.
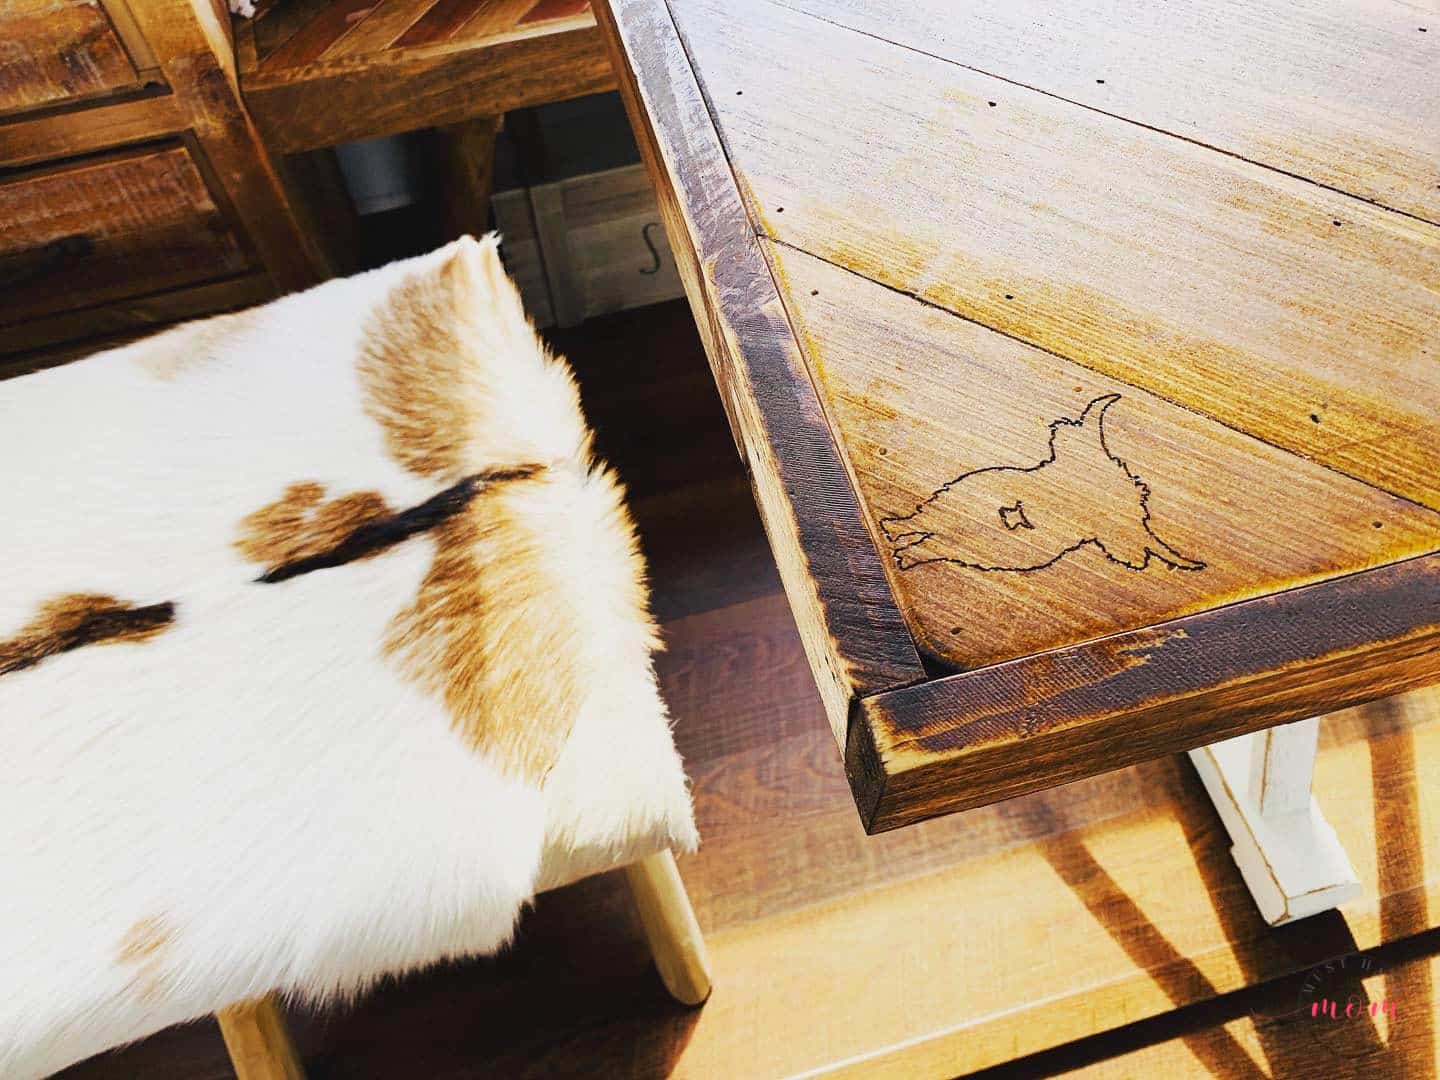
It turned out AMAZING! I love the pattern of the table!
A Bohemian RV Makeover Must Include Wood
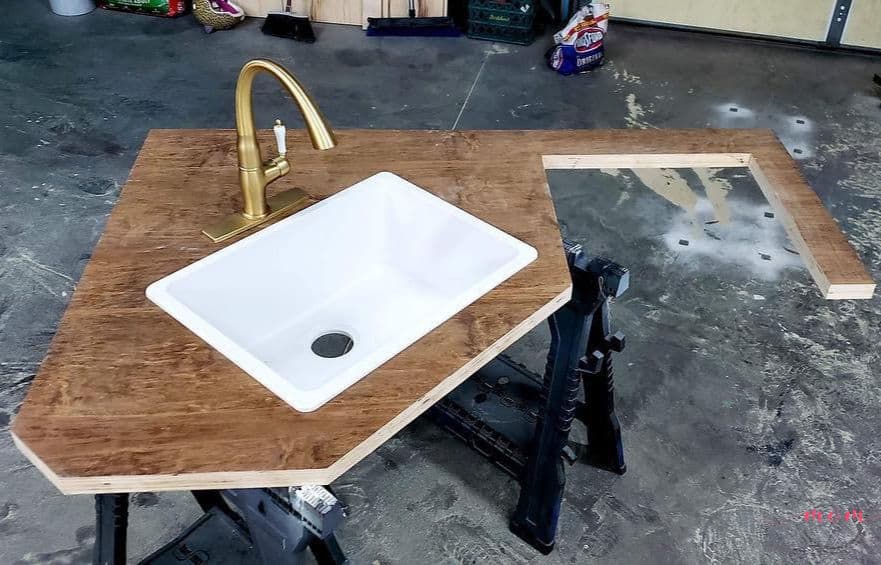
I love to incorporate wood as much as possible. It really adds more warmth to the overall design. Bridget had a good friend and woodworker with Moores Decor Unlimited that had always knocked her home projects out of the park, so she knew he was just the man for the job!
Don’t have your own woodworker to call? It is actually pretty easy to make DIY wood countertops that look expensive.

Bridget continued to use wood with both the bathroom door, and shiplap design by the bathroom, and the walls in the slide. She mentions that they ended up with a neat design in the slide to offset the weird shaping you get in a camper (unlevel walls etc). She used 1/8 plywood to do the shiplap by the bathroom doors and the walls in the slide!
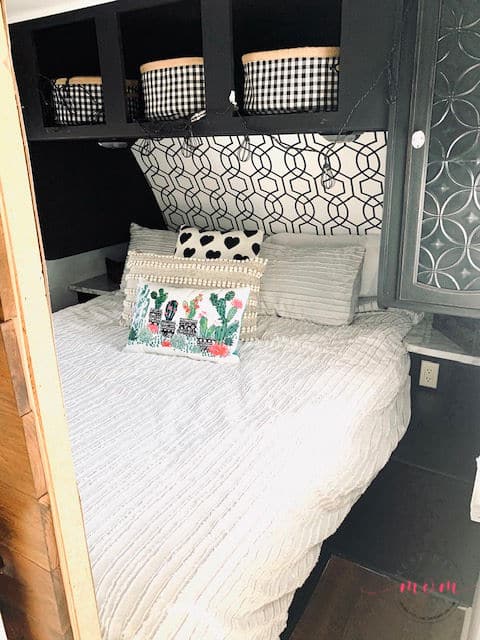
RV Master Bedroom Makeover
Gone is the dark and dingy master bedroom. Instead is a welcoming oasis that anyone would think of as home. Black paint adorns the cabinets while the decal over the bed imitates the tile in the bathroom while breaking up the black cabinets. A beautiful contrasting wall makes a great focal point while becoming the perfect spot for the TV.
Who wouldn’t want to climb into that room after a long day and relax?
RV Bathroom Makeover
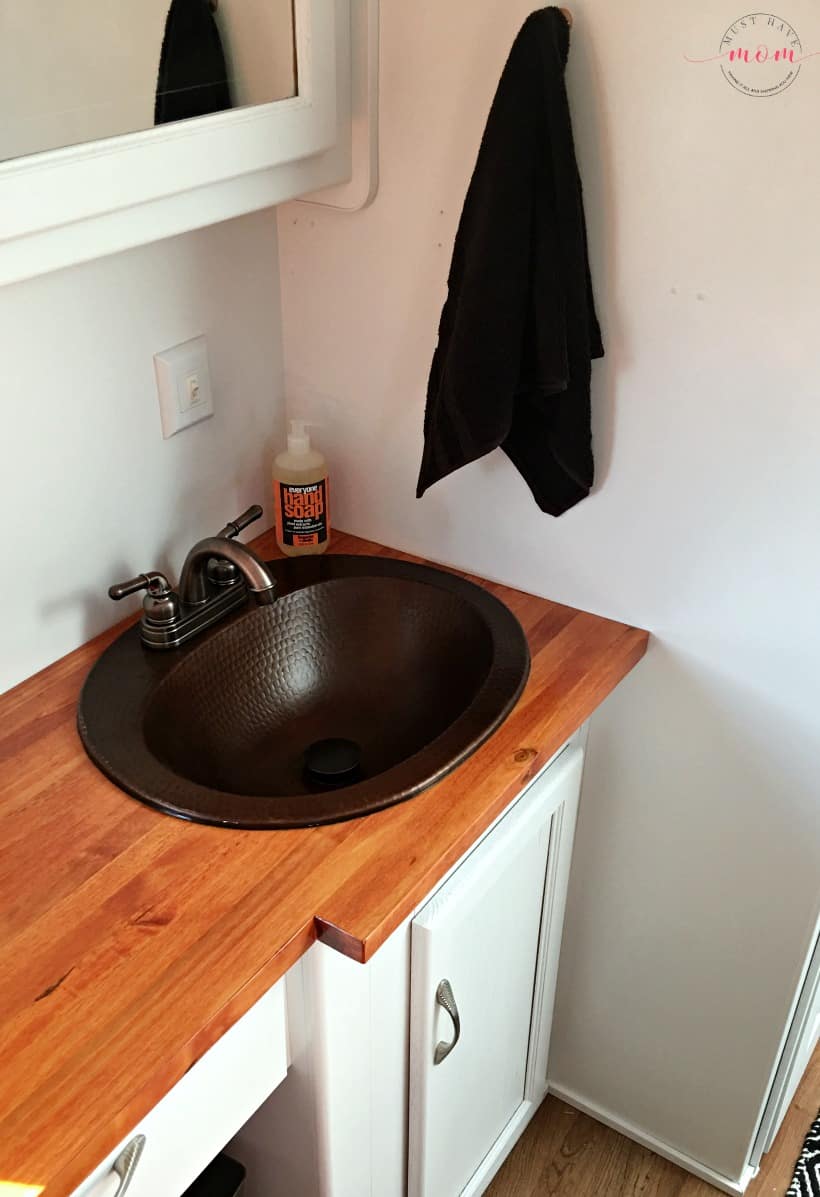
The bathroom is nothing short of beautiful. Dark chalk paint covers the cabinet and ties in perfectly with the tile choice. For the perfect tie-in to the rest of the space, she had the doors covered with 1/8 plywood to create the design over the existing hollow door, always keeping the weight in mind. The end results were the beautiful chevron pattern with wood, white, and more of that beautiful green. The cabinets above add some more much-needed storage space while the mirrors on the front create the illusion of a bigger space.
RV Bunk Room Ideas
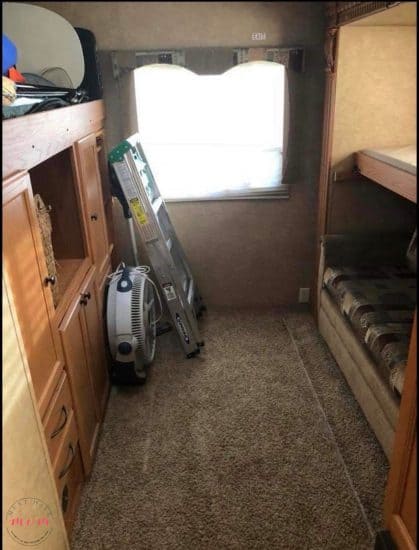
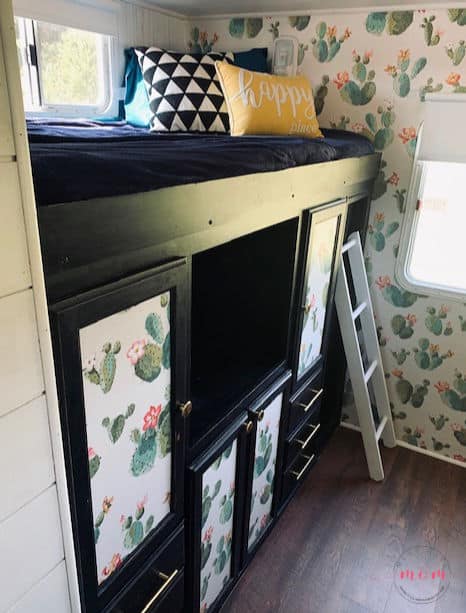
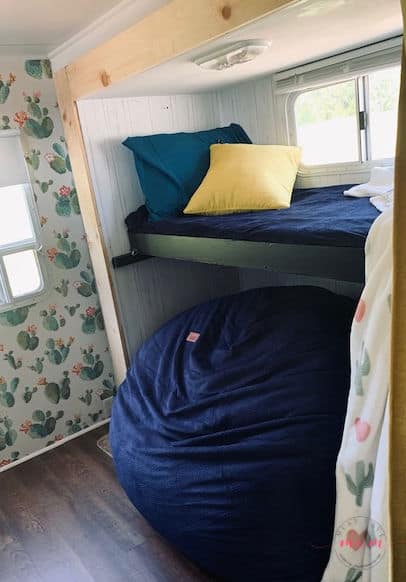
I love the cactus wallpaper in the bunk room! It’s so fun and cheery. Bridget transformed this space using shiplap from Lowes and cactus wallpaper from Walls Need Love on Etsy.
On the opposite wall they added a huge bean bag bed from Cordaroy under the top bunk. This can turn into a queen or king-size bed (depending which size you get) which makes for GREAT extra sleeping space and a fun place to curl up with a good book on rainy days.
Bridget says: I hope our renovation inspires others to step out of the box and go for it! I am my own worst critic and second-guessed myself the whole way… I am so glad I went outside the box and so happy with the end result! Renting it to others for them to enjoy is just an added bonus! Be sure to follow us on Instagram at Flipping Hitched to see all the processes in between and during this renovation. Also, you can see any changes we make and finishing touches still being applied. We also plan to get another rig soon… and I already have my color scheme all picked out! “Join the Herd”!
Shop This Post
Here is a list of the supplies and decor items used in this RV remodel!
Living room Futon: Walmart $299
Living area Light Fixtures: Walmart $25 a piece
Back Splash over the sink: Snazzy Decals on Etsy {I did the 4X4 pattern}
Kitchen Black and White Subway Tile: Hobby Lobby
Floors: Core Tec Vinyl Planks
Master Wallpaper: Lowes Hardware by The Property Brothers
Buffalo Plaid Wallpaper: Target
Subway tile Wall Paper in the bathroom: Amazon
Greenleaf Wallpaper in the Bathroom: Lowes Hardware by The Property Brothers
Bunkroom Shiplap: Walmart
Bunkroom Cactus Wallpaper: Walls Need Love
Black Paint: Valspar Chalk Paint in Tricorn Black
Green Paint: Valspar Chalk Paint color Perdiot Broche
White Paint: Ultra White
Bean Bag in Bunk: Cordaroys (turns into a bed)
Wood Benches at Kitchen area: TJ MAXX
Cow Hide Benches: Ross
Cabinet Under the TV: Hobby Lobby
2 tier shelf by bathroom door: TJ MAXX
Storage under benches: TJ MAXX
Cow Print at Bathroom wall: Hobby Lobby
Cow Print by the stove: At Home
Cow Print in Master: Hobby Lobby
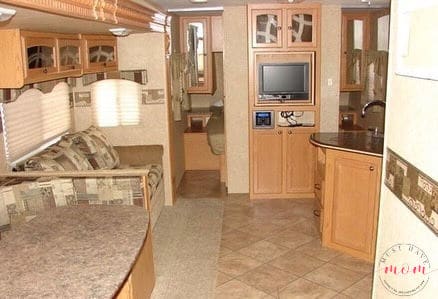
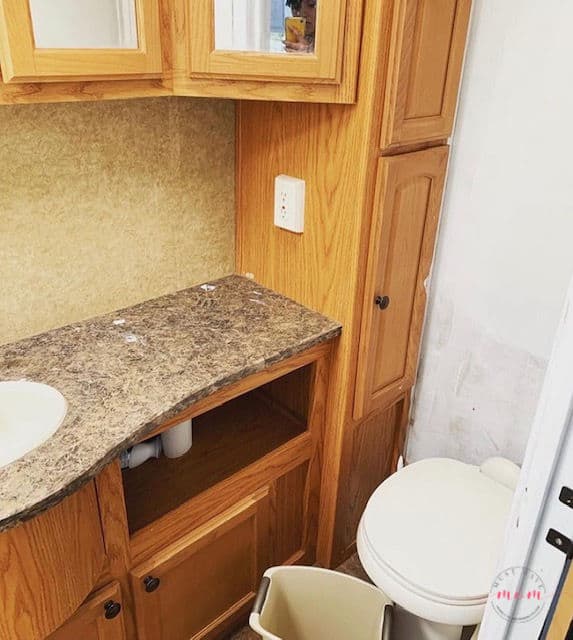
RV Makeover Before And After Photos
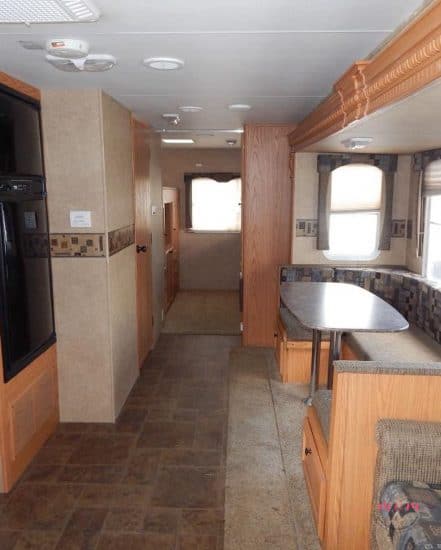
Here are some side-by-side before and after photos of the RV makeover and what each space looked like before the big transformation! It’s amazing what a little paint and elbow grease can do to change a space entirely!


Pin RV Remodel

This sure is an outstanding remodel. Both good choices and skill and maybe just a touch of good luck! It is inviting and makes you want to get away right now!
Yes, it’s so inviting, isn’t it? Thanks!
This place turned out amazing.
So beautiful! I just love that something so cookie cutter and well.. boring can be turned around to a one of a kind showpiece!
Everything really looks amazing, I love it!
It is gorgeous! It looks so bright and cheery now, and even bigger. Instagram isn’t working right now but I hope to ask these questions of her directly, but in case you know too…
How hard was it to replace carpet with vinyl? I think I have the same vinyl with nasty carpet under the dinette and I want to replace it desperately, but I’m a bit intimidated by the edge of the slide.
How much weight did everything add to the trailer? Did you do a before and after weigh in?
Isn’t it beautiful?! We have replaced carpet in two campers and it wasn’t terribly hard! We used click together vinyl and created a bull nose trim on the slide. I know she kept weight in mind and I also have to say that when we have done renovations on our campers you’d often be surprised how heavy some of the factory materials you take out are. Our couch we removed that was factory installed was far heavier than the one we put in. Using stick on backlspash instead of tile also reduces weight, etc. Hope that helps answer – it’s what I know from my own experience!
Wow this is amazing! I love what you did. My husband wants to do this with his, thanks for the ideas!
Thanks Amy!
Very cool! I love the turquoise cabinets. It’s a lovely makeover.
Great post and beautiful picture of kitchen. Thanks for sharing with us.
its adorable! that’s a space i would like to relax in
How did you do the shiplap on the the slide??? it looks awesome. did you glue it or nail it? what kind of glue or nails did you use? and what kind of wood? My wife loves the look.
Hello! They used 1/8 plywood to do the shiplap on the walls. Cut and paint it to achieve the look. I’m not sure what kind of nails she used. Hope that helps!
2 questions. How did you get the couch in and did you remove the wall paper from the walls 1st or just paint over it, thanks
Just paint over the wallpaper. You actually can’t remove the wallpaper in RV’s. It is glued to the plywood walls and not meant to come off 🙂 Assemble the couch once inside.
Beautiful picture of kitchen! I love this!
Thank you!
Could you tell me the color you used in the flooring?
I am not sure what the color in this one was. I’m sorry!
Where are the curtains from?
I think the curtains are from Italy.
TD777 Game is here to transform the way you experience online gaming. With a secure platform and endless opportunities to win, it offers a unique blend of excitement and rewards for players of all levels.
Appreciate the effort put into this. It’s always good to see quality content.
Jeder neue Spieler im Lucky7even Casino wird mit einem fantastischen Willkommensbonus begrüßt, der sowohl Match-Boni als auch
Freispiele beinhaltet. Mit Echtzeit-Dealern und einer sozialen Atmosphäre spielen Sie traditionelle Spiele
wie Blackjack, Baccarat und Roulette mit einem
echten Dealer ganz bequem von zu Hause aus. Für Spieler, die strategieorientierte
Spiele bevorzugen, bieten wir eine große Auswahl an Tischspielen wie
Blackjack, Roulette, Baccarat und Poker. Ob Sie den Nervenkitzel der Walzen bevorzugen, Ihre Strategien bei Tischspielen testen oder sich in Live-Casino-Erlebnisse
vertiefen möchten – hier ist für jeden etwas dabei.
Mit einer großen Auswahl an erstklassigen Spielen, fantastischen Aktionen und spielerorientierten Funktionen ist das Lucky7even Casino
der Ort, an dem Spaß und Gewinne Hand in Hand gehen.
Ein Fitnessstudio bietet die Möglichkeit, fit zu bleiben und sich zu bewegen. Das Lucky 7 Casino
& Hotel (Howonquet Lodge) bietet seinen Gästen verschiedene Möglichkeiten zur Freizeitgestaltung.
Die Lage bietet eine gute Anbindung an die umliegenden Attraktionen und Sehenswürdigkeiten. Das Lucky 7 Casino & Hotel (Howonquet Lodge) in Smith
River bietet seinen Gästen eine Kombination aus Unterhaltung und Unterkunft.
Das Lucky 7 Casino & Hotel bietet ein einzigartiges Erlebnis
für seine Besucher, mit einer Gewinnchance von 85% und einem luxuriösen Ambiente.
References:
https://online-spielhallen.de/lucky-dreams-casino-mobile-app-dein-traum-vom-spielen-unterwegs/
Der Zugang ist auf Anfrage an der Rezeption verfügbar,
sodass Sie ein ruhiges Training genießen können, während Sie den Blick auf die Hotelgärten genießen. Die perfekte Wahl, um
sich zu entspannen und das milde Klima Madeiras zu genießen. Genießen Sie entspannte
Momente am Außenpool der Pestana Casino Studios, einem ruhigen Bereich, umgeben von einer Terrasse mit Sonnenliegen, ideal
zum Sonnenbaden oder Entspannen im Schatten.
Der größte semitropische Regenwald der Erde, auf Madeira
beheimatet und zum UNESCO-Weltkulturerbe ernannt. Das Dockside ist der ideale Ort für einen erholsamen Tag.
Hier finden an besonderen Terminen auch die Galadinner statt, aber selbst an normalen Abenden erfordert die Kleiderordnung beim Abendessen ein wenig Sorgfalt, wodurch
bei Ihrer Mahlzeit ein etwas eleganteres Ambiente entsteht.
Die Tagungs- und Konferenzräume im Pestana Casino Park, die
den Gästen des Pestana Casino Studios zur Verfügung stehen, sind ideal für große Veranstaltungen, Konferenzen, Kongresse und Meetings.
References:
https://online-spielhallen.de/einfach-und-sicher-ihr-leon-casino-login-guide/
Darüber hinaus gibt es auch eine breite Sammlung an Tischspielen wie Online Roulette und Online Blackjack.
Falls Sie Ihr Passwort vergessen haben, können Sie
einfach auf die Option “Passwort vergessen” klicken, die nach dem Anklicken von “Anmelden” angezeigt wird, und Sie erhalten einen Link zum Zurücksetzen des Passworts per E-Mail.
Wenn Sie nach der Anmeldung auf Ihr Konto zugreifen, Einzahlungen vornehmen und spielen möchten, klicken Sie
auf die Option “Anmelden”. © 2025 zetcasinoofficial.com
– Sämtliche Inhalte unterliegen dem Urheberrecht.
Generell sollte man beim Spielen in Casinos immer daran denken, dass
Glücksspiele keine Einkommensquelle sein können. Um die Liste aller Turniere in Zet Casino zu sehen, klicke einfach auf
den entsprechenden Button in der Leiste ganz oben. Dafür reicht es einfach,
eine kurze Nachricht im Live Chat zu schreiben (unten links auf der Startseite).
Aber auch für bereits registrierte Spieler bietet das
Casino mehrere lukrative Bonus-Aktionen an. Hier gibt es
einen der größten zurzeit verfügbaren Willkommensbonus-Angebote für neue Spieler.
Tischspiele und Live Dealer Spiele tragen nur zu jeweils 10 % zum Bonusumsatz bei.
Freuen Sie sich also auf zahlreiche Boni, inklusive Willkommensbonus und regelmäßige Boni.
Bei dem Zet Casino handelt es sich um einen Anbieter,
der bereits seit 2018 online ist und somit schon mehrere
Jahre an Erfahrungen sammeln konnte. Dank der über 3.000 Spiele
wird im Zet Casino sicherlich keine Langeweile aufkommen, was für den langfristigen Spielspaß besonders wichtig
ist.
References:
https://online-spielhallen.de/admiral-casino-bonus-code-alles-was-sie-wissen-mussen/
Most of their titles are playable via mobile with full bonus compatibility.
Minimum deposits for most table games are as low as $1.
These can include leaderboard races, surprise reload bonuses, and
weekend-only spins.
Our bonus system isn’t just about flashy numbers — we’ve designed promotions that players actually want
to use. These games let you cash out anytime before the multiplier crashes — simple concept,
intense gameplay. A trusted casino won’t delay or complicate your
withdrawals.🎁 Fair bonuses with clear termsBig numbers mean nothing if the fine print
is unfair.
If you have a preference for games, make sure that the bonus you choose allows you to enjoy your favorite games.
Before you start playing at Zoome Casino Casino
, check out the different types of bonuses offered by Zoome Casino
. No app download required – access games directly through your
mobile browser with full functionality retained.
Once registered, you’ll immediately access welcome bonuses and can start exploring our game library.
References:
https://blackcoin.co/internet-casino-gambling-all-that-you-should-know/
This section is yours if you enjoy playing poker
or blackjack with your friends. All online slots
are used exclusively under the licens from the developer.
Start with slots if you’re new to the gambling world. At Hell Spin,
the bonuses and promotions are as hot as the underworld
itself. Take advantage of this bonus to bet for free.
In fact, it’s a paradise for gamers, filled with sizzling bonuses, a plethora of games,
and a VIP program that’s hotter than Hades himself.
Hell Spin provides you bonuses with the minimum deposit.
You can get both offers, even if you aren’t ready to spend much money on gambling.
The banking system is as transparent as possible, and the time you should wait for your winnings can be only a few minutes, if you
use an e-wallet. Join the VIP program to enjoy gambling even more!
And with their commitment to responsible gaming, you can be sure that your gaming experience is not only fun but also safe.
The team is responsive, friendly, and dedicated to helping you have the best gaming experience
possible. It’s user-friendly, fast, and lets you enjoy your favorite games
anytime, anywhere. Would you like to find out what bonuses are available?
If you understand you cannot meet all these requirements in time, you can refuse to get a particular
bonus. But when you win money with this extra cash, you cannot withdraw this sum instantly.
References:
https://blackcoin.co/circus-circus-las-vegas-in-depth-guide/
This allows for the excitement of substantial wins, with some casinos offering a lower house edge on certain games to improve favourable outcomes.
A high-quality casino offers a wide array of games, including slots,
table games, and live dealer games. The most common payment method, credit and debit cards like Visa, MasterCard,
and American Express are widely accepted by Australian online casinos.
Aussie players have a variety of casino payment methods to choose from when it comes to playing
games. VIP gaming options provide an exclusive and elevated experience
for high-stakes players. Despite the fact that games have a wide diversity and have
unique features easy to discover at most sites, some are more popular among Australian players and some are less.
Skrill and Neteller are particularly popular among online
casino players for their instant transactions. Choosing secure payment methods at online casinos is important for
safety and efficiency. Visa and Mastercard are popular payment methods for
their convenience and security in online casinos.
Popular methods at Australian online casinos include credit/debit cards,
e-wallets like PayPal and Skrill, cryptocurrencies, and bank transfers.
These bonuses are appealing as players can retain their winnings from a no
deposit bonus, though a deposit might be required before cashing out.
No deposit-free spins allow players to try games without
making a deposit, while regular free spins usually come in welcome packages.
To wrap up, it’s clear that the appeal of winning real
money at Australian online casinos while playing on your mobile goes beyond simple pros and cons.
Furthermore, mobile casinos often offer exclusive bonuses and promotions, providing extra incentives for players to enjoy gaming on their portable devices.
These special games add variety and fun to any experience providing real money at an Australian online casino.
In the competitive realm of playing for real money in Australian online casinos, operators
are always seeking to outdo each other. While claiming a casino bonus or exploring the latest
online casino bonuses can add excitement to your gaming, it’s essential to play responsibly and keep
your experience safe and enjoyable.
Understanding the importance of seamless transactions, the casino has integrated multiple deposit and withdrawal methods,
ensuring convenience and security. Golden Crown Casino takes pride in offering a variety of banking solutions to cater to its diverse player base.
Whether it’s about a game, a transaction, or understanding the nuances
of a bonus code, the attentive staff is always ready to assist.
Player reviews and testimonials further attest
to the casino’s reputation, with minimal complaints regarding payment or gaming issues.
Additionally, its games are routinely tested for fairness by third-party agencies, ensuring unbiased outcomes.
The casino’s commitment to offering regular promotions ensures that the gaming journey remains fresh and exciting.
There’s no need to download any app — the Golden Crown online casino is fully mobile-optimized.
One of the most iconic pokies available here is Golden Century, loved by thousands of Aussie
players. The Golden Crown live casino brings real-time dealer action to your screen. Here at Golden Crown Casino Australia,
we offer a smooth, mobile-friendly, and fully licensed gaming experience.
The ensuing discourse aims to delve into the underlying factors that have contributed to the platform’s notable popularity within the Australian context.
Doesn’t matter if you’re playing on a tablet or your phone—it all runs fine without you needing the newest
model. It’s not the flashiest system, but it respects your time,
and that counts for something. What you see is what you get
at Golden Crown Casino–earn points as you play, cash them
in when you’re ready. So yeah, it’s a slow burn, but if
you’re playing regularly, the points add up.
References:
https://blackcoin.co/online-casino-bonus-guide-in-australia/
Beyond betting on different numbers, roulette is a fun and exciting game that puts you on the edge of your seat.
They offer more combos, multipliers, and up to 117,649 unique ways to
win! We update our slot catalogue as often as possible, so every week, there is always something new to play.
In the Roll XO Casino online slot section, you have access
to over 4000 items, and that is not all!
Apart from the welcome bonus you get after signing up on our platform, we always
have something for every player subsequently. Get your RollXO casino login, and we’ll grant you access to our automatic
VIP program that rewards players with up to AU$45,
000 + 1,500 free spins. It’s not a secret that you have to verify your account after Roll XO casino
login to start playing for real money. Moreover, we provide great deposit and withdrawal options,
including cryptocurrency, which is an important factor for many
players.
Most players prefer smartphones for gaming,
and RollXO casino accommodates that with a smooth, app-free experience.
After login, players can manage deposits, claim promotions,
and set responsible gaming limits in the account area.
RollXO’s got the hottest slots, table games, and exclusive promos—no fluff,
just straight-up gaming thrills for NZ players.
References:
https://blackcoin.co/hellspin-australia-where-the-action-never-cools-down/
Instead, it gives buyers and sellers the freedom to negotiate shipping arrangements that work best for them.
Unlike some other online marketplaces, Facebook Marketplace doesn’t impose set
shipping fees or dictate specific shipping methods.
Facebook Marketplace has become a go-to platform for individuals looking to buy
and sell items within their local communities. That way, you can make the entire process much easier and grow your business.
Another random day during the week the casino offers $1,000
five different times in the Cash Draw. With its strategic locations in Sydney,
Brisbane, and the Gold Coast, The Star Casino offers a unique blend of gaming,
dining, and entertainment options that cater to a wide
range of preferences and tastes. These offers are designed to cater to both new and regular
patrons, encompassing a wide range of rewards from gaming credits to luxury experiences.
The casino offers traditional baccarat along with popular variations that can include side bets or slightly altered rules to add an extra layer of excitement to the game.
The Star Casino offers a diverse range of gaming options, catering
to both seasoned gamblers and newcomers alike.
References:
https://blackcoin.co/keno-rules-explanation/
us online casinos that accept paypal
References:
https://www.konqisakaxgy.shop/bbs/board.php?bo_table=free&wr_id=198
online betting with paypal winnersbet
References:
https://skillproper.com/employer/paypal-casinos-2025-best-paypal-slot-sites-in-the-uk/
online casino usa paypal
References:
https://mixclassified.com/user/profile/1039906
online casino paypal
References:
https://seven.mixh.jp/answer/question/top-paypal-casinos-in-australia-2025
online casino paypal einzahlung
References:
https://afrijobs.co.za/companies/real-money-online-casinos-best-sites-for-2025/
online casino australia paypal
References:
https://thelyvora.com/employer/online-casinos-australia-best-aussie-casino-sites-of-2025/
Your perspective on this topic is very interesting. Thanks for the detailed explanation.
Well written and engaging. A pleasure to read from start to finish.
真实的人类第三季高清完整版采用机器学习个性化推荐,海外华人可免费观看最新热播剧集。
задвижка 30с41нж 250 30с41нж