DIY Fall Decor For A Stunning Porch
Do you wish you had a gorgeous fall porch to welcome your guests? I have always been envious of those gorgeous pinterest porches I see so I set out to create my own welcoming fall porch and to save some money I created my own DIY projects so you can get a high-end look, without the price tag! Come along and I’ll show you how you can create this easy porch.
I designed this fall decor for my porch so it would be relevant for Halloween all the way through Thanksgiving. This is the perfect way to welcome trick or treaters all the way through Thanksgiving guests and friends and family. I love how much it improves my home’s curb appeal!
DIY Fall Porch Projects
I have two fun fall decor projects you can make and you can find all the necessary supplies at Lowe’s. Plus they even have the fun decor items I used (pumpkins, mums, etc!). I’ll show you how to recreate this look!
DIY Farmhouse Welcome Sign
One of my favorite elements of my fall decor for my porch was my farmhouse welcome sign. It’s the perfect sign for any porch and it’s really easy to make. Plus it costs very little to make! You could make several at once and give some as gifts to friends and family.
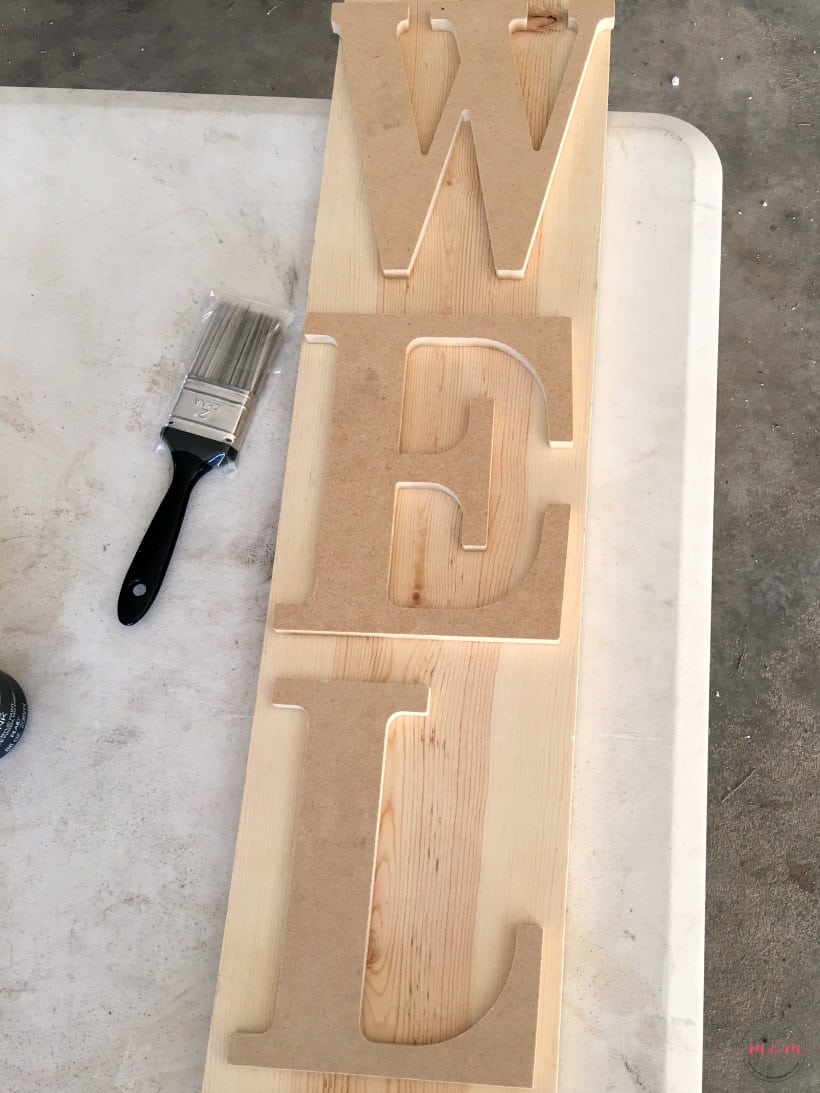
Farmhouse Welcome Sign Supplies:
- For this project you’ll need one .75″ x 7.25″ x 6′ pine board (find it in the lumber section at Lowe’s for approx $4)
- Valspar Satin paint (you can use a sample size container or get a quart and you’ll have plenty leftover for other projects – I used a farmhouse blue)
- Valspar Flat paint (for the top layer of the crackle – I used white)
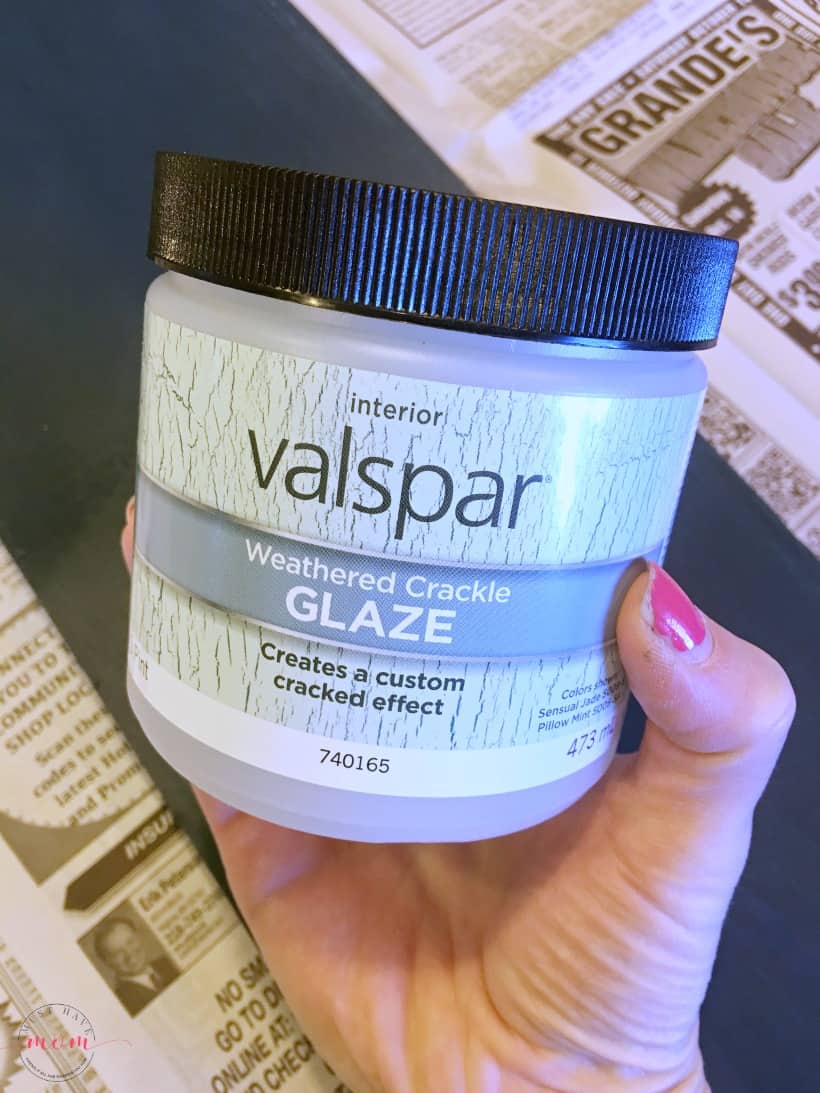
- Valspar weathered crackle glaze
- Letters to spell “Welcome” or whatever you choose – Find these at a craft store.
- Black chalk paint (for the letters)
- Wood glue
- Paint brushes
- Sealant (I used a spray on sealer from Lowe’s)
- burlap, wire edged ribbon in orange burlap and brown burlap (find it at a craft store)
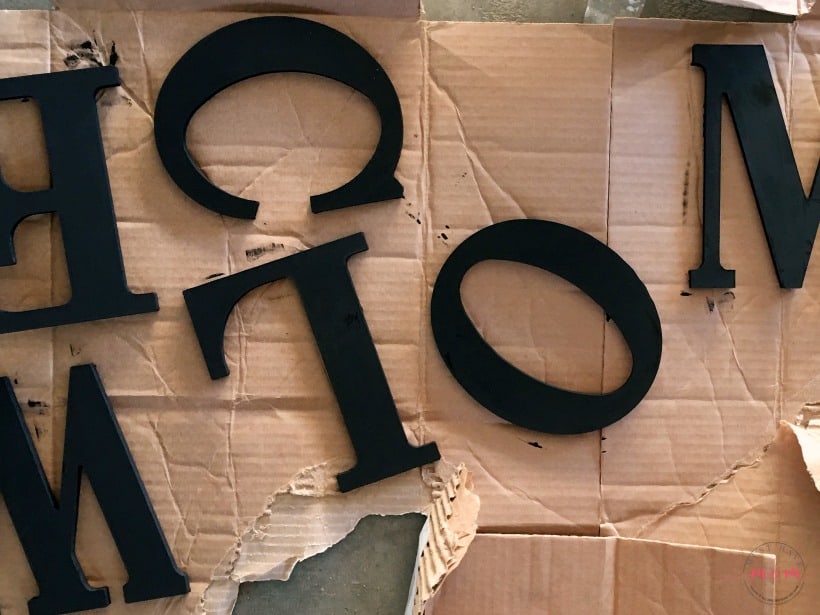
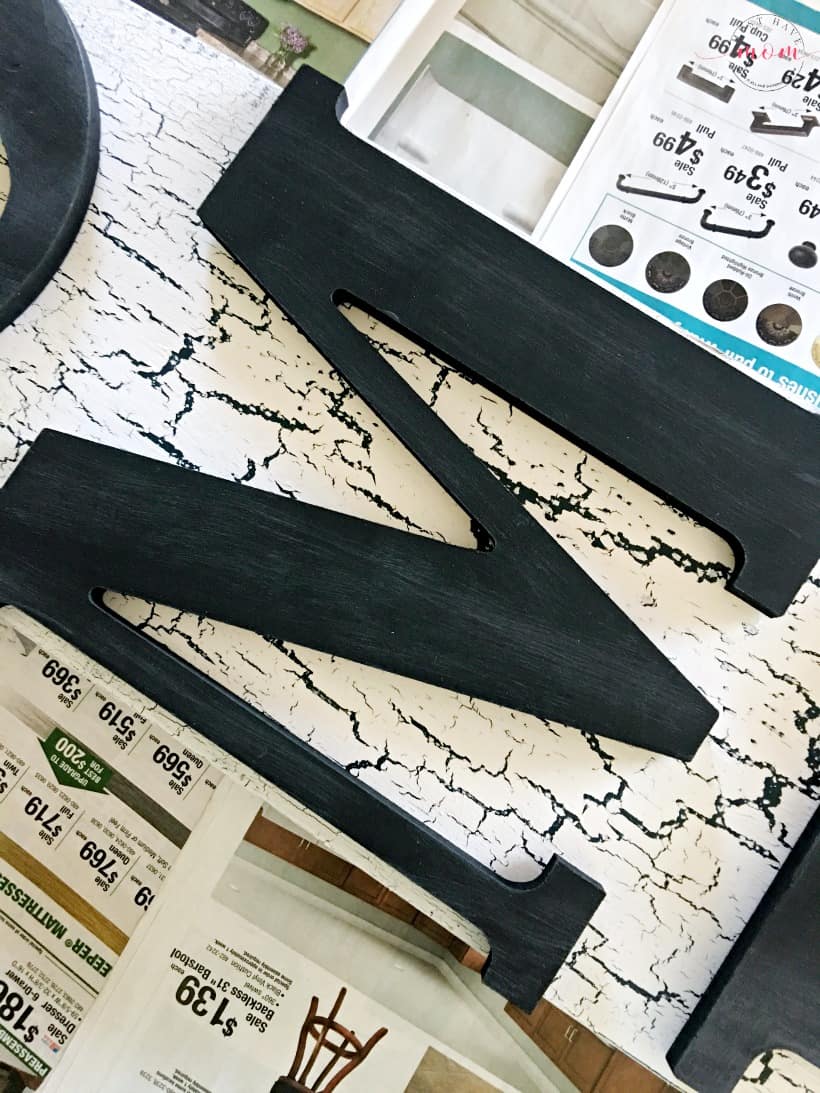
Begin by painting your “welcome” letters with black chalk paint. Let dry.
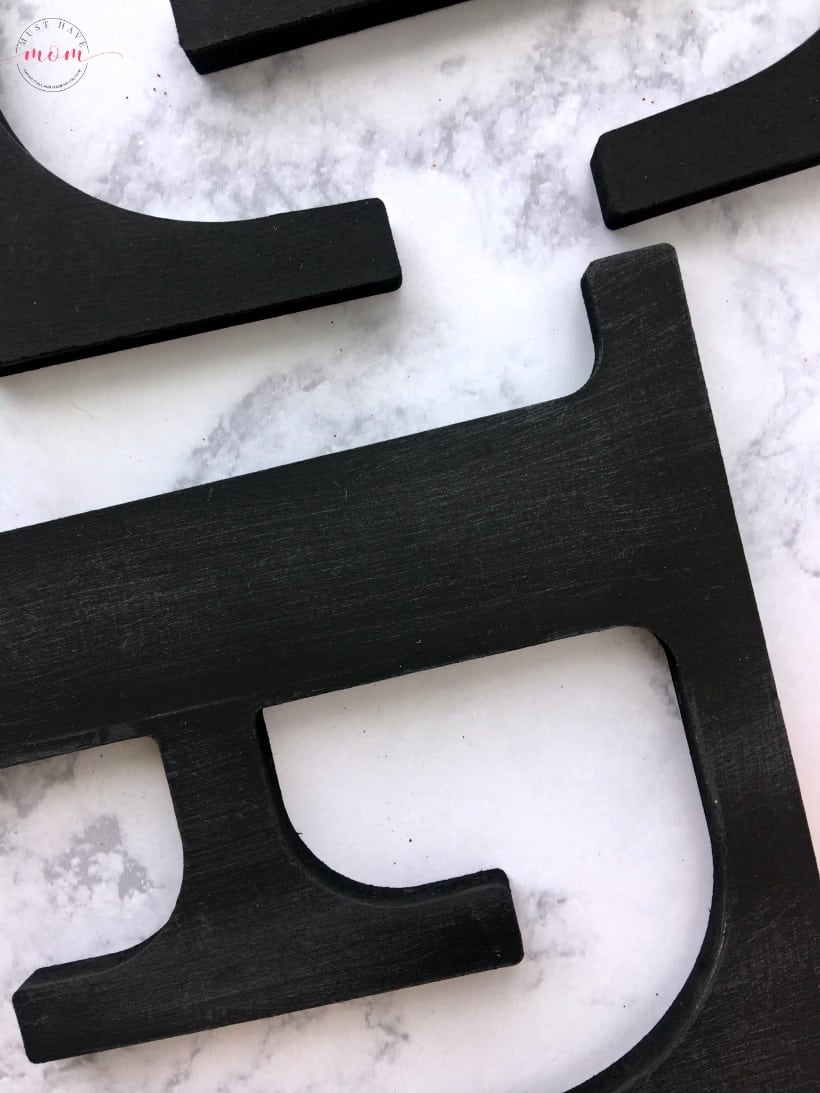
Once the letters have dried use a sanding block to gently create a more rustic look. I just brush over the top of the letters and some of the corners to create a weathered look.
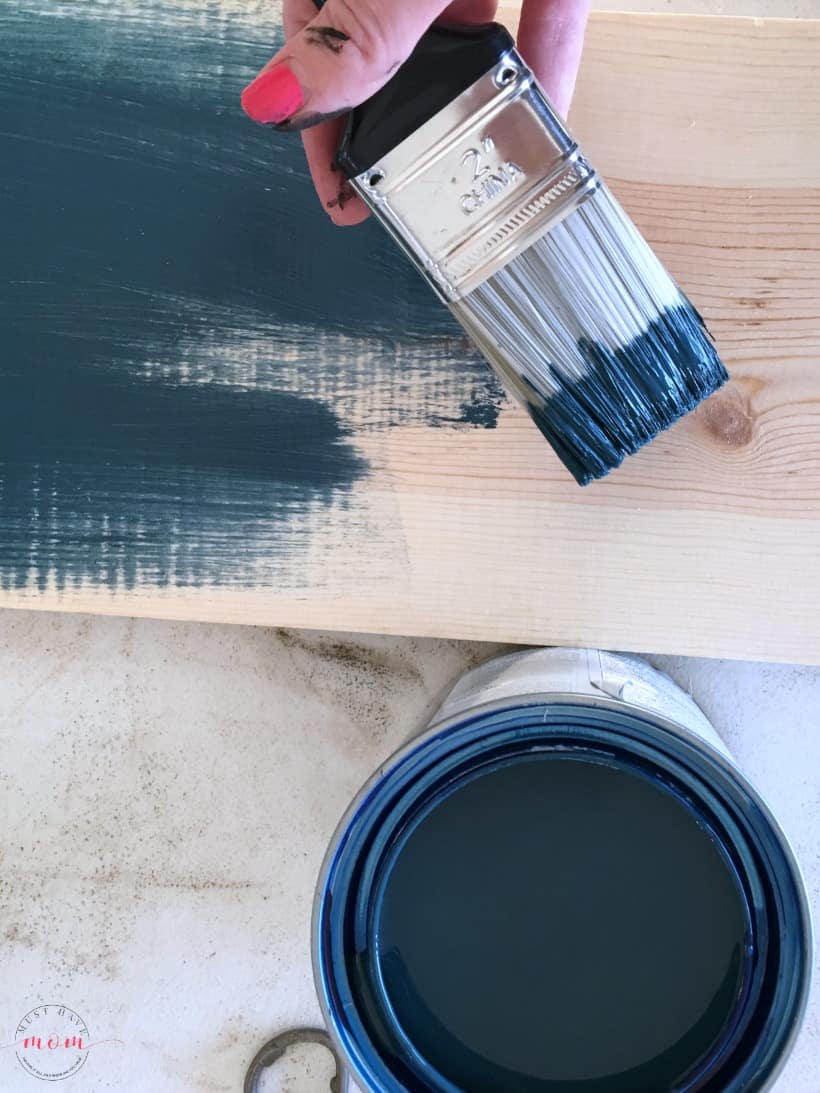
Now for your sign board you’ll need to do a 3-step process for the weathered crackling effect. It is important to use the exact type of paint I specify for each step. For your first layer use Valspar satin in whatever color you choose. Allow to fully dry.
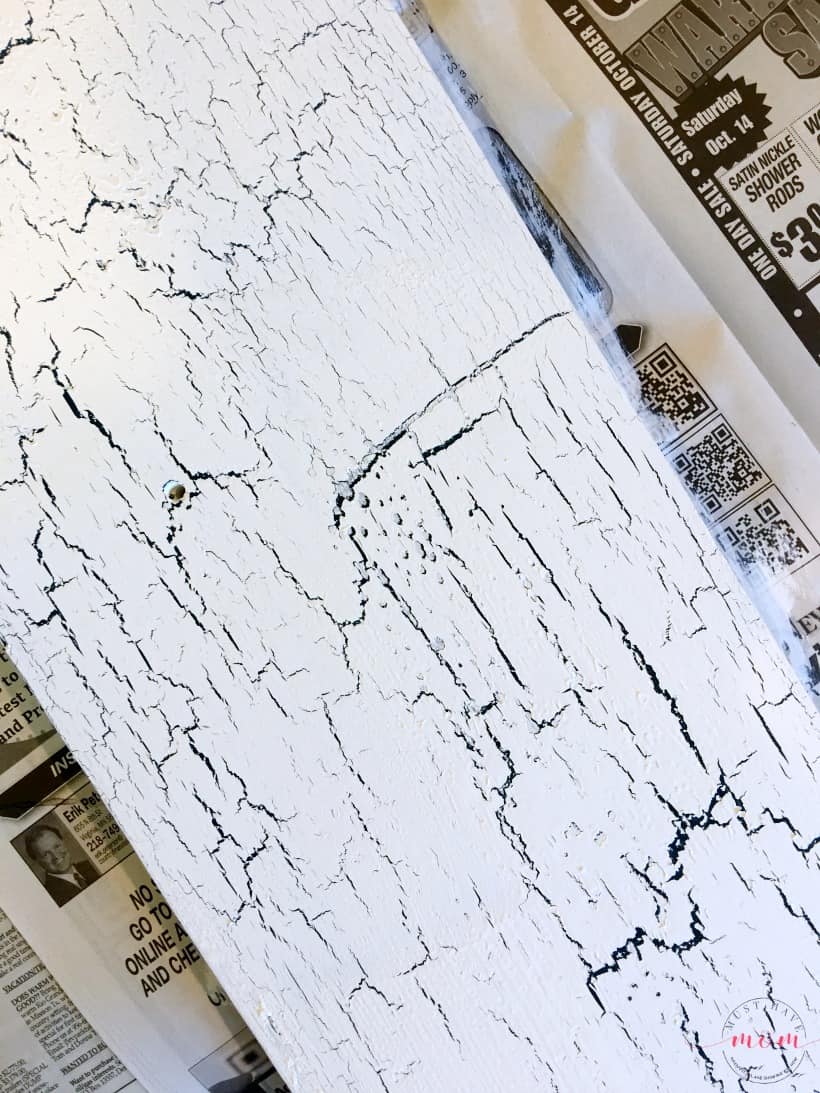
Once the first layer is dried, paint on the Valspar weathered crackle glaze. If you use a thicker coat the crackle will be bigger and a thinner coat will produce smaller crackles. Allow to dry for 1-3 hours, but not longer than that.
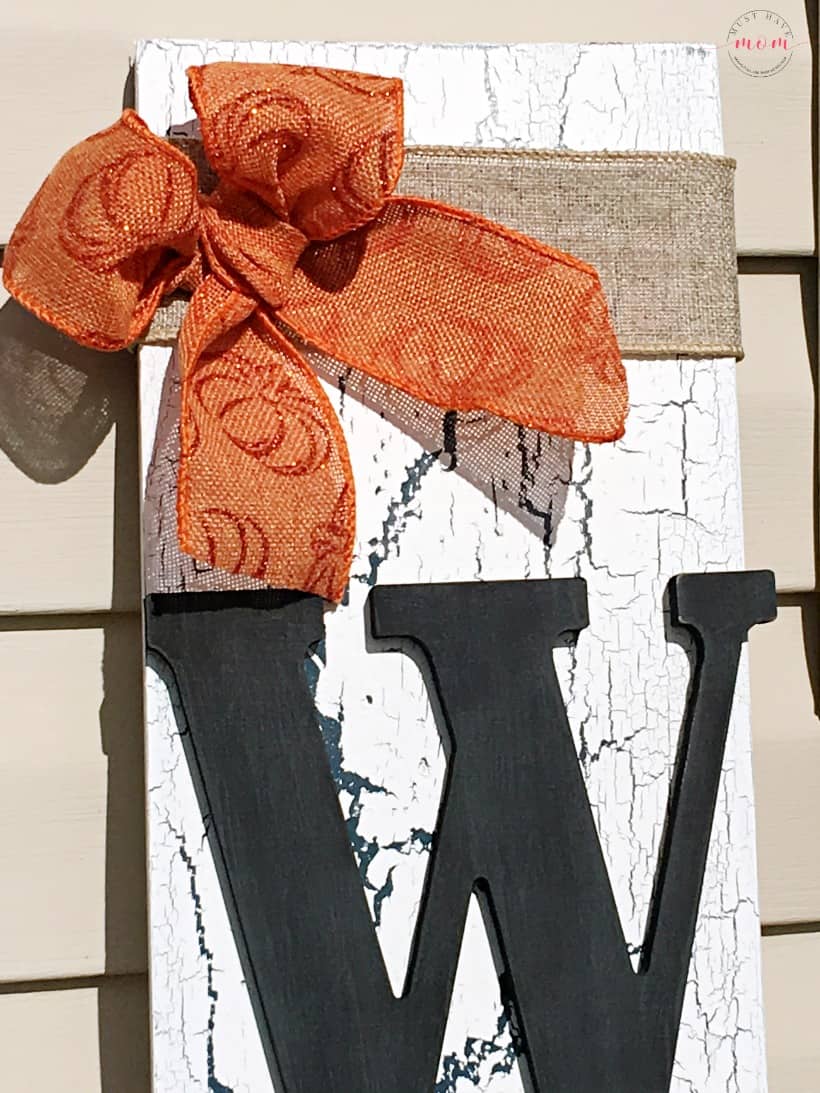
Finally, apply the Valspar flat paint over the crackled coat and it will immediately start to crackle.
Allow to dry completely. Use wood glue to adhere your “welcome” letters to the sign board. Once dry, apply the sealant (wait three days as instructed on crackle label before sealing) so it will be weather-proof.
I then used a burlap ribbon around the top and added a burlap orange bow that I created out of burlap, wire-edged ribbon, and hot glued it to the top of the welcome sign.
Now, you can add your gorgeous farmhouse porch sign to your porch or front door. Ready to make the crate now?
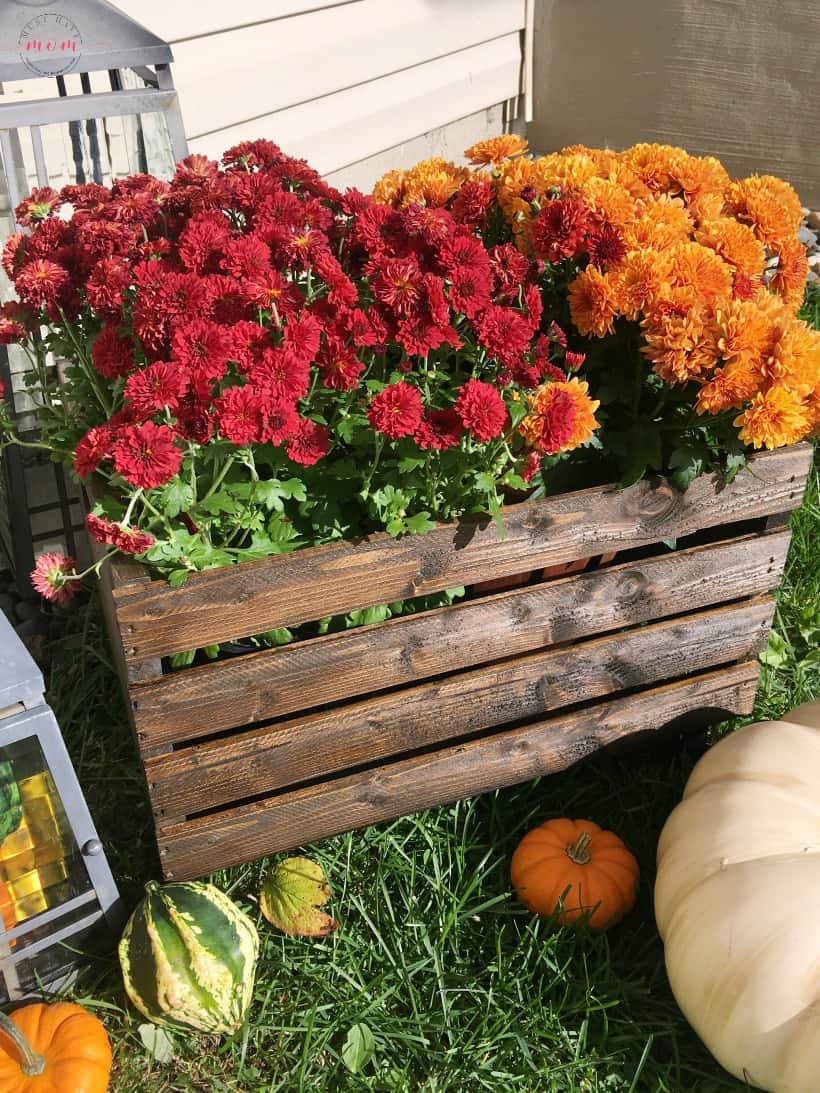
DIY Crate Planter
Create this stunning crate planter for just $12! Add wheels for just a few dollars more and you’ve got a fall planter you can easily wheel in and out of your door when the frost hits. It’s SO easy to make and so much less expensive than buying one from the store. You can get everything you need for this entire fall porch at Lowes!
DIY Crate Planter Supplies:
- wood crate (find in the shelving section at Lowe’s)
- oil based stain (I used leftover stain from my farmhouse mirror project in Jacobean color – from Lowe’s)
- paint brush or rag (rags work great for applying the stain and you’ll need one to wipe off the excess too)
- Optional: Wheels – Find them near the hardware at Lowe’s
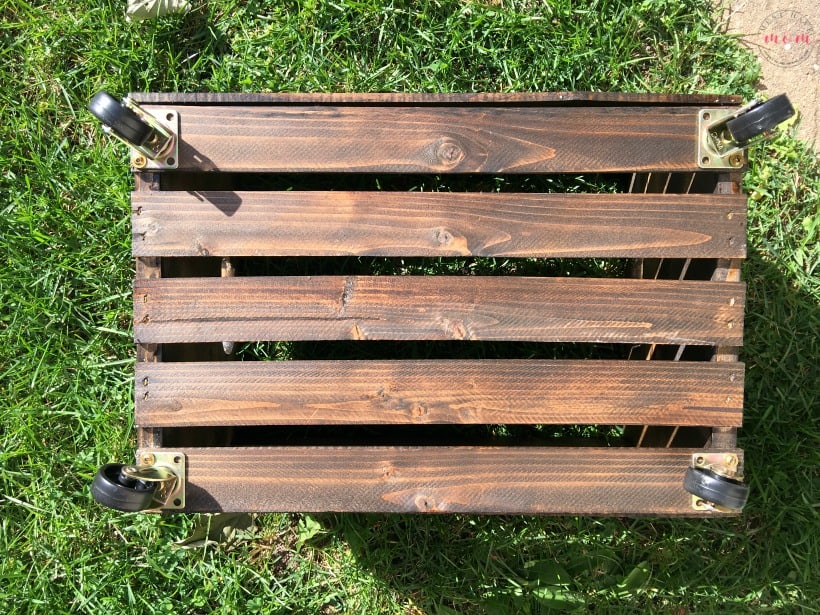
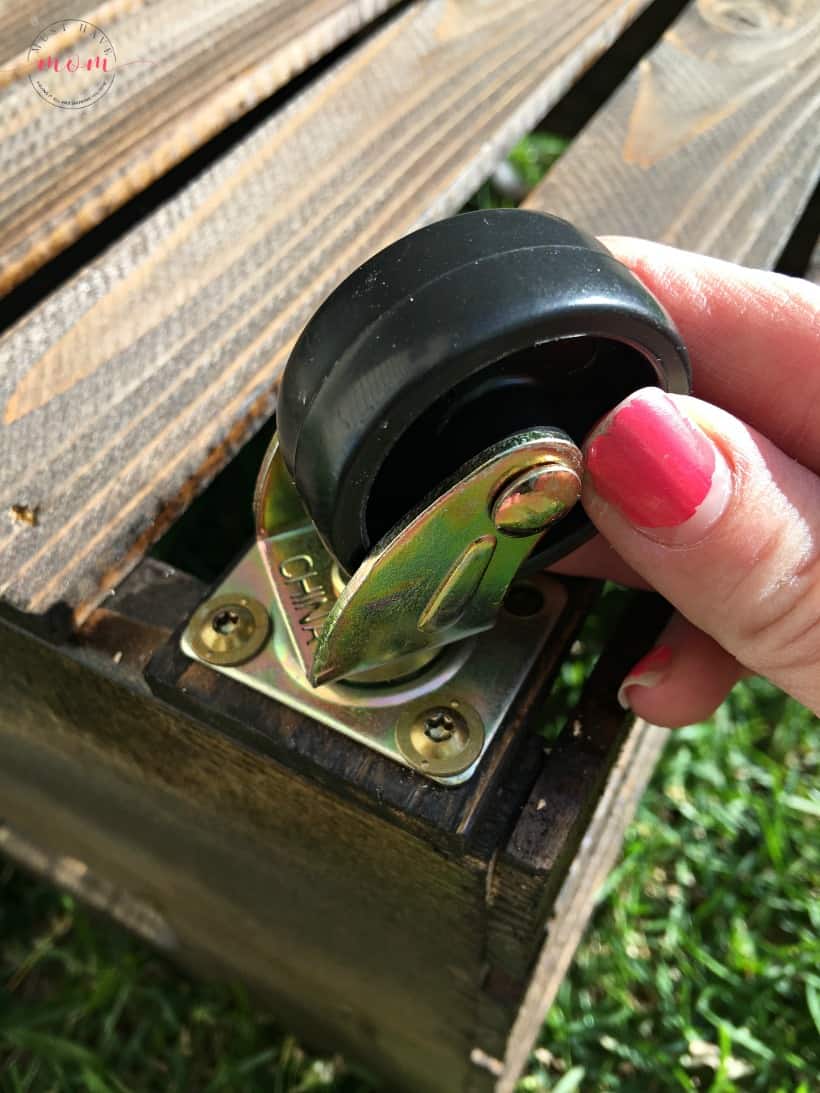
Stain the crate by applying the stain, one side at a time, and wiping off whatever doesn’t soak in. Repeat until all sides are covered. Allow to dry completely. Then, you are ready to install the caster wheels! They will go on each corner of the bottom of the wood crate.
Use an electric drill to attach the wheels with screws on all four corners (bottom side).
Then fill the finished crate with Mums from Lowe’s garden department. They are SO colorful and pretty. I absolutely love how pretty they are and they are also very hardy plants and do well with the cooler temperatures. If it is going to frost, I simply wheel them inside the porch for the night.
Complete your doorstep with a fall welcome mat (found in Lowe’s fall decor section) so guests can wipe their feet and feel the fall love.
I completed the fall decor look with mini gourds and mini pumpkins, as well as a few larger white and orange pumpkins from Lowe’s. The mini gourds and pumpkins are real, but the larger pumpkins I can re-use again and again every year! They look so real but I love that I can use them over and over again every year. Add a pop of fall color with a planter of mums on top of a hay bale and you’ve got a great look! I also filled my outdoor lanterns with mini gourds to give it a seasonal look!
Get everything you need to improve your curb appeal and welcome guests in style this fall at Lowe’s! I had SO MUCH FUN putting together this fall decor for my porch. It looks so festive and makes fall feel a little more inviting!
Pin this $12 DIY Crate Planter:

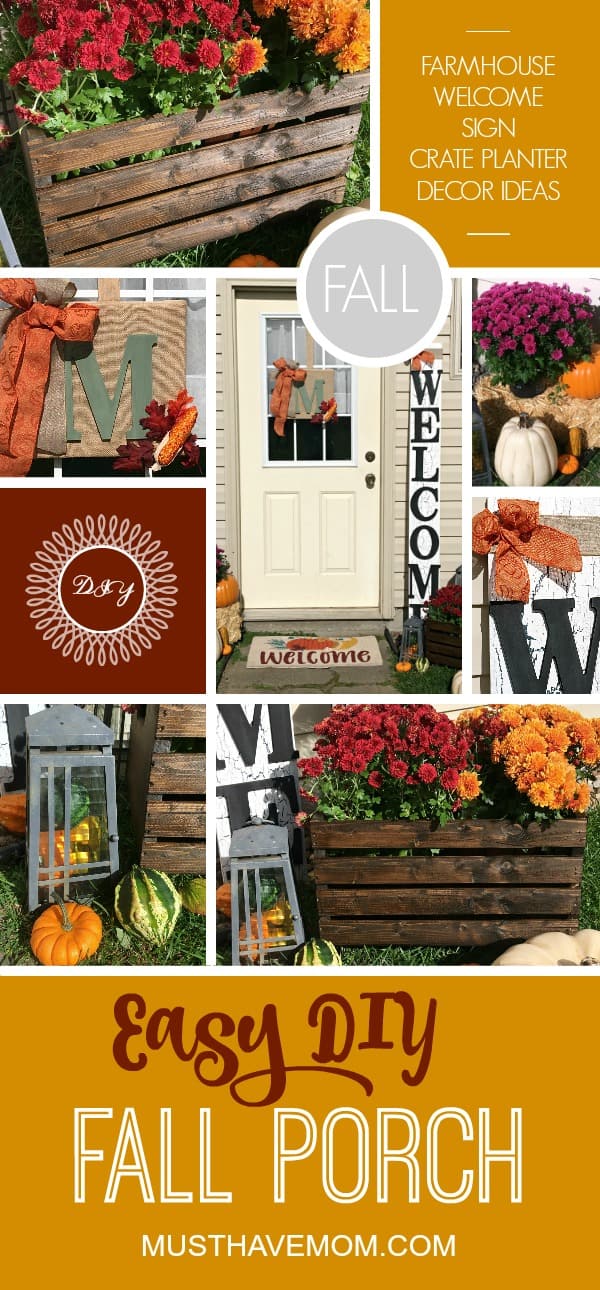
Pin this Fall Decor and DIY’s for your Porch!







I love your porch! All the decorations are gorgeous and that welcome sign is my favorite!
Your porch looks amazing and festive! I love the rustic wood…really makes it pop! Great ideas – thank you so much!
Can I hire you to do my porch? LOL that looks really cute pull it better than my plain porch that has nothing on it at the moment. You are so very creative.
You did an awesome job. I love the combination of the pumpkins and the flowers. That’s a nice look. The welcome sign came out awesome.
You did such a great job decorating your porch! I like to decorate in ways that are good for all of the holidays in Fall also since I don’t have time to decorate for so many great holidays individually. I think I’m going to try and make that Welcome sign. It just looks like a very fun project and the end result looks high end also!
Your porch decor is adorable. I always have good intentions to decorate, but just never seem to get it done. You have inspired me.
I love decorating for the Fall. You know, I never thought to go to Lowes!
I love your style! Looks like we both like rustic and farmhouse style decor!
I have been looking for some ideas to dress up my front door. I am in love with this welcome sign. I will have to get the supplies I need to make one this weekend.
That little flower box is seriously the cutest! I love the stain on it. Makes for a perfect fall eye catcher!
I really like how you used your mums. I wouldn’t mind planting some of those! They work really well with the fall theme.
Wow! I am so in love with your Welcome Sign! So clever and so me. By me I mean country distressed! Your porch is perfect for September through November!
I love your porch. All the decor looks amazing. I need to start doing something like this for my porch. It could really use a nice touch like this.
I love to decorate for all. Love the warm colors of the harvest season. That welcome sign would be a great addition to my porch.
I think fall decorating is my favorite. The Crate Flower Planter is absolutely adorable!
Your porch came out amazing! I so wish I had a home during the holiday months. There’s only so much you can do with an apartment!
It looks like you have the perfect fall decor going! I really want to make that welcome sign for our home!
I really love the pallet box you made! It’s so cute for your fall look but it’ll be good for all the seasons to add the bit of classic farmhouse style. What a great look!
These are great fall decorations.
What size letters did you use for the Welcome Front Porch sign?
I purchased the largest letters that Walmart had in their craft section. It will just depend on the size of your board too.
Did you paint both sides of your welcome sign board?
I didn’t but you can if you want to. You don’t see the back at all so I skipped it. You could also do welcome on one side and a holiday welcome on the opposite side if you wanted to get really creative!
********************************************************
Thank you for sharing at #OverTheMoon. Pinned and shared. Have a lovely week. I hope to see you at next week’s party too! Please stay safe and healthy. Come party with us at Over The Moon! Catapult your content Over The Moon! @marilyn_lesniak @EclecticRedBarn
********************************************************
Love the welcome sign, but just curious, why didn’t you use a stencil for the letters. That way you could do over again.
Thank you! You certainly could do it with a stencil as well. I love the look of the raised letters 🙂
I was looking at the crackle glaze container I can’t see where it says to wait 3 days to seal. I’m on day two and want to do it already ????
Lol I would be a rebel and do it 🙂
Beautiful! What size are your letters. I have the same board. Thanks for sharing
They are the letters in the Walmart craft area. Around 5-6″ I believe
Sarah, I Love your fall decor. Please share at Meraki Link Party at https://doodlebuddies.net/2020/08/24/meraki-link-party-2/
Naush
Thank you so much!
The mums look so festive in your crate! That was a great idea to add wheels to your crate and I like the stain color you used.
Thank you so much! So easy and inexpensive!
Fantastic idea ! I love how creative you are.
Thank you!
Your front door looks very welcoming! Great DIY ideas especially your welcome sign.
Thank you!
Your porch decor turned out so cute and I am really itching to try the Valspar crackle paint now! Thank you for sharing!
Thank you!!
So pretty! Great ideas and I love how you have everything displayed!
Gorgeous Chrysanthemums, so colorful
Thank you for sharing your links with us at #276 SSPS Linky. See you again next week.
“What an incredible use of technology! The HD background contrasts beautifully with the smoothness of the face, giving this photoshoot a clean and sophisticated look that’s hard to ignore.”
I love howTechgues com balances technical depth with easy readability. Perfect for tech enthusiasts of all levels
Create soft-focus portraits with a delicate glow by using this snapseed qr code that smoothens skin and boosts warmth.
This is absolutely gorgeous! I love how the DIY welcome sign and crate planter come together to create such a warm, inviting porch. Your step-by-step instructions make it totally doable on a budget — thank you for inspiring me to decorate our entrance this fall!
What a brilliant creative project! The mix of rustic textures, the crackle paint effect on the sign, and the movable planter on wheels are such smart touches. You’ve turned fall porch decor into something high-end looking but affordable — I can’t wait to try this myself.
Dreamz.com ist eine sehr mobilfreundliche Website; sie
bietet den Spielern das schnellste und eines der benutzerfreundlichsten Online-Casinos!
Die anekdotische Erfahrung von mir, dem Autor, im Dreamz Casino zu spielen, war erstaunlich.
Kurz gesagt, es bietet alles, was Sie von einer sicheren und vertrauenswürdigen Online-Glücksspielseite erwarten würden. Die Casinospiele sind ästhetisch ansprechend für die
Augen und – zusammen mit den exzellenten Casinoboni – eine Erfahrung,
die Sie nie vergessen werden.
Dreamz Casino bietet viele Arten von Spielen an, die Sie vielleicht spielen möchten, aber die beliebtesten sind oft die Slot-Spiele.
Sie können mehr zusätzliche Daten über die Casino-Boni und mehr aus dem Bonus-Bereich auf dreamzcasino.com lesen. Zum Zeitpunkt des Verfassens dieses Artikels bietet
Dreamz Casino Ihnen – dem Kunden – einen 100%igen Einzahlungsbonus + 10 Freispiele.
References:
https://online-spielhallen.de/cocoa-casino-login-ihr-weg-zum-spielvergnugen/
Whether you’re relaxing at home or sneaking a spin during your
commute, Woo Casino mobile ensures the action is always right there in your hand.
That means the same jackpots, same live dealer streams, and same promotions –
just built for life on the move. The dedicated Woo Casino app (also
available as a Woo Casino mobile app) makes it even easier to dive in. From welcome packs to regular promos,
every stage of play at Woo Casino Australia feels like you’re getting more for your money.
And Woo Casino bonus deals are some of the most generous around.
High-definition streams, pro dealers, and interactive features bring that authentic casino vibe straight
to your screen.
With quick navigation, touch-friendly controls,
and instant access to 10,000+ pokies and table games, it’s designed for players who want everything just a tap away.
With over 10,000 titles on the roster – from classic pokies to the latest live dealer
experiences – this is the Woo online casino built for
Aussie players who want the lot. Woo casino transforms your
gaming routine with instant deposits, withdrawals processed within 1-24
hours, and round-the-clock support tailored specifically for Aussies.
Woo Casino Australia appeared on the gambling market in 2020, bringing thousands of casino games and huge bonuses to the table.
Woo Casino offers a premium online gaming experience with over 2,
000 games, generous bonuses, and secure payment options.
References:
https://blackcoin.co/allslots-casino-poker-no-deposit-bonus/
Online casinos are about the thrill, not making money.
Make sure you pick one that puts your safety and experience
first. Here’s a quick look at everything you need to know about Zoome Casino – from supported devices to payment options, withdrawal speeds, and more.
Yes, our mobile site works on all smartphones and tablets through your browser.
Minimum deposits are $10 for cards and e-wallets, $20 for cryptocurrencies, and $50 for bank transfers.
E-wallet withdrawals process within 2-12 hours, cryptocurrencies within 1 hour,
and card withdrawals take 3-5 business days after approval.
Most queries get resolved within minutes on live chat, though complex payment investigations might take up to
24 hours — we’ll keep you updated throughout.
Long-term players often receive exclusive codes by email
or live chat, which can unlock no-deposit perks. Australian players can reach out via live chat or email at any time of day.
While most are tied to a deposit, Zoome Casino Australia gives
players loyalty-based spins without requiring top-ups.
Cashback on Thursdays and VIP free spins are examples of benefits players can unlock without needing to top up their account again. Zoome Casino Australia is built for players who want straight-up value – no nonsense, just real games, real money, and
reliable payouts. With a range of payment methods available, players enjoy
flexibility and control over their transactions, making Zoome Casino – quick, worry-free, and efficient – every time.
References:
https://blackcoin.co/are-bitcoin-casinos-better-than-normal-casinos/
online australian casino paypal
References:
recrutement.fanavenue.com
online casino roulette paypal
References:
https://classifylistings.com