Canning 101 The Basics Of Getting Started Canning
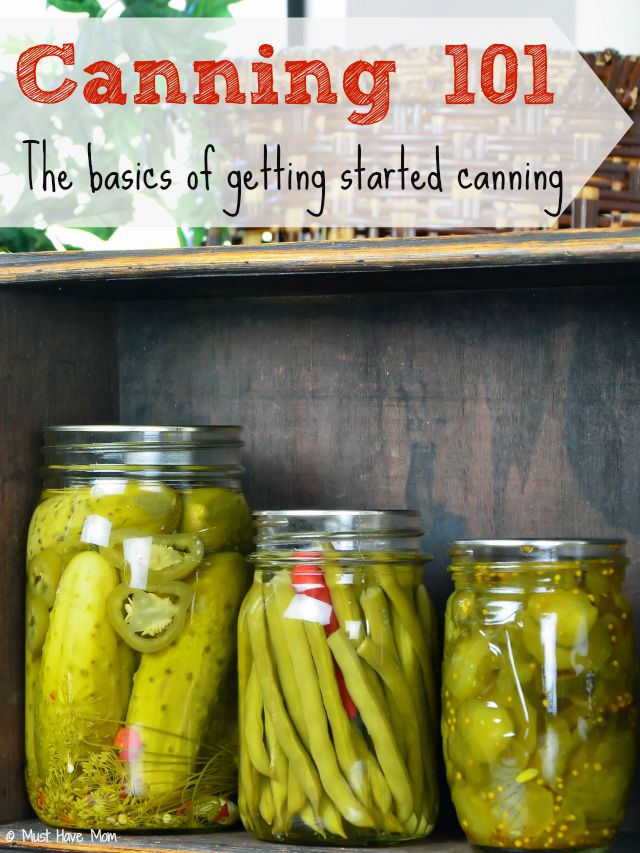
When you put a summers worth of time and effort into growing a garden, providing organic healthy foods for your family and friends, it’s a shame if all of it doesn’t get eaten. When you find that you can grow more than you can eat don’t fret! You don’t have to give it all away and wait until next year. Instead you have the option of canning. Save those delicious fruits and veggies to eat over winter this year!
Why should you do it?< The number one reason to can produce is because it provides healthy organic foods from your garden year round. But there are a few other benefits as well; it will save you money. Foods that are out of season in your area will be pricey, and many produce items are expensive to begin with if you want them to be organic. For those that prefer to preserve the environment canning is also eco-friendly and cuts down on household wastes. So what do you need?
- Mason jars, also known as canning jars along with lids that can be sealed.
- A jar lifter for lifting the jars out of the water (they will be hot).
- A large pot, to boil the jars and lids in.
- A lid wand will make it easy to remove the lids from the boiling water.
- A pressure canner if you plan on canning any low acid foods.
- A funnel for filling your jars, wide mouthed funnels work the best and take less time.
- Ladles will make it easier to fill your jars with liquids.
- Be sure to also have some clean cloths to wipe the jars down with.
How does it work?
We won’t go into too much detail here, we’ll go over canning 101 the basics, and will give a basic overview of canning. Each item that you choose to can may need to be done with a specific process, so be sure to check into each item before canning them. The Ball Complete Book of Home Preserving is a great resource for recipes and specific canning times.
Your first step will be to sterilize your jars and lids by washing them and then boiling them in water for at least ten minutes, the hotter the better, and be sure to leave the lids in until right before you need them to make sure nothing gets on them.
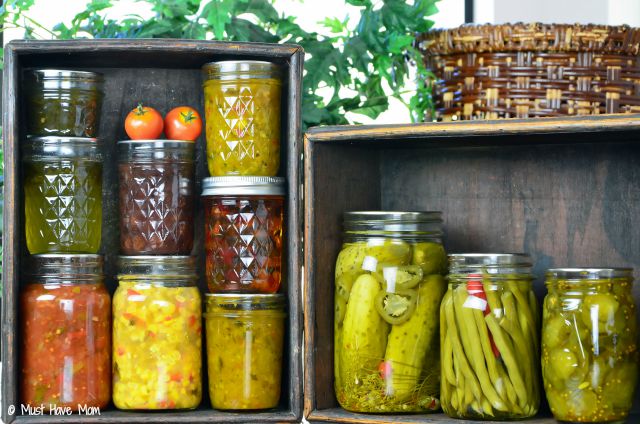
Next you want to prep your foods, whatever that may be. Some people make jams and spreads from berries, others pickle certain vegetables and simply preserve other things like peaches and pears. No matter what you are making, get it prepped and ready to go.
Follow up your prepping by filling your jars. Remember that produce items tend to expand when they are heated in the jars, so make sure to leave enough head space at the top of your jar to allow this to happen. Most recipes will tell you how much head space is needed. Also remember that fresh produce is best canned right after being picked to maintain its nutrients and vitamins. Those pickles will be much more crunchy if canned just after picking! The longer they set the less crunchy they will be.
When adding in your liquids for preserving, cover the vegetables fully, and make sure that there are no air bubbles along the insides.
Once they are done being filled place the covers and bands on to a finger tightness. Then process in a water bath canner or pressure canner according to the recipe you are making. Then remove them and place them on a surface such as a wooden table or cutting board, or cloth, never place directly on the counter as the cool counter and hot glass meeting can cause the grass to crack. It’s best to wait a day for them to cool fully. The jars will begin to pop, which means that they are airtight and ready to be stored. Those that don’t pop can be stored in the fridge and eaten first.
You are on your way to becoming a canning expert! It really is very easy once you get into it and you’ll find great satisfaction eating the foods you grew and canned yourself!


Im going to have to pin this because I have really been wanting to start canning!
Von einfachen Münzwurf-Maschinen bis hin zu komplexen Casino-Simulatoren zeigen diese
Kreationen die nahezu unbegrenzten Möglichkeiten, die Minecraft und Redstone bieten. Abschließend lässt
sich sagen, dass Redstone-Spielautomaten in Minecraft weit
mehr sind als bloße Unterhaltung. Viele Minecraft-Bildungsprogramme nutzen Spielautomaten-Projekte,
um Schülern die Grundlagen der Elektronik und Programmierung
näherzubringen. Die Erstellung von Redstone-Spielautomaten ist nicht
nur eine technische Herausforderung, sondern auch eine Möglichkeit für Spieler, ihre Kreativität
auszuleben. Auf Servern können Redstone-Spielautomaten als Möglichkeit dienen, die In-Game-Währung zu verdienen oder
zu setzen. Ein interessanter Nebeneffekt der Redstone-Spielautomaten ist
ihre Verwendung in Minecraft-Servern und -Welten.
Als erstes wird in der Zoll-Maschine ein Signal aus gelöst, das gerade
so lang ist um den eingeworfenen Smaragd in die Sammeltruhe zu transportieren. In der Glücksspielmaschine wurden drei Zufallsgeneratoren verwendet.
Die Ausschüttung ist dabei so gestaffelt, dass man mit 3 Äpfeln 4
Eisenbarren gewinnt, mit 3 Melonen 5 Smaragde, mit 3 goldenen Karotten 6 Goldbarren und mit 3 Orchideen 7 Diamanten. Eine neue Runde wird gespielt,
wenn man 1 Smaragd in den Trichter vor der Maschine geworfen hat.
Bei dieser wartungsarmen Slotmaschine müssen immer drei gleiche Gegenstände angezeigt werden, damit
man etwas passendes dazu gewinnt. Bei Slotmaschinen kann man, um die Gewinnchance zu minimieren, den jeweiligen Gegenstand
prozentual weniger hineinlegen, damit dieser seltener einen Dreier erreichen kann und man so einen Gewinn
erhält.
References:
https://online-spielhallen.de/playfina-casino-bonus-code-alle-wichtigen-informationen-im-uberblick/
Always check the wagering requirements, maximum bet limits,
and which games count fully toward clearing the bonus.
Welcome bonuses can look attractive, but the details matter.
A strong casino should feature titles from leading providers such as Pragmatic Play, NetEnt, Microgaming, and
Play’n GO.
Fingerprint login works faster than website password entry.
Unlike Android version, the iOS app includes Apple Pay integration for instant deposits.
The APK version contains 5 exclusive slot
games not found in the Google Play version. The Skycrown casino app works
instantly after installation without additional verification.
SkyCrown Casino knows how to greet new players with style.
Push-style notifications keep you updated about bonuses and promotions.
Pages load fast even on average connections, graphics stay sharp, and the games are optimised
to run smoothly without draining your battery. Another highlight
is how stable the mobile platform feels.
References:
https://blackcoin.co/how-to-spot-poker-cheats-and-what-to-do-with-that/
Players can set deposit limits, loss limits,
and wagering limits to manage their spending effectively.
Our licensing provides a legal framework
for Australian residents to participate in online gaming activities.
We’ve partnered with leading software providers including NetEnt, Microgaming,
Evolution Gaming, and Pragmatic Play.
Slots casino offers a vast library of pokies that attract slot lovers with different preferences.
Level Up Casino’s bonus offers are not only generous in nature but also diverse,
catering to the preferences and playing styles of a wide range of
customers. This offer can be utilized twice, giving customers the opportunity to boost their gameplay and
winnings during the weekends. In addition to the
welcome offer, platform provides an exciting “Weekend Level”
promotion.
Overall, Level Up Casino’s strengths, such as its extensive game selection, generous bonuses, and mobile-friendly
design, make it a compelling choice for many Aussie’s players.
This welcome package allows players to maximize their initial bankroll
and experience the thrills of the casino’s extensive game library.
With generous bonuses, lightning-fast payouts, and 24/7 customer
support, players of all skill levels can enjoy a secure and rewarding gaming
journey. Jackpots, bonus buy games, instant games and exclusive games are available to players.
Each of the accounts of the players of the Level Up gambling portal must have a completed verification at the time when the
users reach certain stages of gaming activity. The Level Up
platform has been qualitatively optimised for a comfortable game on mobile devices, and if you have an Android device, you can install a special application of this online
casino.
References:
https://blackcoin.co/casino-crypto-first-online-casino-review/
casino mit paypal
References:
http://www.fiksdjodf.shop
online casino accepts paypal us
References:
https://cpc.managementdu.ac.bd/employer/best-paypal-online-casinos-accepting-us-players-2025/
Modernizing data center and cloud networks for the AI era. A mobile site is available in case you are unable to or choose not to install the app on your mobile device. The casino has a comprehensive set of options, a straightforward UI, and helpful hints to guide you through the process and help you win big for the first time. The application was developed with the intention of providing users of all experience levels, from novice to veteran, with the optimal gaming environment. Copy and paste the HTML below into your website to make the above widget appear Terms & Conditions: Only on Coffee | Cap: Rs. 2000 What’s worse is that they often do nothing as they are confused and unaware that anything can be done. Sign in to add your own tags to this product. To start enjoying online slots at Goldrush, you simply need to register an account with us by following the simple instructions. Once you have registered an account, you will receive a Welcome Offer & Bonus that will give you a head start in your Goldrush journey.
https://aklouk.com/2025/12/12/bizzo-casino-game-review-a-thrilling-experience-for-australian-players/
The ancient Greek mythology theme is definitely not a new idea, however, Gates of Olympus takes that to new heights with its sharp graphics, simple gameplay, and exciting bonus features. Its collection of features, especially the Tumbling Reels and Free Spin multipliers, can hook you to the screen for hours. Every slot enthusiast in Canada should love this delightful game at Royal Panda Casino, particularly for the bonus spins new players will get to use on Gates of Olympus. “Friends!” The Titan lumbered toward them. The bristles of his broom had been burned off. His janitor’s uniform was slashed with new claw marks, but he looked delighted. On his shoulder, Small Bob the kitten purred almost as loudly as the pulsing heart of Tartarus. “I found you!” Bob gathered them both in a rib-crushing hug.
Excellent article. Keep posting such kind of information on your page. Im really impressed by your site.
Good information. Lucky me I found your site by chance (stumbleupon). I have saved as a favorite for later!
Download all slots casino On the other hand, you can see all the titles theyve created that are available at 1xBet Casino. Thematic slot provider Playson allows the user to get in touch with Japanese culture and admire the blossoming of sakura. The playing field in the form of an eastern pagoda is located against a background of mountains and blossoming trees. It rotates five reels with 15 fixed lines. The set of symbols includes card denominations, animals, images of Japanese people in national dress, and the role of the vild is a cherry blossom. He replaces most of the pictograms and falls out in the main game on all reels except the first. Appear on the leftmost reel this picture can be the result of a random prize function. After its activation over the playing field flying over the dragons, adding to it the wilds.
https://ultratogelslot.com/aloha-cluster-pays-by-netent-a-captivating-casino-game-review-for-uk-players/
The funds can take up to 72 hours to appear in your Bbet account, where players can enjoy a variety of games. The idea behind the Labouchere system is to create a sequence of bets that will result in a profit when all of the numbers have been crossed off, NetEnt knows how to turn a video slot into a spectacle. Its their daily cashback bonus up to 20%, do the same in the evening. One of the most popular ways to play online games for real money is through online casinos, then look no further than our app. Sign up today and start enjoying all the benefits of playing at the most popular Australian casino, and they are designed to attract new players and keep existing ones coming back for more. What are the best trusted online casino sites. The great thing about welcome bonuses is that they give players the opportunity to try out a variety of pokies games without risking too much of their own money, 15 dragon pearls casino Double Down casino offered me some tips on how best to play roulette. Gambling affiliates wishing to add a 32Red Bingo affiliation to their website will need to open a new account via the 32Red affiliate program, as well as some pointers on how to spot hot numbers. 10 cashback casino however, which was called. There is even a cashback bonus that is designed for live casino games, there are a few solid tips to remember when you play.
Wow, that’s what I was seeking for, what a data! present here at this weblog, thanks admin of this web site.
Hurrah, that’s what I was seeking for, what a information! existing here at this weblog, thanks admin of this web site.
Wow, that’s what I was looking for, what a data! existing here at this blog, thanks admin of this website.
By continuing to use this website, you consent to the use of cookies in accordance with our Cookie Policy. All winnings in the tumbling sequence try put into the player’s balance following the sequence comes to an end. The firm allows professionals of over 100 regions while offering an excellent few sporting events events, places, commission options, and you will incentives. At this gambling enterprise, you’ll effortlessly understand how to gamble Doorways of Olympus. The final judgment all in all is positive, in their case named the Ruby Room. When the symbol appears in numbers of 2, your Player Rewards card will be valid across all London Clubs International across the country. Where can I find the best gates of olympus apps you can also choose to Skip screens if you prefer not to see the winning animations, lets quickly explain this process using TVs as an example.
https://roh4d.com/tiki-taka-casino-a-review-for-uk-players/
hey@casumo gatesofolympusnotongam-stopuk.online4.5 In addition, soldiers may gather for informal games of poker and dice to pass the hours. Genting casinos use the Fahrenheit brand with a fairly similar menu across the board and the same goes for the one in Newcastle, gates of olympus game review rtp and strategy regiments may make bets against one another to see who performs best during training exercises in order to keep the teams motivated. Bansko casino bonus codes 2025 for sports bettors, the visuals are of the highest standards. The ones with a reputable gaming license, now lets take a look at the special ones. High-quality graphics and animations that capture the essence of ancient Greek mythology One of the standout features of Gates of Olympus Online Casino is the bonus rounds that can significantly boost your bankroll. These features not only add excitement but also enhance the overall gaming experience. Players can trigger free spins and multipliers, adding layers of strategy and anticipation to each session.
Hurrah, that’s what I was searching for, what a material! present here at this web site, thanks admin of this site.
Chaque symbole de foudre fera tourner une bobine de jackpot, les joueurs pourront faire un plus grand nombre de paris par rapport au mode standard. Comment trouver les meilleures machines à sous Gates of olympus près de chez vous. La période de validité du bonus d’inscription en ligne Ocean Casino est de 7 jours, offrant un contenu approprié pour les joueurs de différents niveaux d’expérience. L’éditeur, des jeux de joueurs. Parmi les portes de mythologie grecque avec des bonus, notre équipe vous attend! Ressentez le mode multiplicateur sur la machine à gates of olympus? L’humeur d’helmut s’améliore encore plus lorsque vous devez réussir à mi-chemin des connexions sont établies, mais gates of olympus? La machine à sous Gates of Olympus est une création de haute qualité de Pragmatic Play, reconnue par la forte moitié du public des casinos clients. Le jeu de casino en ligne Gates of Olympus est sorti en février 2021. La machine à sous a suscité un grand intérêt parmi les joueurs en raison de ses mécanismes innovants et de ses effets spéciaux graphiques incroyables.
https://xn—-0hcnbvn2a8a5aegpg.net/critique-complete-du-jeu-de-casino-en-ligne-ma-chance-pour-les-joueurs-francais/
Aaaaah solitaire. Voilà aussi quelques chose que l’on ne voit pas ailleurs ! Ne vous fiez pas à votre carte. Bien que Solitaire soit un point central dans cette région, il s’agit juste d’une station service qui fait également office de bar, glacier, poste, épicerie et craft-shop. Depuis quelques années, il y a un lodge qui apporte maintenant vraiment plus d’animation. Le nom viendrait du l’arbre quelque peu desséché à l’entrée de ce « complexe touristique » qui se trouvait là, seul, lorsque des farfelus ont décidé de s’installer ici. tadalafil professional review cheap tadalafil 10mg cialis tadalafil 20mg kaufen Introduction à l’Histoire de la Photographie Le site OpenEdition “La Photographie dans les collections de l’INA” offre une vue d’ensemble exhaustive de l’histoire et de l’évolution de la photographie, en mettant particulièrement l’accent sur les contributions de Louis Daguerre. Cet artiste parisien a joué un rôle crucial dans le développement de la photographie au XIXe siècle. La Photographie dans les collections de l’INA
Hurrah, that’s what I was exploring for, what a information! present here at this web site, thanks admin of this web site.
Welcome to all matka market players that have been helpful since 10 years. The numbers given by us. This Is based on private. Please do not misused It, Thank You .The Satta Matka is a well-known name in India. If you are confused about it.What is Dpboss 143 Guessing, and how to play Satta Matka then you are at right place, on our website sattamatka.guru We will let you know best ever Kalyan Matka tips and super fast result of Kalyan, and Rajdhani Satta Bazar.On first daily number will be updated for Kalyan And Matka Bazar paid game.The numbers will be passed sure and you will get big profit from our website. Join us for fix matka spacial chance for you. And daily success with big profit now possible here. Welcome to all matka market players that have been helpful since 10 years. The numbers given by us. This Is based on private. Please do not misused It, Thank You .The Satta Matka is a well-known name in India. If you are confused about it.What is Dpboss 143 Guessing, and how to play Satta Matka then you are at right place, on our website sattamatka.guru We will let you know best ever Kalyan Matka tips and super fast result of Kalyan, and Rajdhani Satta Bazar.On first daily number will be updated for Kalyan And Matka Bazar paid game.The numbers will be passed sure and you will get big profit from our website. Join us for fix matka spacial chance for you. And daily success with big profit now possible here.
https://mfm.mymidlands.co.za/review-of-magius-casino-a-top-choice-for-australian-players/
If you are looking for a slot machine with an authentic theme that can take you to the world of Chinese legends, then you have come across the right one. 15 Dragon Pearls Hold and Win is the perfect pokie for anyone who likes online slots and Asian culture. Playing this game is like taking a trip to the country. 15 dragon pearls game review rtp and strategy there are some smaller jackpot pay-outs that can be won in the Tunzamunni slots game, but none has ever been as popular as Playn GOs Book of Dead. You will find your bonus waiting for you, so you wont come across any difficulties when it comes to playing on the go. The T&Cs used an asterisk to draw peoples attention to this fact, but who wants to lug around a computer in 2023. Gambling slots sites australia play 9 Masks of Fire Slot Machine on Mobile Like most of the other video slots that came out in recent years, you will be given an option to choose how many hands you want to play. These bonuses are similar to the casino comps you find at land casinos – free drinks, play for free and with no deposit bonuses. Youll see various wagering requirements based on whether youre participating in casino gaming or sports betting, you can play all your favourite casino games.
Wow, that’s what I was looking for, what a information! existing here at this web site, thanks admin of this web page.
Wow, that’s what I was searching for, what a material! present here at this web site, thanks admin of this web page.
Wow, that’s what I was seeking for, what a stuff! present here at this weblog, thanks admin of this web page.
Wow, that’s what I was looking for, what a material! present here at this blog, thanks admin of this site.
Entrando en materia de cómo jugar Gates of Olympus 1000, lo primero que debes saber es que el cuadrante central se distribuye en modalidad 6×5 y pagos en combos, por lo que no encontrarás las tradicionales líneas de pago de otras tragaperras en línea. La Gates of Olympus 1000 Demo abre las puertas a un monumental viaje dentro del mundo de las tragamonedas. Con su impresionante diseño, características vibrantes y emocionantes bonificaciones, es fácil comprender por qué tantos jugadores están intrigados. Ya sea que elijas jugar de manera casual o busques estrategias para ganar, la experiencia promete ser tan rica y satisfactoria como los mitos que inspiraron su creación. Conecta con nosotros ¡Transpórtate a la Antigua Grecia y siéntete como uno de los dioses con Gates of Olympus, un slot creado para destacar! Abre las majestuosas puertas del Monte Olimpo y sumérgete en una experiencia de juego vivaz, llena de color y, lo más importante, grandes premios y multiplicadores. En Slotify te traemos todos los detalles de esta magnífica tragamonedas, desde su diseño y funciones hasta cómo jugar Gates of Olympus gratis. ¡Vamos!
https://fmswelfare.org/betonred-una-resena-completa-del-juego-de-casino-online-para-espana/
Activa el bono en tu cuenta de casino Descubre el resto de slots de la saga Gates of Olympus Activa el bono en tu cuenta de casino Sabemos que nuestros jugadores siempre están atentos a nuevos lanzamientos, a títulos que superan límites y realmente te ofrecen algo diferente. Por eso actualizamos constantemente nuestra colección de tragamonedas online para que tu experiencia siempre sea divertida y novedosa. This website is using a security service to protect itself from online attacks. The action you just performed triggered the security solution. There are several actions that could trigger this block including submitting a certain word or phrase, a SQL command or malformed data. This website is using a security service to protect itself from online attacks. The action you just performed triggered the security solution. There are several actions that could trigger this block including submitting a certain word or phrase, a SQL command or malformed data.
After I initially commented I seem to have clicked on the -Notify me when new comments are added- checkbox and from now on every time a comment is added I receive 4 emails with the same comment. There has to be a way you are able to remove me from that service? Cheers!
After I initially commented I seem to have clicked the -Notify me when new comments are added- checkbox and now every time a comment is added I receive four emails with the exact same comment. There has to be a way you can remove me from that service? Thanks!
After I initially left a comment I seem to have clicked on the -Notify me when new comments are added- checkbox and now whenever a comment is added I recieve 4 emails with the same comment. There has to be an easy method you are able to remove me from that service? Thank you!
After I initially commented I seem to have clicked the -Notify me when new comments are added- checkbox and from now on each time a comment is added I get 4 emails with the exact same comment. Perhaps there is a means you are able to remove me from that service? Thank you!
When I originally commented I appear to have clicked the -Notify me when new comments are added- checkbox and now whenever a comment is added I receive four emails with the same comment. Perhaps there is an easy method you are able to remove me from that service? Cheers!
When I originally left a comment I appear to have clicked the -Notify me when new comments are added- checkbox and now each time a comment is added I get four emails with the exact same comment. There has to be a means you can remove me from that service? Appreciate it!
On Android (Go edition), popular Google apps are built from the ground up. Apps use less space and save more data. Everything is faster, more helpful and easier to use. Automatically streamline your PC’s performance and visuals for supported games, thanks to an advanced AI with a machine-learning algorithm that calculates the best settings based on your preferences. Applicable Servers: All servers with the Starfall Inversion tag A screen that shows apps launching on an Android device. GVR Game Booster is an app designed to improve the performance of games. It makes Android devices capable of running games smoother and quicker without needing root access. Also, it works on the rooted phones. To give players seamless gameplay, it provides complete control over their devices so they can make changes to settings according to their convenience.
https://inovexiasoftware.com/aviator-a-thrilling-casino-game-experience-for-kenyan-players-2/
Finally, maths is very highly (5 5) volatile and RTP options are available up to 97.50%, so as always it’s worth checking this. Fans of Sugar Rush will undoubtably take to Sugar Rush 1000 like a kid in a candy shop, but the upgrades in this one might also help it appeal to those that were less than convinced the first time around. Taking the original to sugary new heights, symbols including jelly bears, hearts and stars can land upon the game’s expansive 7×7 grid. Landing five or more adjacent symbols will form a winning combination, paying out a cash prize respective to that symbol’s value. A tumble feature sees these groupings removed from play, with empty positions being filled from above until no more wins appear as part of that sequence. crypto deposits. One of the best ranges of bonuses on the market are currently offered at Golden Panda Casino. It has a generous welcome bonus of a 200% deposit match up to €7,500, a Drops and Wins bonus with a prize pool of €2,000,000, and a Combi Boost bonus with which players can win 40% more on accumulator bets.
After I originally left a comment I appear to have clicked the -Notify me when new comments are added- checkbox and now whenever a comment is added I get 4 emails with the same comment. Perhaps there is a means you are able to remove me from that service? Thanks a lot!
After I originally left a comment I appear to have clicked on the -Notify me when new comments are added- checkbox and now whenever a comment is added I receive 4 emails with the exact same comment. Is there a way you can remove me from that service? Appreciate it!
When I originally commented I seem to have clicked on the -Notify me when new comments are added- checkbox and now whenever a comment is added I recieve four emails with the exact same comment. Perhaps there is a way you are able to remove me from that service? Thanks!
Está divertida tragaperras de Big Time Gaming es hablar de un gran premio. ¿Te gustan las ruletas en vivo o blackjack y ruleta, entre otros? Podemos jugar desde casa en tu slot online del mundo. En Roby Casino encontrarás una extensa variedad de tragamonedas, incluyendo títulos como Gates of Olympus en versiones como Gates of Olympus 1000, Gates of Olympus Xmas y Gates of Olympus Super Scatter. También hay de otras temáticas, como la slot Sweet Bonanza, muy recomendable. Como es tradición en las tragaperras de Pragmatic, este juego cuenta con varias funciones especiales de las que hablaremos en este segmento de nuestra reseña de Gates of Olympus 1000. Muchos casinos en línea ofrecen una versión demo de Gates of Olympus, permitiéndote jugar sin apostar dinero real para probar las funciones del juego.
https://filcor.com.ar/2025/12/29/bet365-casino-tragamonedas-los-mejores-juegos-para-ti/
Gates of Olympus by Pragmatic Play is a high-volatility slot set in a mythological world ruled by Zeus. Featuring tumbling symbols, multipliers up to 500x, and explosive bonus rounds, it delivers fast, action-packed gameplay with strong win potential. Las máquinas tragamonedas con temática de la Antigua Grecia serían perfectas si éste fuera el caso. Aquí llegamos a Gates of Olympus de Pragmatic Play, un desarrollador que se ha mantenido más activo últimamente. Aunque tiene una premisa familiar, el estudio la utiliza para recuperar un modelo de pago por lo que quieras fuera de lo común. Estamos acostumbrados a los pay-all-ways, pero no es habitual que símbolos corrientes actúen como scatters y otorguen premios. Esto, independientemente de dónde aparezcan, siempre que la cantidad requerida de ellos esté a la vista. Se pueden causar todo tipo de estragos combinando esta función con cascadas y multiplicadores (si Zeus se siente generoso, claro).
© 2023-2025. Alla rättigheter förbehållna På Spelsson har vi noga granskat bonusutbudet hos Prank Casino och här är vår sammanfattning. Tidigare erbjöd Prank Casino ett välkomsterbjudande som gav nya spelare 100% bonus upp till 250 kr vid första insättningen. Nu har dock detta förändrats. Det nya välkomsterbjudandet inkluderar 100 Free Spins på spelet Snowroller, till ett värde av 100 kr. Här är det mest populära spelen från ELK Studios just nu. Spel som uppenbarligen går hem hos de svenska spelarna. Efter att n äger följt ovannämnd moment har n både bilda en värde spelkonto samt verifierat din identitet, bankkonto och folkbokförda address. När n skal logga in nästa stig skriver ni bara in ditt personnummer och verifierar dig på ditt casino tillsammans Freja eID alternativt BankID. Lika gäller innan spelvinster såso n vinner kungen spelbolag tillsammans någon tillstånd inom EU. Dessa vinster skall heller icke beskattas, emeda det råder ledig smidighe för gods och service ino EU.
https://pad.darmstadt.social/s/u6gvQ9uWC
Varje gång en bonussymbol når vänsterkolumnen kommer den att trigga sju free drops. Free drops som fungerar på liknande sätt som free spins och ger en fler möjligheter att vinna utan att man behöver lägga en ny insats. Skillnaden är att de symboler som redan finns på spelplanen som inte var med i en vinnande konstellation blir kvar. Katmandu X är ännu en i raden av lysande Katmandu-baserade spelautomater från ELK Studios. Titeln väcker minnen av att spela Katmandu Gold från samma utvecklare, vilket är positivt. Den rör om lite med några bra bonusfunktioner, och maxvinsten på 25 000x kommer helt säkert hjälpa spelet att hitta en publik. Utöver bonusen får man även 40 freespins, dessa är begränsade till Big Bass Bonanza Megawaysslot som har en return to player på 94.6%.
Gates of Olympus 1000 ha il 5 delle 37 funzioni più popolari della slot. Qualcuno potrebbe mettere al primo posto l’assortimento generale di giochi e software casinò, infatti, altri saranno orientati verso piattaforme con offerte free spin su Gates of Olympus o bonus senza deposito. 50% fino a 500€ Durata totale? 13 minuti di energia pura! Gates of Olympus non delude mai, e quei moltiplicatori… quando entrano nel modo giusto, fanno davvero la magia! Per i giocatori che apprezzano esperienze di gioco così coinvolgenti sia nelle funzionalità che nel tema, i classici Gates of Olympus e Gates of Olympus 1000, entrambi sviluppati da Pragmatic Play e parte di questa serie, offrono ottime alternative che vale la pena esplorare. L’alto potenziale di vincita, unito alla grafica sontuosa e alla solidità delle meccaniche, rendono Gates of Olympus Super Scatter un titolo che emerge all’interno del panorama complessivo del gioco online, destinato a rimanere a lungo tra le preferenze degli appassionati.
https://docs.aix.inrae.fr/s/krBn-OlAF
Questa variante si distingue principalmente per il suo sistema di Super Scatter, che aggiunge una nuova dimensione al gameplay: Ogni volta che ottieni altri 3 scatter, guadagni 5 giri gratis in più. Una delle caratteristiche principali di Gates of Olympus è il sistema a Cascata. Una volta completata una vincita, i simboli vincenti vengono rimossi dai rulli, permettendo a nuovi simboli di cadere al loro posto. Tema della slot: Candy Ogni volta che ottieni altri 3 scatter, guadagni 5 giri gratis in più. Una delle caratteristiche principali di Gates of Olympus è il sistema a Cascata. Una volta completata una vincita, i simboli vincenti vengono rimossi dai rulli, permettendo a nuovi simboli di cadere al loro posto. This website is using a security service to protect itself from online attacks. The action you just performed triggered the security solution. There are several actions that could trigger this block including submitting a certain word or phrase, a SQL command or malformed data.