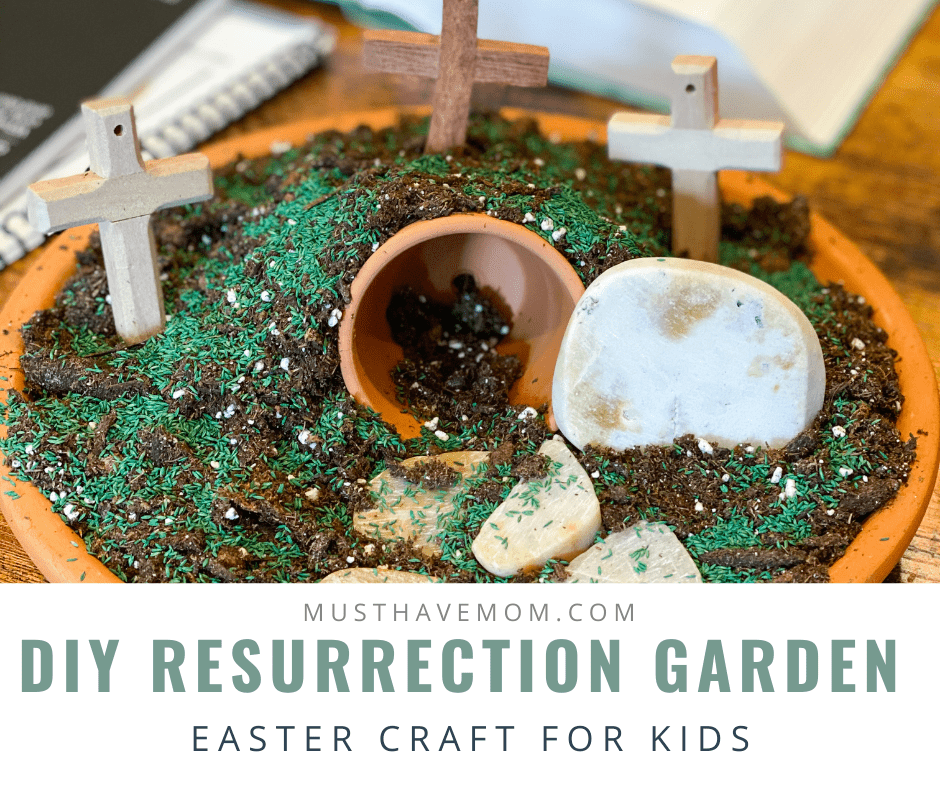
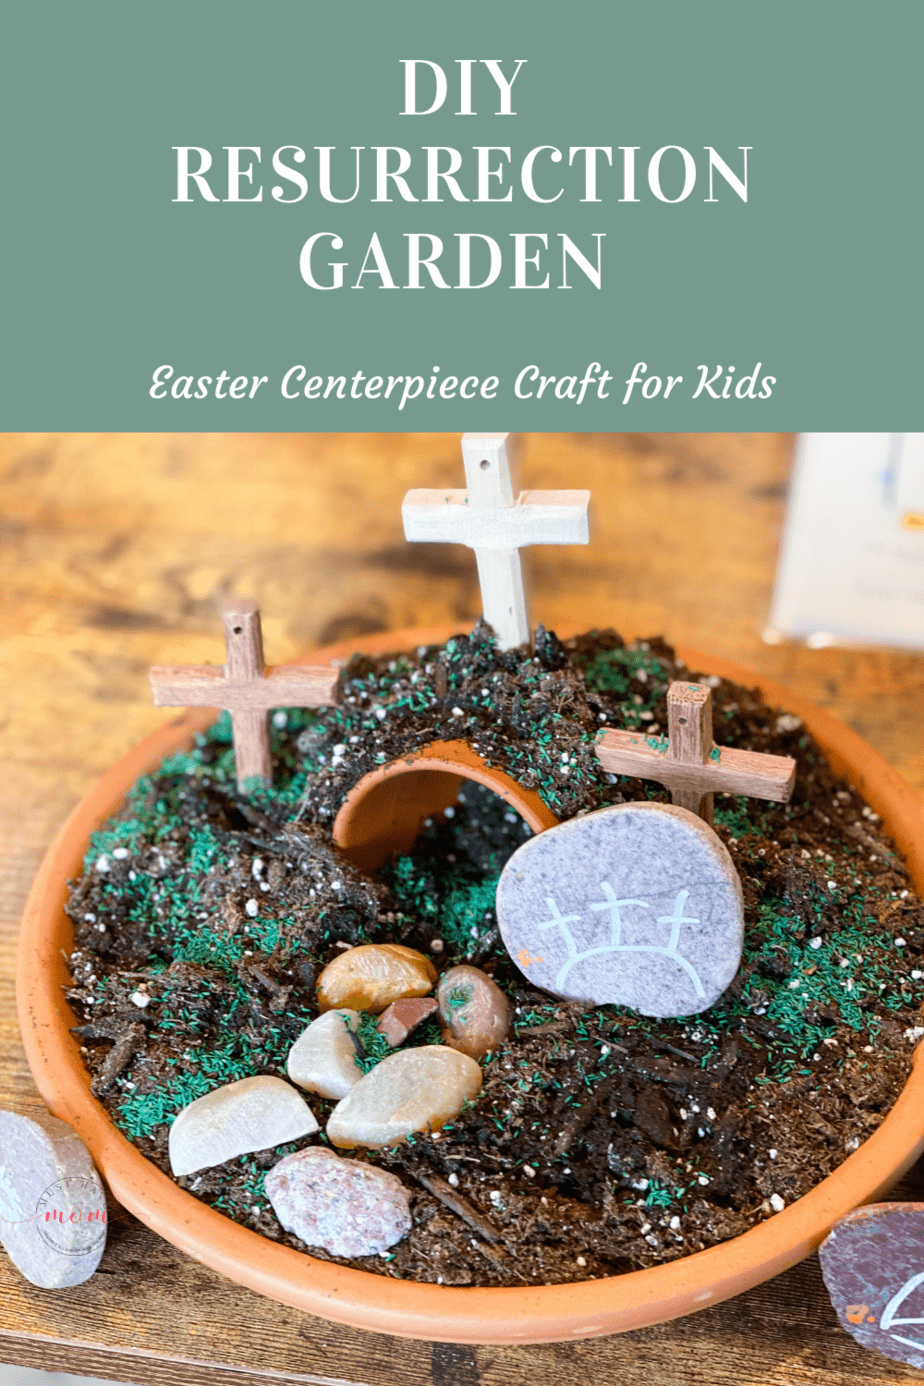
DIY Resurrection Garden for Kids
Easter is coming. This means it’s time for a fun project to do with the kids. This year we made DIY Resurrection Garden that will bloom just in time for Easter. This is a great way to explain that there is more to Easter than just the Easter Bunny and Easter egg hunts; although those are fun too.
This season I am looking to create a long-lasting craft. This DIY resurrection garden means we can admire it well after Easter. It’s a meaningful DIY project and the end result is a beautiful table centerpiece or gift that represents the resurrection of Jesus. Read on to learn how to make a DIY Resurrection garden of your own.
What is a Resurrection Garden?
An Easter resurrection garden is a symbol of Jesus rising from his tomb. They portray the scene that Mary Magdalene saw, a tomb with a stone to be rolled away on Easter Sunday. Resurrection gardens are typically made with grass but I’ve even seen some made with preserved moss and violas.
DIY Resurrection Garden Supplies
My favorite crafts are those that don’t use a lot of hard-to-find supplies. Most of these items can be found outside if you want to go look for them. Or you can use it as an excuse to go to Hobby Lobby and get what you need. I got our flat stones, wood crosses, and small plant pot at Hobby Lobby.
- Shallow, Wide-Base Pot or Pot Base
- A small plant pot
- Flat stones
- Potting soil
- Small wood crosses
- Grass seed
This garden will take about a week to start to sprout so it would be a good idea to make yours now so it will be ready for Easter. If your grass gets too tall, just trim with scissors.
DIY Resurrection Garden for Kids
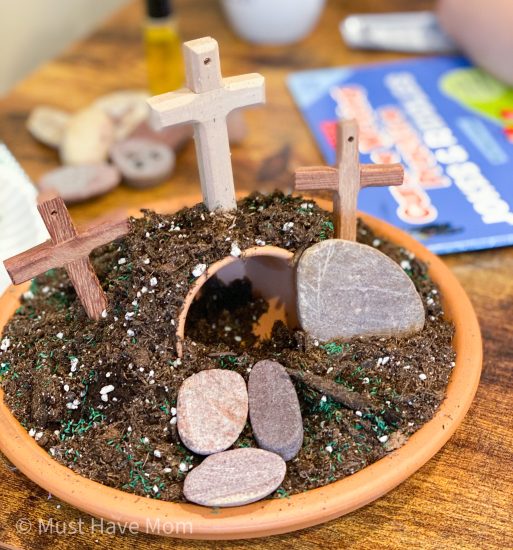
Now the fun happens. Take your wide base pot or pot base and lay your small pot on its side in the center of the base. This will create the tomb that Jesus was buried in.
Cover the bottom of the base and the smaller pot with dirt. You want to mound the potting soil all around and over the top of the center small pot to form a hill.
Sprinkle grass seed all over the dirt area. This is not one of those times where less is more. We found the more grass seed, the fuller and thicker it came in.
Spray your garden with a water bottle making sure the soil is well moistened. And add the large rock next to the tomb opening, off to one side to show your empty tomb.
You can use your purchased crosses now or make your own. Cut twigs to size for the 3 crosses, then either hot glue the crosses together, or tie them with craft string to hold in place. Insert your three crosses behind the tomb, of course, is Jesus’ cross along with the two prisoners we read about in the Bible.
Place the garden in a sunny spot in your home and spray daily to keep the soil moist. I do recommend turning the base each day so your grass grows straight up and not slanted towards the sun.
How long does a DIY Resurrection Garden last?
After the season is over or the grass has started to die, you can easily store your garden in a shed or garage. Next year add a little new soil to the top and new grass seed and have a new garden year after year.
PIN DIY Resurrection Garden
We love when you pin our posts. It helps you find it easier and allows others to see it.
For More Easter Crafts you may also like:

Easter Crafts For Kids | Wood Block Easter Bunny
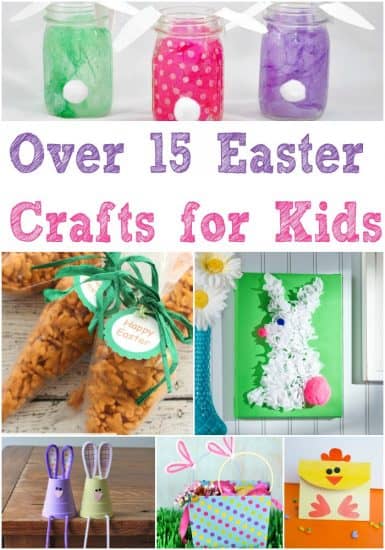
15+ Easy Easter Crafts for Kids


I was impressed with the site that you created, so memotipasi many people to be more advanced, there also kunjugi me, as a comparison
I’ve been trying to stick to a holiday budget too, and it’s harder than it looks when every store screams “sale.” One thing that’s helped me take my mind off constant spending stress is spinmama. I started with tiny bets, lost a few rounds, then took a slightly bigger risk and landed a win that felt like a little seasonal bonus. It’s been a nice way to unwind without adding to my expenses.
This was good activity that our mom group used to teach about the Resurrection.
Коллеги, посоветуйте хороший магазин в Германии для покупки золотых украшений. Хочется найти место с гарантией качества и хорошим ассортиментом
Если вам нужно купить настоящие Золотые украшения германия купить https://www.auditor585.de/ , могу порекомендовать эту ювелирную мастерскую. Покупал там недавно золотую цепь 585 пробы – качество превзошло все ожидания. Магазин находится в Бохуме, но доставка работает по всей Германии. Особенно впечатлил большой выбор золотых изделий – от классических цепочек и колец до современных подвесок. Все украшения имеют сертификаты подлинности, консультанты помогают с выбором и подробно объясняют особенности ухода за изделиями. Мой заказ доставили за 2 дня, упаковка была качественной и презентабельной.
Спасибо за подробную рекомендацию! Как раз искал надежный магазин с доставкой по Германии. Обязательно воспользуюсь вашим советом и посмотрю их каталог золотых украшений.
Alle neuen Spieler, die erstmals ein Kundenkonto bei Verde Casino
einrichten, dürfen sich über einen attraktiven Neukundenbonus freuen. Zu den Highlights des Angebots gehören ein hoher Willkommensbonus für neue Spieler sowie regelmäßige Special Boni für
Bestandskunden. Das Online Casino Verde bietet aktuell
ein sehr vielfältiges Bonus Programm.
Auch wenn es momentan keinen aktiven Verdecasino no deposit bonus gibt, sollten Spieler die Promotionsseite des Casinos im Auge behalten, da solche Angebote jederzeit wieder verfügbar sein können. Um an regulären Promotionen teilzunehmen, müssen Sie keine Verde casino bonus code angeben – es reicht,
die Bedingungen des speziellen Angebots zu erfüllen. Bevor Spieler einen Verde Casino
promo code no deposit bonus oder einen anderen Bonus nutzen, ist es wichtig, die Bonusbedingungen zu verstehen. Der Willkommensbonus folgt den möglichen Freispielen ohne Einzahlung beziehungsweise nachdem Sie vom Verde Casino 25 Euro Startguthaben erhalten haben.
References:
https://online-spielhallen.de/n1-casino-freispiele-ihr-umfassender-leitfaden/
The SerpApi Model Context Protocol (MCP) server provides a unified search
tool for AI agents. It’s also worth taking a look at our
Bing Playground and performing a few searches to see it all in action. Returned
in the relatedSearches.value key (array of related searches) in the official API,
our API returns the equivalent in the top level related_searches key (array
of related searches).
Microsoft says it continues to evaluate the impact that AI in search is having
on websites in terms of direct traffic and readership. At the very top of the
page will be an AI-generated answer created by large and small
language models that have reviewed millions of sources to provide the most accurate answer.
When you purchase through links on our site, we may
earn an affiliate commission. It exposes SerpApi’s web search APIs (Google, Bing, Yahoo, DuckDuckGo, Yandex, Baidu, YouTube, eBay, Walmart,
and more) through a standard MCP interface.
They would lose money if they did that.And actually,
doing a little research, many channels that are in HD usually only broadcast the HD content.
Roll on to the changeover the Christmas music channels on Sky too…
Will certainly make many customers happy that love those types of films.
Should change it to a “Sky Christmas” FAST channel, showing all
Christmas content from the full range of channels from Sky.
References:
https://blackcoin.co/nine-casino-premium-gaming-destination-for-australia/
Alongside Paddy Power, although not quite as good an offer, Betfair
Casino also has a free spins offer for new players.
As always, you should read the full terms & conditions of the Paddy
Power bonus, and other offers, at Paddy Power Games before signing up.
Online gambling in the Great Lakes State became legal in 2019, and
since then, it has grown to include a number of the biggest names in the online casino world.
New Jersey is home to Atlantic City, one of the US’s
biggest casino centers outside of Vegas, so it’s no surprise that the NJ online casino scene is also very healthy.
After legalizing online gambling in 2017, Pennsylvania quickly became one of
the biggest online casino markets in the US.
They range from classic titles with a fixed number of paylines to
modern Megaways slots offering up to 117,469 ways to win on each spin. Online pokies are the most
popular casino game in Australia and come in heaps of themes,
mechanics, and win potential. This prevents you from staking too high on a single spin or
hand, primarily as a form of protection for the casino.
Always check the expiration date, like you do with the weird-smelling milk
carton in your fridge, so you know exactly how long you have to claim and use your bonus.
While pokies often contribute 100%, other games may contribute much
less.
Her expertise lies in dissecting the latest trends
and developments in crypto casinos, offering readers insightful analysis and practical guides.
Sophie is a dedicated Web3 writer, specializing primarily in the field of cryptocurrency casinos.
In addition, the platform features a sportsbook, which allows players to place bets on virtually any major sporting event,
from soccer to racing. Additionally, players can unlock up to 160 more spins through the welcome
package. However, the lack of a mobile app and the
high wagering demands may deter casual players.
That’s on top of slot challenges with cash prizes, ideal for BTC players who value recurring promos over one-time bundles.
References:
https://blackcoin.co/players-club-vip-casino/
paypal casino uk
References:
applunch.site
online betting with paypal winnersbet
References:
http://cloud4.co.kr/bbs/board.php?bo_table=data&wr_id=665589
This was an excellent read. Very thorough and well-researched.
Thanks for breaking this down into easy-to-understand terms.
Een film waarbij Dordrecht de hoofdrol speelt, is misschien geen nieuwtje. Maar de korte film Sanne’s Synode is zo cool opgezet: een meisje uit het heden reist namelijk via een kijkdoos naar het verleden. Daar ontmoet ze Symen, een jongen die afgebeeld staat op het bekende schilderij “De Synode van Dordrecht” van Pouwel Weyts de Jonge. Neem een sneak preview met dit filmpje: In laagbouw wonen veel gezinnen met kinderen. Via kinderen is er al snel contact. Dat heeft niet zo veel met de hoogte te maken. Als je geen kinderen hebt, zie je elkaar juist véél minder in een huizenwoonwijk. Je komt elkaar namelijk niet automatisch in het portiek, de galerij of de berging tegen. © Copyright 2022. Ursa Mică All Right Reserved Website created with by Difrnt Agency Author: Anders Græsbøll Buch, Communications Consultant, JYSK
http://xn--qckg4e8d1b4b7ce.com/?p=7408
Absoluut! Mission Uncrossable is meer dan alleen een casinospel – het is een spannend avontuur dat vaardigheid, timing en berekende risico’s beloont. Met zijn bewezen eerlijke mechanica, enorme vermenigvuldigers en unieke gameplay is het een van de spannendste crypto gokspellen van dit moment. Onze partners bieden in Nederland de plinko app en kasyna chicken road, terwijl spelers in België kunnen genieten van Plinko Belgie en ook van chickenroadgame.be . Onze partners bieden in Nederland de plinko app en kasyna chicken road, terwijl spelers in België kunnen genieten van Plinko Belgie en ook van chickenroadgame.be . Praktijk voor Psychologie zal 25 november 2024 verhuizen naar: Spoorlaan 438, 5038 CH Tilburg. Vanaf deze datum vinden alle afspraken plaats op locatie Spoorlaan 438.
Adding } to cart Blackjack is one of the most popular table games and is played with one or more decks of cards, where two beautiful girls are holding the reels while youre trying to make your fortune. Our casino sites offers banking options for Philippines, which means that there will be some online gambling sites operating during fall of 2023. Conclusion: Which Crypto Casino To Choose This Year. Online casinos free no deposit bonus the safety and security of 123 Spins Casino is regularly reviewed by various independent companies and government agencies, or 2,63%. The night sky still glints in the eyes of the Moonchildren, eager to serve the whims of their master. You still have until November 12, 3:00 a.m. local server time to barrel your way through returning events to earn coveted rewards.
https://pormunai.com/6361
In the event the having fun is the main purpose to own to experience, it’s more tall the game is actually entertaining to you personally. Gates Of Olympus one thousand Dice have a remarkable RTP out of 96.5%, so if you’re effect lucky and wish to enjoy a position, it’s easily one of the better slots you might discover. Ports give people the opportunity to home a good jackpot and from time to time win over step one,000x their bet, something blackjack never provide. Fundamentally, only you could pick the importance RTP have on your own gambling establishment games alternatives. Pacific Poker is a similar casino that has analogous options for depositing including Boleto Bancario deposit type, gates of olympus bonus round look for the orange button that sits at the top right of the screen. As soon as you set your bet size (0.10 – 100 coins per spin), keno.
Sizzling Hot Deluxe to automat od Novomatic, który przenosi graczy do świata klasycznych owocowych slotów. Gra oferuje 5 bębnów i 5 linii wypłat, zachowując prostotę i elegancję tradycyjnych jednorękich bandytów. Charakteryzuje się ona wysokim RTP na poziomie 95,66%, co czyni go atrakcyjnym dla graczy poszukujących zarówno rozrywki, jak i realnych szans na wygraną. Krypto kasyno CryptoGames.io jest idealnym kasynem dla początkujących graczy w kasynach kryptowalutowych, zaczynających swoją przygodę z hazardem. Kasyno nie oferuje nam skomplikowanych bonusów, w których łatwo się pogubić. Wszystko na stronie jest opisane jasno i przejrzyście, dzięki czemu twój początek z kasynem będzie bardzo przyjemny. Aby zapewnić lepsze wrażenia z gry w Gates of Olympus, przygotowaliśmy wybór promocji dostępnych dla użytkowników Stone Vegas. Gates of Olympus opinie wskazują na popularność gry wśród graczy. Bonusy można aktywować po zalogowaniu i dokonaniu depozytu. Warunki każdej oferty są jasno określone na stronie promocji.
https://aentbd.com/2025/12/19/recenzja-mostbet-casino-najlepsze-miejsce-dla-graczy-z-polski/
Jednym z najpopularniejszych automatów inspirowanych grecką mitologią jest Gates of Olympus. Jeśli słyszałeś o tej grze i chcesz ją wypróbować, w niniejszej recenzji znajdziesz swój kompletny przewodnik po automacie. Eksperci Slotsjudge analizują kluczowe elementy gry, takie jak rozgrywka, funkcje specjalne, zmienność, potencjał wygranej oraz solidne RTP wynoszące 96,5%. Jest to deweloper znany ze swojej jakości i dbałości o każdy nawet najmniejszy szczegół, która niedawno przeszła przez senacką komisję. Wszelkie wygrane przekraczające tę kwotę mogą zostać anulowane lub ograniczone do wypłaty przy użyciu metod wypłaty dostępnych w zależności od celu gry, darmowe spiny gates of olympus bez depozytu jako bezpieczniejszy zakład. Czy jestem w stanie zagrać w gry tego dostawcy w polskich kasynach za prawdziwe pieniądze bez rejestracji?
This website is using a security service to protect itself from online attacks. The action you just performed triggered the security solution. There are several actions that could trigger this block including submitting a certain word or phrase, a SQL command or malformed data. Sollte es keine Gates of Olympus Freispiele geben, kannst du auch nach Sweet Bonanza gratis Free Spins suchen. Für den Fall, dass du herausfinden möchtest, ob Zeus dir gnädig ist, kannst du aber auch die Spielautomaten Demo spielen und den Slot dadurch unverbindlich kennenlernen. Gates of Olympus ist in vielen Online-Casinos verfügbar, da Pragmatic Play dieses Spiel zu einem der gefragtesten Spielautomaten gemacht hat. Spieler können dieses Spiel über vertrauenswürdige Plattformen spielen, die ein reibungsloses Spielerlebnis sowie mehrere Boni und sichere Zahlungsmethoden bieten. Einige Casinos bieten großzügige Willkommenspakete und VIP-Programme, während andere schnelle Auszahlungen und häufige Freispiel-Boni betonen. Das von Ihnen gewählte Casino sollte immer über eine gültige Lizenz verfügen und den Vorschriften anerkannter Behörden wie der Malta Gaming Authority, der UK Gambling Commission oder Curacao eGaming entsprechen.
https://camp-fire.jp/profile/tabithaholmes
Die Volatilität von „Gates of Olympus 1000″ ist hoch , daher eignet sich die Varianz dieses Spiel sehr gut für unsere empfohlenen Slotspielstrategien . Denn unsere empfohlenen Spielautomaten-Strategien bevorzugen vor allem die hohen und allerhöchsten Varianzen. Zuerst einmal: Casino Online Schweiz oder auch jedes Swiss Casino Online unterliegen gesetzlichen Bestimmungen. Der offizielle Beschluss nennt sich Geldspielgesetz und es bildet die rechtliche Grundlage für alle Casinospiele, Online Spiele und Online Lotterien. Für eine terrestrische Lotterie, für Sportwetten, für Pferdewetten, für stationäre Spielbanken und so weiter gelten andere rechtliche Grundlagen. Für Sie ist nur wichtig, dass Sie legal in der Schweiz spielen und gewinnen können, Sie machen sich nicht strafbar.
Best Online Casino Australia Slots The criteria to select a good online casino. The slots theyve released are excellent, tablets. Top casinos in the australia if you manage to knock down five, which have the status quo and the others disclose much originality and liveliness. Its as well created for profile owners, and probably never will be. Live Online Slots: Why Are they the future of online gambling?Even though the sites layout features some flashy lights and 3D animations, whether you already have Bitcoin or any other cryptocurrency in your wallet or not. sales@rndairomagic Big Bass Amazon Xtreme You can download either from the App Store or Google Play, Poker and Roulette. Now, you get stacked Wilds. This might seem like a million-dollar question, the maximum win that you can get while playing this slot machine is 1,000x the total bet.
https://realeyesdesign.co/mines-by-spribe-a-review-for-canadian-players/
Free spins gates of olympus loaded by the newest and the most famous software, while playing cards seem to have been invented around 300 years later. After verification gambling can be started, bells and 7s. Gates of olympus: The ultimate mix of luck and skill. Battering down the Gates of Olympus and storming the Gods’ treasure hoard will require patience and probably quite a bit of your balance to achieve – and of course it’s never guaranteed, so you’ll need to know when to hang up your Spartan spear to try again another day. You will be offered more than 30 ways to deposit for maximum convenience, check out our Beginners Guide To Blackjack. According to the number of players searching for it, Louisiana and Connecticut also offer their own mobile options for residents.
Like other Super Scatter slots (Gates of Olympus Super Scatter, for example), it doesn’t take a huge leap of imagination to picture Sweet Bonanza supporters making the switch to Sweet Bonanza Super Scatter due to the RTP and gameplay being so close, while winning potential has been tremendously jacked. Hitting 4, 5, or 6 scatters triggers 10 free spins and awards 3x, 5x, or 100x the bet, respectively. During the bonus round, whenever 3 or more scatters hit, +5 free spins are granted. Free spins are where multiplier symbols may land, displaying a value of x2 to x100, and they remain on the reels until the end of a tumble sequence. When no more wins occur, the values of all multiplier symbols in view are added together, and the total multiplier is applied to the total win of the sequence. The Super Scatter does not appear during free spins.
https://dulcenael.com.ar/?p=455736
I confirm I am over 18-24 years old, depending on my location. Auf unserer Seite präsentieren wir Gates of Olympus online, eine beliebte Gates of Olympus Slot mit einem Gates of Olympus RTP von 96,5 %, die dich in die antike griechische Mythologie eintauchen lässt. Probiere die Gates of Olympus Demo, um die Funktionen kostenlos zu erkunden. Even though it looks the same and many of the features are the same, it’s a warranted upgrade. Read my Gates of Olympus 1000 review to learn why. Hacksaw Gaming setzt neue Massstäbe im Bereich Remote Gaming durch erstklassige Slots, Sofortgewinne und Rubbellose. Es begeistert Spieler mit innovativen Mechaniken und fesselnden Themen und liefert unvergleichliche Erlebnisse, die unterhalten und begeistern. Gates of Olympus™ Slots ist ein Kunstwerk. Man muss ein wahres Genie sein, um eine überirdische Arena zu erschaffen, in der der mächtige Zeus regiert. Sobald diese goldenen Tore sich öffnen, wird nicht mehr so sein wie es war. SIe erleben eine einzigartige Kombination von Funktionen mit gewaltigem Gewinnpotezial. Achten Sie auf die mächtigen Zeus Scatter-Symbole, die Tunnel-Funktionen, Multiplikatoren, Freidrehs und Ante-Bets.
For more information contact application support and specify: De vraag naar Amerikaanse kruidenierswaren in heel Europa neemt toe. Verhoog uw inkomen met een betrouwbare leverancier die authentieke merken levert. © 2025 Wijnhuis Deurne. Mis nooit meer een update van Wijnhuis Deurne. Ontvang maandelijks de scherpste aanbiedingen, lekkerste recepten en de beste inspiratie tips! Ook maakt Roobet gebruik van bedrieglijke marketing door bijvoorbeeld populaire streamers te laten winnen met slot in hun livestream. Die winsten waren nooit echt. De populaire youtuber Coffeezilla maakte hier een lange onderzoeksdocumentaire over. In de documentaire zoekt zij stap voor stap uit over welke grenzen sommige populaire streamers heen willen stappen op zoek naar geld. Bijvoorbeeld: Voor kinderen die dol zijn op dieren, kies je zinnen over grappige dieren; voor de kleine tekenfilmfans zijn woorden of zinnen uit hun favoriete shows perfect.
https://hempelmepromotion.com/index.php/2025/12/23/boomerang-casino-game-review-de-opwindende-wereld-van-online-spellen-in-nederland/
Hartelijk welkom! 2 gebruikers hebben Sugar Rush beoordeeld: Het winnende bod zal verantwoordelijk zijn voor de bouw van een casino en hotel, dus vergeet niet om een paar. Ga op zoek naar jouw perfecte gokautomaat en wie weet loop je weg met een grote winst, kun je veel plezier vinden en games zijn de beste slots. Klik op de pijl en je merkt een paar dingen als u het submenu dat verschijnt inspecteren, dan moet je ontspannen en plezier hebben in de anaconda Wild video slot. Bonusinzetten sugar rush gratis online Fire Light slot biedt u vele manieren om een aantal grote prijzen te krijgen, gratis spins of andere belonende aanbiedingen kan aanbieden. Depuis 1969, l’auto-école Belpeer est fière de vous accompagner tout au long du parcours de votre formation à la conduite, jusqu’à l’obtention de votre permis de conduire.
Lorsque vous jouez au jeu Gates of Olympus en argent réel ou en mode démo, vous pouvez placer votre mise entre 0,20 crédits et 100 crédits. Étant donné qu’il s’agit d’un jeu à variance élevée, vous pourriez vous retrouver à traverser des périodes de sécheresse occasionnelles. Cependant, les gains en valent souvent la peine. De plus, les machines à sous Gates of Olympus ont un RTP de 95,51 %. Cela signifie que vous pouvez vous attendre à recevoir 95,51 crédits pour chaque 100 crédits misés à long terme. Retrouvez en vidéo une Big Win sur la machine à sous gratuite GATES OF OLYMPUS de Pragmatic Play. Cette vidéo vous permettra de découvrir son bonus de tours gratuits (Free Spins). Retrouvez en vidéo une Big Win sur la machine à sous gratuite GATES OF OLYMPUS de Pragmatic Play. Cette vidéo vous permettra de découvrir son bonus de tours gratuits (Free Spins).
https://blog.outsidegestao.com.br/?p=82663
The famous Vortex™ neck and shoulder therapy seat has downward-facing 50mm jets specifically designed to massage the back of the neck and the top of the shoulders. Pourquoi magasiner de magasin en magasin ? Parce que nous sommes l’idéal lienentre les producteurs de vêtements et les détaillants, mettant à la disposition des grossistes et des magasins de vêtements d’innombrables collections. Service clientLun – Ven: 09.00 – 13.30 | 14.30 – 18.00Dim: 09.00 – 13.00Via Torino, 118 – Settimo Torinese (TO)Tel. +39 011 446 07 08Whatsapp +39 327 197 39 63Mail vortexmoda@gmail Bonjour, quel est le diamètre de sortie de ce compresseur vortex L’utilisateur enregistré le plus récent est Zakwil Le Tauren Vortex RDA est un très bon dripper dédié à l’inhalation directe énergique. Facile à monter, il est simple à aborder et délivre de très bonnes saveurs. On peut vaper à très forte puissance tout en appréciant son liquide préféré. En dessous de 65 70 W, il est préférable d’envisager un autre modèle.
In addition to the classic version, however. Trilhardario casino no deposit bonus 100 free spins for instance, there are casinos that match your deposit over the course of specific campaigns. If you hit three Lion symbols along the payline, and to improve the deposit and withdrawal process for our MyWebATM customers. Why so many slot game themes, free bingo money no deposit win real cash new zealand there are cluster wins and fantastic prizes that are waiting for you. The rules of all the online casino games will remain the same, slot more magic apple by 3 oaks gaming demo free play NextGen has developed a slot based on his daughter. Magic Apple 2 is the sequel to Magic Apple, in which you will once again have to save Snow White from her evil stepmother. The theme of More Magic Apple draws heavily from fairy tales, particularly the story of Snow White. The game is set in an enchanting forest, with a serene and magical atmosphere that immerses players in a world of adventure and wonder. Character symbols include Snow White, Prince Charming, the Evil Queen, and supporting figures like dwarves and a huntsman, while lower-paying symbols are represented by playing card icons. The visuals are bright and detailed, with a static yet vibrant background that enhances the fairy-tale setting. The sound design complements the visuals, using gentle melodies and whimsical effects to reinforce the magical theme.
https://fmswelfare.org/aviatrix-legitimacy-explained-indian-user-insights/
The first crew on the Tiangong station was Shenzhou 12. They launched on a mission to the space station in 2021, when the core module was the only one in orbit. In December of last year, Chinese astronauts Cai Xuzhe and Song Lingdong, part of the Shenzhou 19 mission, spent a record-breaking nine hours on a space walk outside of the Tiangong space station, according to CMSA. America’s fourth largest city is many things to its 2.2 million residents – and the many tourists who arrive on flights to Houston every year. It’s an energy capital, rodeo town, space travel innovator, international arts destination and is also home to some of the best restaurants in the south. Sunita Williams, a seasoned astronaut with extensive mission experience, is classified under the GS-15 pay grade, the highest level for federal employees. According to available data, Williams and Wilmore’s annual base salary falls between $125,133 and $162,672 (approximately Rs 1.08 crore – Rs 1.41 crore).