Easy DIY Holiday Cork Board Perfect For Teacher Gifts!
This post brought to you by FrogTape provided by ShurTech Brands, LLC. All opinions are 100% mine.
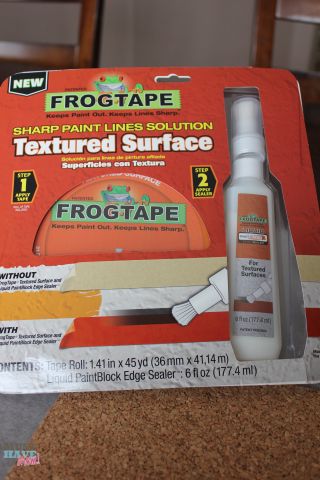
This year I was on the hunt for an easy DIY project I could make to thank the teachers in our lives. As I was searching for the perfect idea I came across FrogTape® for textured surfaces. I kenw I could use that for a great holiday DIY project! FrogTape® Textured Surface is designed to make it easy to get straight lines on textured surfaces. That means that those orange peel walls in your house can now have crisp, clean lines when you paint! It also means that crafting on textured surfaces just got a little easier! I decided on creating a holiday cork board as every teacher needs to stay organized!
Here are all of the supplies you need:
- FrogTape Textured Surface
- Cork Boards
- Paint
- Foam Brushes
- Ribbon and Embellishments
- Wet Rag
- Hot Glue Gun
FrogTape® claims to deliver crisp, straight lines on textured surfaces. I was excited to put it to the test on the cork boards as they are difficult to get a clean line on without the paint bleeding under the tape due to the textured surface. I’m also excited to try it out on my walls which are all textured!
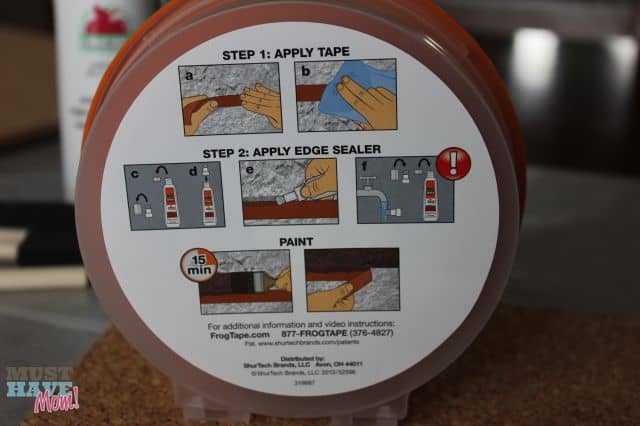
Using FrogTape® is easy and they break it down into simple to follow steps right on the packaging.
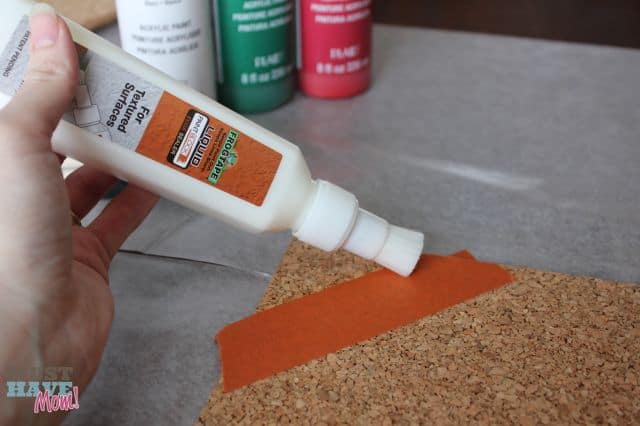
First I taped off the corners of one cork board. I then ran a wet rag over the edge of the tape as instructed and then applied the glue to the edge of the tape. You then need to allow it to dry for 15 minutes before painting. This helps form the seal so your paint lines are crisp and clean.
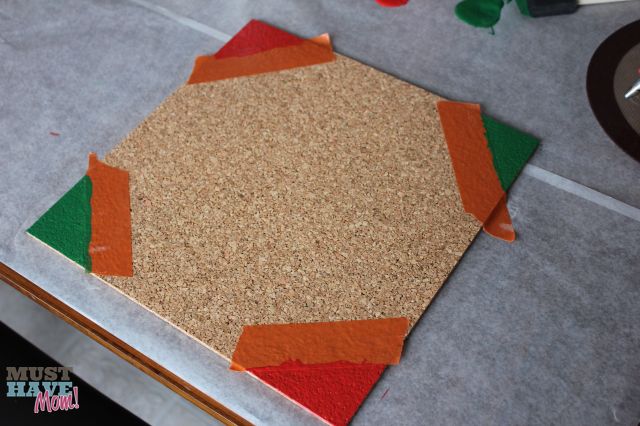
I then used my foam brushes to paint red and green corners on my cork board. I let that sit to dry and moved on to the next cork board.

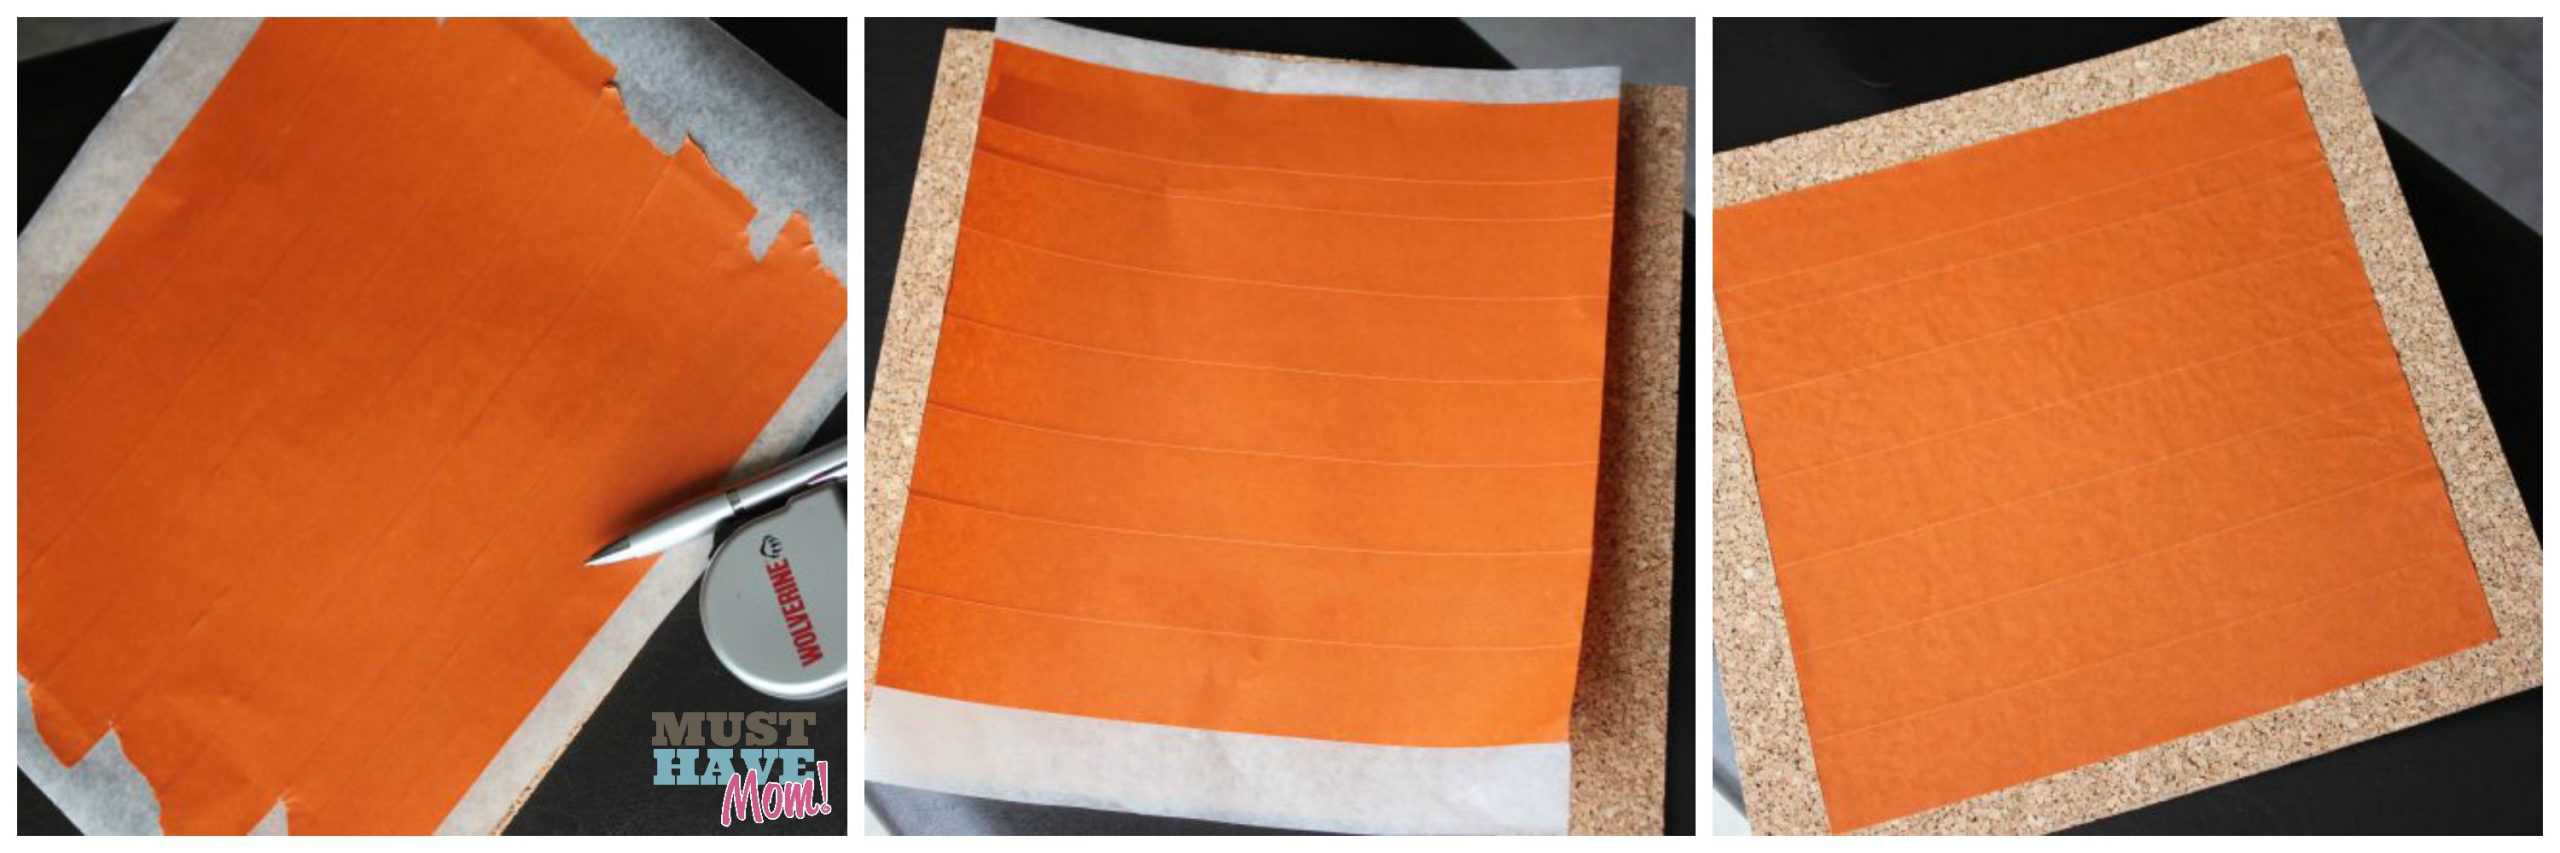
Next I wanted to create a border look. On my second cork board I was going for a different look. First I measured my cork board and figured out the dimensions I would need to tape off in the center in order to achieve the border I wanted. I applied the tape to a piece of wax paper, slightly overlapping each piece. I then measured my dimensions out and cut out the square so I had a nice square piece of tape. I peeled the wax paper off the back and then applied the tape square to my cork board. I pressed the tape down firmly, applied the wet rag and then the glue and allowed to sit for 15 minutes.
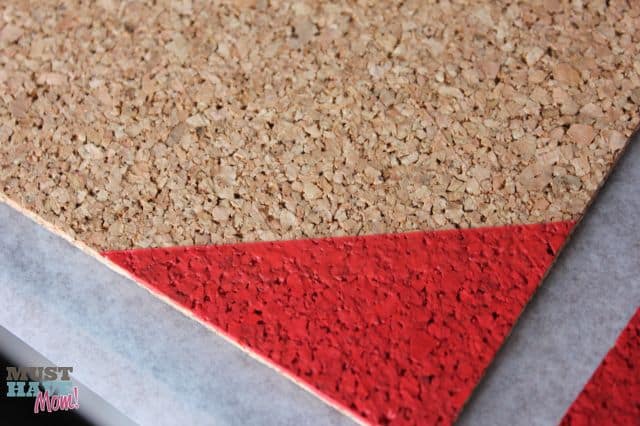
Once the paint dried I peeled off the tape to reveal these beautiful straight lines! The FrogTape® did an amazing job at delivering clean lines! I am very impressed and will definitely be using this when we paint our walls!
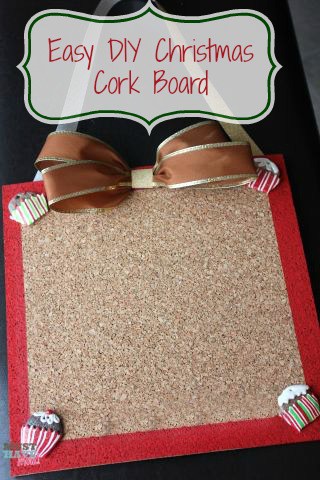
Next I used a hot glue gun to apply these embellishments and ribon on to my painted cork board. I used a ribbon as a hanger as well by hot gluing each end to the back of the cork board. For the hanger be sure to use a double sided ribbon as both sides of your ribbon will show.
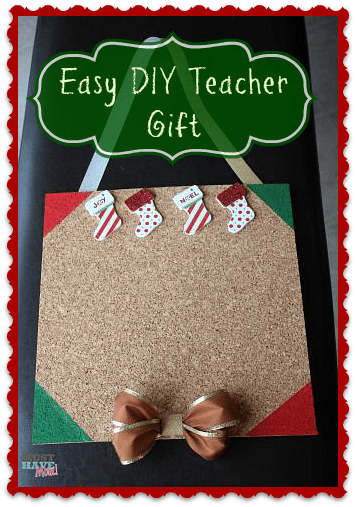
These DIY Cork Boards were quick and easy to make and will be the perfect DIY teacher gift this year!
Follow FrogTape® on Twitter @FrogTape for tons of creative inspiration!FrogTape Textured Surface


I was just trying to figure out what to do for teacher gifts this year and you post this adorable cork board. Thank you very much…totally creative and useful.
what a great ideal,an something that will last for many seasons,,good gift ideal
I’ve been looking for something different to do for the boys teachers. I like these!
Cute idea